

As the sun sets, there’s something special about enjoying a sweet treat from the heart of Spain. Think about the creamy delight of Classic Spanish Flan or the crunchy pleasure of Churros paired with a rich chocolate sauce. Each recipe is a piece of Spain’s culinary story, ready to be shared at your table. Which of these tempting desserts will become your new favorite? Let’s explore and find out!
Classic Spanish Flan
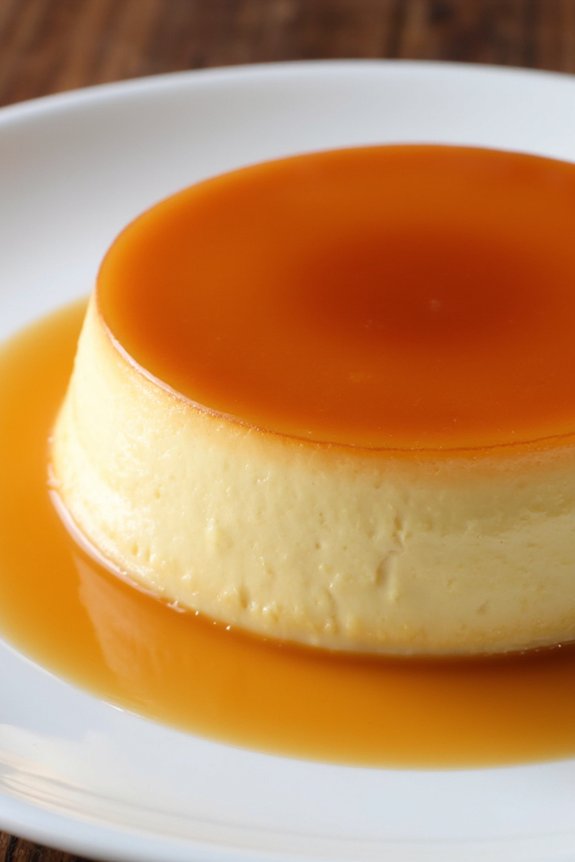
Spanish Flan, a cherished dessert in Spain, is celebrated for its smooth, creamy texture and rich caramel flavor. This delightful custard dish is simple yet sophisticated, making it a perfect end to any meal. The origins of flan date back to ancient Rome, where it evolved over centuries to become a beloved staple in Spanish cuisine.
Today, this classic dessert is enjoyed by people around the world, each region adding its own unique twist to the traditional recipe. The beauty of a Classic Spanish Flan lies in its simplicity—requiring only a few basic ingredients, which blend together to create a dessert that’s both elegant and comforting.
Whether you’re preparing it for a family gathering or a special occasion, flan is sure to impress with its delicate texture and sweet caramel topping. This recipe will guide you through the steps to make a traditional flan that serves 4-6 people, guaranteeing everyone at the table gets to savor its delightful taste.
Ingredients for Classic Spanish Flan (serving size: 4-6)
- 1 cup granulated sugar
- 6 large eggs
- 1 14-ounce can sweetened condensed milk
- 2 cups whole milk
- 1 tablespoon vanilla extract
- Pinch of salt
Cooking Instructions
1. Preheat and Prepare Caramel: Preheat your oven to 350°F (175°C). In a medium saucepan over medium heat, add the granulated sugar. Stir constantly with a wooden spoon until the sugar melts and turns into a golden-brown caramel. Be careful not to burn it.
Once caramelized, quickly pour the caramel into a round 9-inch cake pan, tilting the pan to evenly coat the bottom.
2. Mix the Custard: In a large mixing bowl, whisk together the eggs, sweetened condensed milk, whole milk, vanilla extract, and a pinch of salt until well combined. Strain the mixture through a fine sieve to guarantee a smooth texture, removing any egg solids.
3. Pour and Prepare for Baking: Gently pour the custard mixture over the hardened caramel in the cake pan. Place the cake pan inside a larger baking dish. Fill the larger dish with hot water until it reaches halfway up the sides of the cake pan, creating a water bath to guarantee even cooking.
4. Bake the Flan: Carefully transfer the water bath to the preheated oven. Bake for 50-60 minutes, or until the flan is set and a knife inserted near the center comes out clean. The flan should have a slight jiggle in the center when done.
5. Cool and Refrigerate: Remove the flan from the oven and let it cool to room temperature in the water bath. Once cooled, cover the cake pan with plastic wrap and refrigerate for at least 4 hours, or overnight, to fully set and develop flavors.
6. Serve: To serve, run a knife around the edges of the flan to loosen it. Place a serving plate over the pan and invert it to release the flan onto the plate. The caramel will flow over the top, creating a luscious sauce.
Extra Tips
When making flan, patience is key. Allowing the flan to cool and set properly in the refrigerator is essential for achieving the perfect texture. If the caramel hardens too quickly while pouring it into the pan, simply warm it slightly to make it more pliable.
Additionally, always use a water bath when baking to guarantee gentle, even cooking and to prevent the flan from cracking. If you want to add a twist, consider infusing the milk with cinnamon or citrus zest before mixing it with the other ingredients for an extra layer of flavor.
Churros With Chocolate Sauce
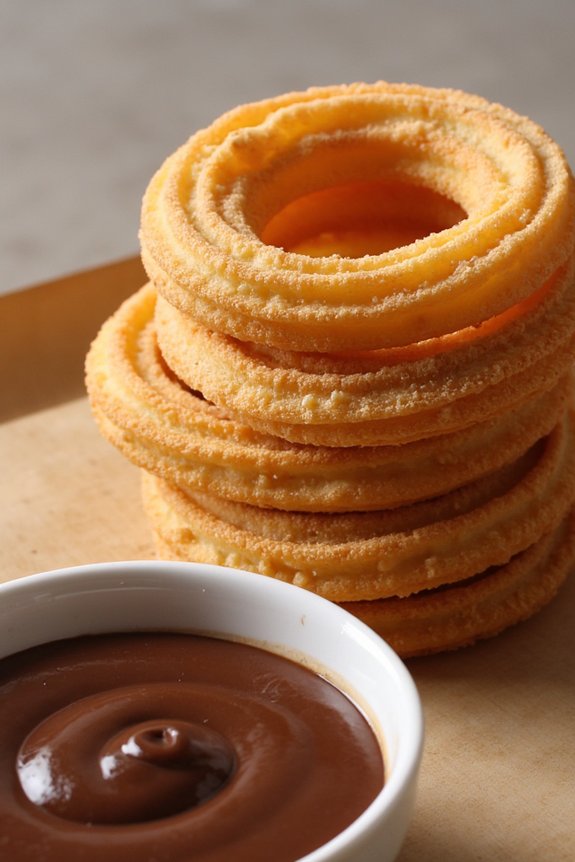
Churros are a beloved Spanish sweet treat, loved for their crispy exterior and soft, airy interior. Traditionally enjoyed as a breakfast or snack, churros are often paired with a rich, velvety chocolate sauce for dipping. This delightful combination of textures and flavors makes for an irresistible treat that’s perfect for sharing with family and friends.
Whether you’re serving them at a festive gathering or indulging in a cozy afternoon snack, churros with chocolate sauce are bound to be a hit.
Making churros from scratch is easier than you might think, and the results are well worth the effort. With just a few simple ingredients, you can create delicious churros at home. The key to perfect churros lies in achieving the right dough consistency and frying them at the correct temperature to guarantee they puff up beautifully.
Pair them with a homemade chocolate sauce for a decadent and authentic Spanish experience. This recipe serves 4-6 people, making it ideal for gatherings or special occasions.
Ingredients for Churros:
- 1 cup water
- 1/4 cup unsalted butter
- 1 tablespoon sugar
- 1/2 teaspoon salt
- 1 cup all-purpose flour
- 2 large eggs
- Vegetable oil, for frying
- 1/2 cup sugar
- 1 teaspoon ground cinnamon
Ingredients for Chocolate Sauce:
- 1 cup heavy cream
- 1 cup chopped dark chocolate or chocolate chips
- 1 tablespoon sugar (optional)
- 1/2 teaspoon vanilla extract
Cooking Instructions:
- Prepare the Dough: In a medium saucepan, combine 1 cup of water, 1/4 cup unsalted butter, 1 tablespoon sugar, and 1/2 teaspoon salt. Bring the mixture to a boil over medium heat. Once boiling, reduce the heat to low and add 1 cup of all-purpose flour. Stir vigorously with a wooden spoon until the dough comes together and forms a ball, pulling away from the sides of the pan. Remove from heat and let it cool for 5 minutes.
- Add Eggs: Transfer the dough to a mixing bowl. Add the eggs one at a time, thoroughly beating each one into the dough until fully incorporated. The dough should be smooth and glossy.
- Heat Oil: In a deep pot or deep fryer, heat vegetable oil to 350°F (175°C).
- Pipe Churros: Fill a piping bag fitted with a large star tip with the churro dough. Carefully pipe 4-6 inch strips of dough directly into the hot oil, cutting the dough with scissors to release each churro. Fry a few churros at a time, avoiding overcrowding the pot.
- Fry Churros: Fry the churros until they’re golden brown and crisp, about 2-3 minutes per side. Use a slotted spoon to remove them from the oil and drain on paper towels.
- Coat Churros: While still warm, roll the churros in a mixture of 1/2 cup sugar and 1 teaspoon ground cinnamon until evenly coated.
- Make Chocolate Sauce: In a small saucepan, heat 1 cup of heavy cream over medium heat until just simmering. Remove from heat and add 1 cup of chopped dark chocolate (or chocolate chips), stirring until smooth and melted. Add 1 tablespoon of sugar and 1/2 teaspoon vanilla extract, stirring to combine.
- Serve: Serve the warm churros with the chocolate sauce for dipping.
Extra Tips:
To achieve the best churros, confirm your oil is at the correct temperature. Too hot, and they’ll brown too quickly on the outside while remaining doughy on the inside. Too cool, and they’ll absorb too much oil.
If you don’t have a piping bag, a sturdy plastic bag with the corner cut off can be used as a substitute. Be cautious while frying, as hot oil can be dangerous.
For an extra twist, experiment with different chocolate types for the dipping sauce, such as milk or white chocolate, to find your preferred flavor.
Tarta De Santiago
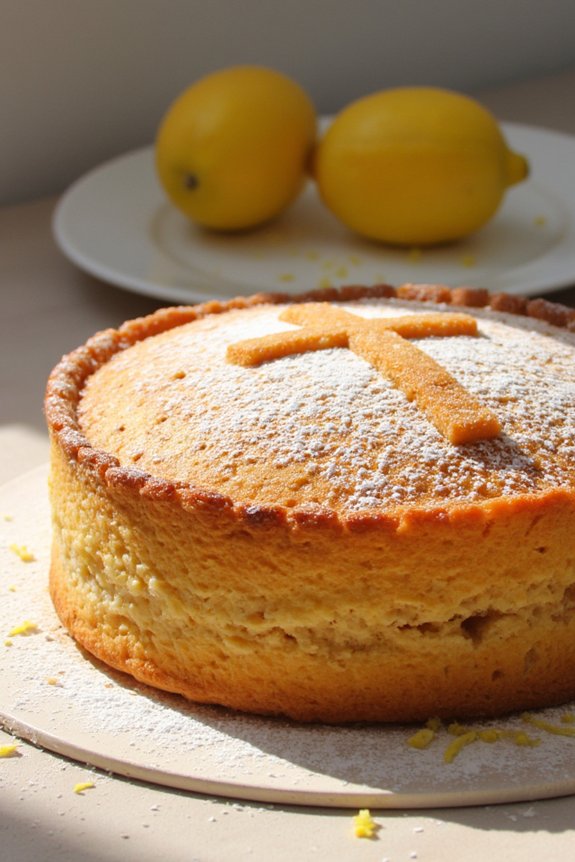
Tarta De Santiago is a traditional Spanish almond cake that hails from the region of Galicia. Named after St. James (Santiago in Spanish), it’s often associated with the Camino de Santiago pilgrimage. This cake is a delightful treat that combines the simple flavors of almonds, sugar, and eggs, resulting in a moist and flavorful dessert.
Traditionally, it’s decorated with the cross of Saint James dusted on top with powdered sugar, making it not only delicious but also visually appealing. This gluten-free dessert is incredibly easy to make, requiring only a few ingredients and minimal preparation time.
The Tarta De Santiago is perfect for any occasion, whether you’re hosting a dinner party or simply looking to indulge in a sweet treat. Its nutty, sweet flavor and tender texture make it a favorite among many. Prepare this cake, and you’ll transport your taste buds to the charming streets of Santiago de Compostela.
Ingredients for Tarta De Santiago (serving size: 4-6 people):
- 250g ground almonds
- 250g granulated sugar
- 5 large eggs
- Zest of 1 lemon
- 1/2 teaspoon ground cinnamon
- Powdered sugar, for dusting
- Butter, for greasing the pan (optional)
Cooking Instructions:
- Preheat the Oven: Begin by preheating your oven to 175°C (350°F). This guarantees that your cake will bake evenly and achieve the perfect texture.
- Prepare the Cake Mixture: In a large mixing bowl, combine the ground almonds, granulated sugar, lemon zest, and ground cinnamon. Mix these dry ingredients together until they’re well combined.
- Incorporate the Eggs: Lightly beat the eggs in a separate bowl. Gradually add the eggs to the almond mixture, stirring continuously until you have a smooth and uniform batter.
- Grease the Pan: If you aren’t using a non-stick pan, lightly grease a 9-inch round cake pan with butter to prevent the cake from sticking.
- Pour and Level the Batter: Pour the batter into the prepared cake pan. Use a spatula to spread the batter evenly and guarantee the top is smooth.
- Bake the Cake: Place the cake in the preheated oven and bake for approximately 30 to 35 minutes. The cake is done when it turns a light golden brown and a toothpick inserted in the center comes out clean.
- Cool and Decorate: Allow the cake to cool in the pan for about 10 minutes before transferring it to a wire rack to cool completely. Once cooled, dust the top of the cake with powdered sugar. For a traditional touch, use a stencil of the cross of Saint James to create the iconic design.
Extra Tips:
For the best flavor, use high-quality almonds and fresh lemon zest. This will enhance the cake’s nutty and citrus notes. If you don’t have a stencil for the cross of Saint James, you can easily make one by cutting the shape out of paper.
When mixing the batter, be gentle to maintain the airiness of the eggs, which contributes to the cake’s light texture. Finally, Tarta De Santiago pairs wonderfully with a cup of coffee or a glass of dessert wine, making it an exquisite choice for an after-dinner treat.
Crema Catalana
Crema Catalana is a classic Spanish dessert that’s often compared to the French crème brûlée. This deliciously creamy custard is flavored with citrus and cinnamon, and topped with a crispy caramelized sugar crust. Traditionally served on St. Joseph’s Day in Catalonia, Crema Catalana has become a beloved dessert throughout Spain and is enjoyed year-round. The vibrant citrus notes and the warm aroma of cinnamon make it a perfect treat for any occasion.
The preparation of Crema Catalana is relatively simple, yet it requires attention to detail to achieve the perfect texture and flavor. The custard is cooked on the stovetop until thickened and then chilled, allowing the flavors to meld beautifully. Once set, it’s topped with a layer of sugar that’s caramelized just before serving, creating a satisfying contrast between the creamy custard and the crunchy sugar topping. This recipe is sure to be a hit with your family and friends, offering a taste of Spanish tradition in every spoonful.
Ingredients (serving size: 4-6 people):
- 4 cups whole milk
- 1 cinnamon stick
- Zest of 1 lemon
- Zest of 1 orange
- 6 large egg yolks
- 1 cup granulated sugar (plus extra for caramelizing)
- 2 tablespoons cornstarch
Cooking Instructions:
- Infuse the Milk: In a medium saucepan, combine the whole milk, cinnamon stick, and the zests of one lemon and one orange. Heat the mixture over medium heat until it just begins to simmer. Remove from heat and let it steep for 15-20 minutes to allow the flavors to infuse into the milk.
- Prepare the Egg Mixture: In a separate bowl, whisk together the egg yolks, 1 cup of granulated sugar, and cornstarch until the mixture is smooth and pale.
- Temper the Eggs: Gradually pour the warm milk mixture into the egg yolk mixture, whisking constantly to prevent the eggs from curdling. Once combined, return the mixture to the saucepan.
- Thicken the Custard: Place the saucepan over medium heat and cook, stirring constantly, until the mixture thickens and coats the back of a spoon. This should take about 8-10 minutes. Don’t let it boil, as this can cause the custard to curdle.
- Chill the Custard: Remove the custard from heat and discard the cinnamon stick. Pour the custard into individual ramekins or a large shallow dish. Allow it to cool to room temperature before covering with plastic wrap and refrigerating for at least 4 hours, or until fully set.
- Caramelize the Sugar: Just before serving, sprinkle a thin, even layer of granulated sugar over the top of each custard. Use a kitchen torch to carefully melt and caramelize the sugar until it forms a golden, crispy crust. If you don’t have a torch, you can also place the custards under a broiler for a minute or two, watching closely to prevent burning.
Extra Tips:
To guarantee your Crema Catalana has a perfectly smooth texture, it’s important to constantly stir the custard while it’s cooking. This prevents lumps from forming and ensures even thickening.
For a richer flavor, you can substitute some of the milk with heavy cream. When caramelizing the sugar, be sure to use an even hand to achieve a consistent crust. If you prefer a deeper caramel flavor, you can use brown sugar instead of granulated sugar for the topping.
Finally, make sure to serve the dessert immediately after caramelizing the sugar to enjoy the contrast between the warm, crunchy top and the cool, creamy custard.
Arroz Con Leche
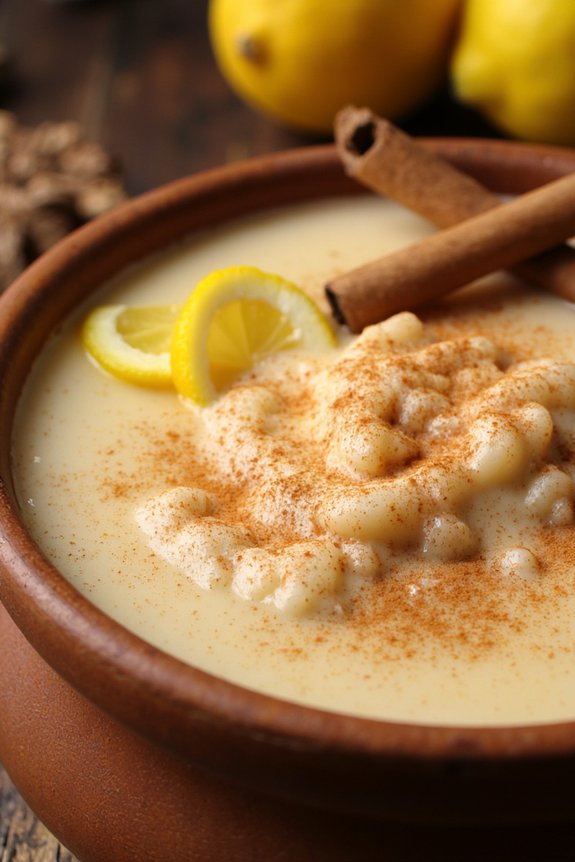
Arroz Con Leche, a beloved Spanish dessert, combines the comforting flavors of creamy rice pudding with the aromatic essence of cinnamon and citrus. This traditional sweet treat is often enjoyed during festive occasions and family gatherings, offering a warm and satisfying conclusion to any meal.
The dish is renowned for its simplicity and rich flavor, making it a favorite among both children and adults alike.
The preparation of Arroz Con Leche involves simmering rice slowly in milk and sugar, which results in a smooth, velvety texture. Infused with fragrant cinnamon sticks and zesty lemon peel, the pudding takes on a delightful aroma that fills the kitchen with warmth.
As the rice absorbs the flavors, it transforms into a luscious dessert that’s both comforting and indulgent, perfect for those who enjoy a classic, home-cooked sweet.
Ingredients (serves 4-6 people):
- 1 cup of short-grain rice
- 4 cups of whole milk
- 1 cup of granulated sugar
- 1 cinnamon stick
- Zest of 1 lemon (in large strips)
- 1/2 teaspoon of vanilla extract
- Pinch of salt
- Ground cinnamon for garnish
Cooking Instructions:
- Rinse the Rice: Begin by rinsing the short-grain rice under cold water until the water runs clear. This step helps to remove excess starch and prevents the pudding from becoming too thick.
- Boil the Rice: In a large saucepan, combine the rinsed rice with 1 cup of water. Bring it to a boil over medium heat, then reduce the heat to low and allow it to simmer until the water is mostly absorbed, about 5 minutes.
- Add Milk and Flavorings: Once the water is absorbed, add the whole milk, granulated sugar, cinnamon stick, lemon zest, and a pinch of salt to the saucepan. Stir well to combine.
- Simmer the Pudding: Increase the heat to medium-low and let the mixture simmer gently. Stir occasionally to prevent the rice from sticking to the bottom of the pan. Continue simmering for about 30-35 minutes, or until the rice is tender and the mixture has thickened.
- Finish with Vanilla: Remove the saucepan from heat and stir in the vanilla extract. Discard the cinnamon stick and lemon zest strips.
- Cool Down: Allow the Arroz Con Leche to cool slightly. It will thicken more as it cools. Serve warm or at room temperature.
- Garnish and Serve: Before serving, sprinkle ground cinnamon over the top for an additional touch of flavor. Enjoy as is or with a dollop of whipped cream if desired.
Extra Tips: For a creamier consistency, you may substitute half of the whole milk with heavy cream. If you prefer a less sweet dessert, reduce the amount of sugar to 3/4 cup.
Arroz Con Leche can also be made ahead of time and refrigerated; just make sure to cover it well to prevent it from absorbing other odors. When reheating, add a splash of milk to restore its creamy texture.
Turrón De Jijona
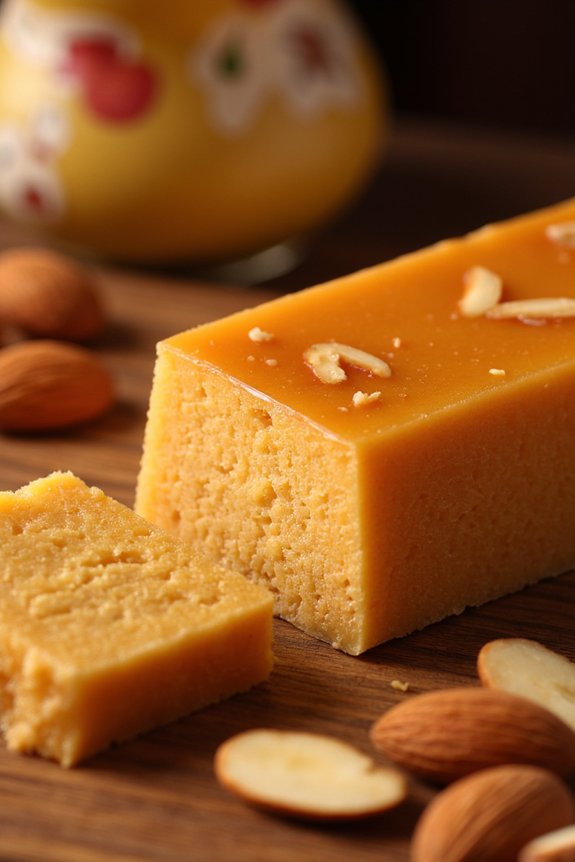
Turrón De Jijona is a classic Spanish sweet that’s particularly popular during the Christmas season. Known for its soft and chewy texture, this nougat-like treat is made primarily from almonds and honey, giving it a rich and nutty flavor that’s beloved by many.
Originating from the town of Jijona in the Alicante province, Turrón De Jijona has a protected designation of origin status, ensuring that the traditional recipe and methods are preserved.
This delectable sweet is traditionally made by grinding almonds into a paste and mixing them with honey and sugar. The mixture is then cooked until it reaches the perfect consistency, before being poured into molds to set. While it’s a classic holiday treat, Turrón De Jijona can also be enjoyed year-round as a delightful dessert or snack.
Below is a recipe for making Turrón De Jijona that serves 4-6 people.
Ingredients
- 300g blanched almonds
- 200g honey
- 100g granulated sugar
- 1 egg white
- Lemon zest from 1 lemon
- 1 pinch of salt
Instructions
- Prepare the Almonds: Preheat your oven to 180°C (356°F). Spread the blanched almonds on a baking tray and roast them for about 8-10 minutes until they’re golden brown. Allow them to cool slightly and then grind them into a fine paste using a food processor.
- Cook the Honey and Sugar: In a heavy-bottomed saucepan, combine the honey and granulated sugar. Cook over medium heat, stirring constantly until the sugar is completely dissolved and the mixture reaches a boiling point.
- Add the Almond Paste: Once the honey and sugar mixture is ready, reduce the heat to low and stir in the almond paste. Mix well until the ingredients are fully combined. Add the lemon zest and a pinch of salt to enhance the flavor.
- Incorporate the Egg White: In a separate bowl, beat the egg white until it forms soft peaks. Gently fold the egg white into the almond mixture, ensuring it’s evenly distributed throughout the mix.
- Cook the Mixture: Continue to cook the mixture on low heat for about 20-25 minutes, stirring frequently to prevent it from sticking to the pan. The turrón should thicken and become slightly glossy.
- Mold the Turrón: Line a rectangular mold or a baking dish with parchment paper. Pour the mixture into the prepared mold, using a spatula to smooth the top. Allow it to cool to room temperature, then refrigerate for at least 3 hours or until set.
- Serve: Once the Turrón De Jijona is set, remove it from the mold and cut it into rectangular pieces. Serve at room temperature for the best texture and flavor.
Extra Tips
When making Turrón De Jijona, it’s essential to keep the heat low and stir the mixture consistently to prevent it from burning or sticking to the pan.
The quality of the almonds will greatly impact the flavor of the turrón, so use fresh, high-quality almonds for the best results. Additionally, you can experiment with adding different flavors such as a touch of vanilla or a sprinkle of cinnamon to customize the taste to your liking.
Polvorones
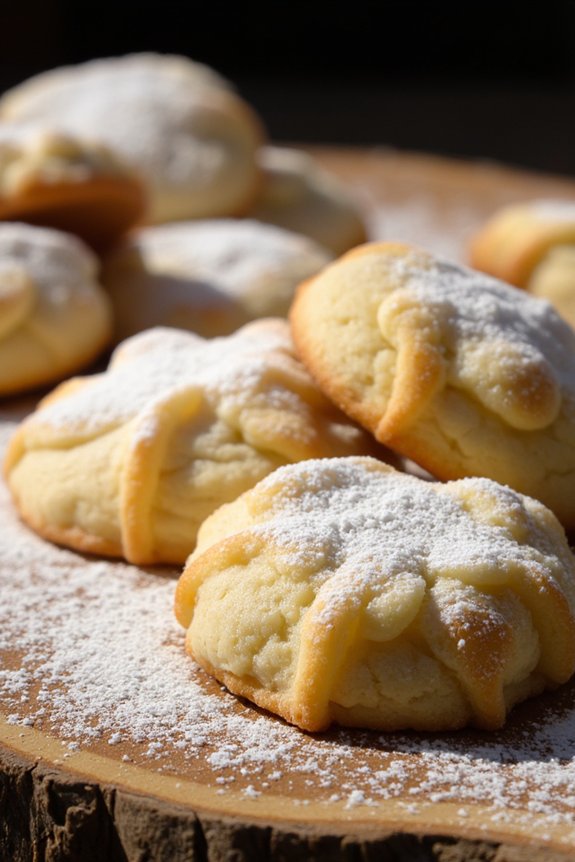
Polvorones are a classic Spanish sweet treat that are particularly popular during the holiday season. These crumbly, melt-in-your-mouth cookies are named after the Spanish word “polvo,” meaning dust, which perfectly describes their delicate and powdery texture. Traditionally, polvorones are made with almonds and flavored with cinnamon, giving them a rich and nutty taste that complements their buttery base.
They’re often enjoyed with a cup of coffee or tea, making them a perfect addition to any festive gathering or afternoon snack. In Spain, polvorones are a staple during Christmas, often made in large batches to share with family and friends. The preparation is relatively simple, involving a short list of ingredients that come together to create a delightful and aromatic cookie.
Whether you’re looking to add a Spanish twist to your holiday baking or simply want to try something new, polvorones are a delicious choice. Now, let’s plunge into the recipe for making polvorones that can serve 4-6 people.
Ingredients:
- 250g all-purpose flour
- 125g unsalted butter, softened
- 100g powdered sugar (plus extra for dusting)
- 125g ground almonds
- 1 teaspoon ground cinnamon
- 1/4 teaspoon salt
- 1 teaspoon vanilla extract
Instructions:
- Prepare the flour: Start by preheating your oven to 350°F (175°C). Spread the all-purpose flour evenly on a baking sheet and toast it in the preheated oven for about 10 minutes, stirring halfway through. This enhances the flavor and gives the polvorones their unique taste. Allow the flour to cool completely before using.
- Mix the dry ingredients: In a large mixing bowl, combine the cooled toasted flour, ground almonds, powdered sugar, ground cinnamon, and salt. Mix these dry ingredients well to confirm they’re evenly distributed.
- Cream the butter: In a separate bowl, beat the softened butter using an electric mixer until it becomes creamy and smooth. Add in the vanilla extract and mix until fully incorporated.
- Combine the mixtures: Gradually add the dry ingredients to the creamed butter, mixing continuously until the dough comes together. You may need to use your hands towards the end to fully integrate the ingredients into a smooth dough.
- Shape the cookies: Take small portions of the dough and roll them into balls, about the size of a walnut. Place them on a baking sheet lined with parchment paper, leaving some space between each cookie to allow for slight spreading.
- Bake the cookies: Bake the polvorones in the preheated oven for 12-15 minutes, or until they’re lightly golden. Be careful not to overbake, as they should remain soft and crumbly.
- Cool and dust: Allow the cookies to cool on the baking sheet for a few minutes before transferring them to a wire rack. Once they’re completely cooled, generously dust them with powdered sugar to finish.
Extra Tips:
For a more authentic flavor, consider using high-quality European butter, which has a richer taste and lower water content compared to regular butter. Additionally, you can experiment with different nuts such as hazelnuts or pecans if you wish to vary the flavors.
Always confirm the flour is fully cooled after toasting before mixing it with the other ingredients, as this will affect the dough’s texture. Finally, handle the dough gently, as polvorones are meant to be crumbly and delicate. Enjoy your homemade Spanish polvorones with a hot beverage for a delightful treat!
Leche Frita
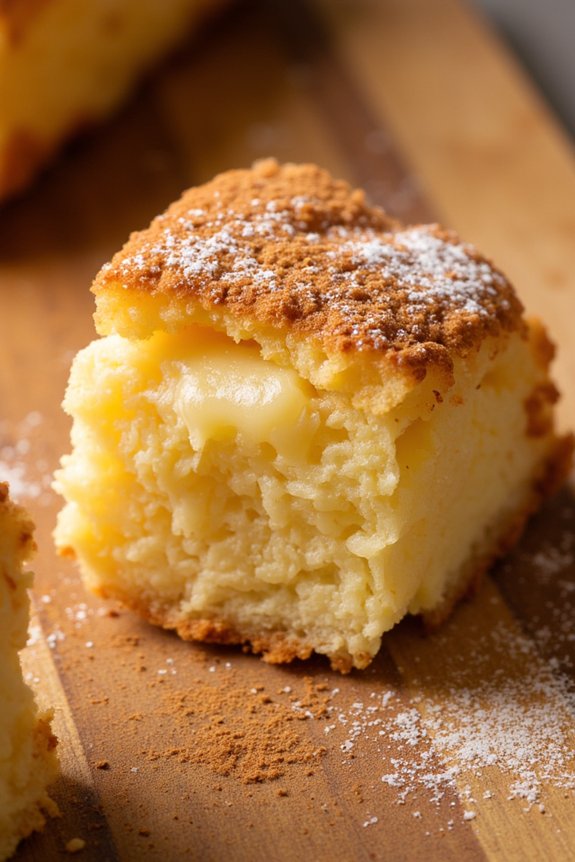
Leche Frita, a traditional Spanish dessert, is a delightful treat that translates to “fried milk.” This dessert is popular in the northern regions of Spain and is particularly beloved for its creamy texture encased in a crispy shell. The inside is silky and custard-like, while the outside is golden and crunchy, offering a beautiful contrast in textures.
It’s often served sprinkled with cinnamon sugar, making it a perfect indulgence for those with a sweet tooth. The simplicity of its ingredients—milk, sugar, flour, and eggs—belies the depth of flavor and enjoyment it brings.
To prepare Leche Frita, you begin by creating a creamy milk pudding, which is then chilled until firm. Once set, the pudding is cut into squares, dipped in flour and egg, and fried until crispy. It’s an ideal dessert for gatherings or simply to enjoy as a special treat at home. The recipe can be made ahead of time, allowing the flavors to meld and making for a quick and easy finish when you’re ready to serve.
Follow these instructions to create a serving for 4-6 people and enjoy this delicious Spanish sweet at home.
Ingredients for 4-6 servings:
- 1 liter whole milk
- 150 grams granulated sugar
- 120 grams all-purpose flour
- 1 cinnamon stick
- Peel of 1 lemon
- 1/4 teaspoon salt
- 3 large eggs
- Additional flour (for coating)
- Vegetable oil (for frying)
- Ground cinnamon (for dusting)
- Powdered sugar (for dusting)
Cooking Instructions:
- Infuse the Milk: In a saucepan, pour the whole milk and add the cinnamon stick and lemon peel. Heat the mixture over medium heat until it begins to simmer. Remove from heat and let it steep for about 15 minutes to infuse the flavors. Strain the milk to remove the cinnamon stick and lemon peel.
- Prepare the Milk Mixture: In a separate bowl, combine the granulated sugar, salt, and 120 grams of all-purpose flour. Gradually add this dry mixture to the infused milk, whisking continuously to avoid lumps.
- Cook the Pudding: Return the milk mixture to the saucepan and cook over medium heat, stirring constantly with a wooden spoon or whisk until it thickens to a pudding-like consistency. This should take about 10 minutes. Once thickened, remove from heat.
- Chill the Mixture: Pour the thickened milk mixture into a shallow rectangular or square dish lined with parchment paper. Smooth the top with a spatula, cover with plastic wrap, and refrigerate for at least 4 hours, or until fully set.
- Cut and Coat: Once the milk pudding is firm, cut it into squares or rectangles. Beat the eggs in a bowl. Coat each piece first in additional flour, then dip into the beaten eggs, ensuring all sides are covered.
- Fry the Leche Frita: Heat vegetable oil in a frying pan over medium-high heat. Fry the coated milk squares in batches, turning occasionally, until golden brown on all sides. Remove with a slotted spoon and drain on paper towels.
- Serve: Dust the fried squares with ground cinnamon and powdered sugar. Serve warm or at room temperature.
Extra Tips:
For the best results, make sure that the milk mixture is thoroughly chilled before cutting and frying. This helps maintain the pudding’s shape during cooking.
When frying, maintain a consistent oil temperature to achieve a crispy exterior without burning. Additionally, you can adjust the sweetness by varying the amount of sugar or adding a touch of vanilla extract for extra flavor.
Leche Frita can be enjoyed plain or with a drizzle of honey for added sweetness.
Buñuelos De Viento
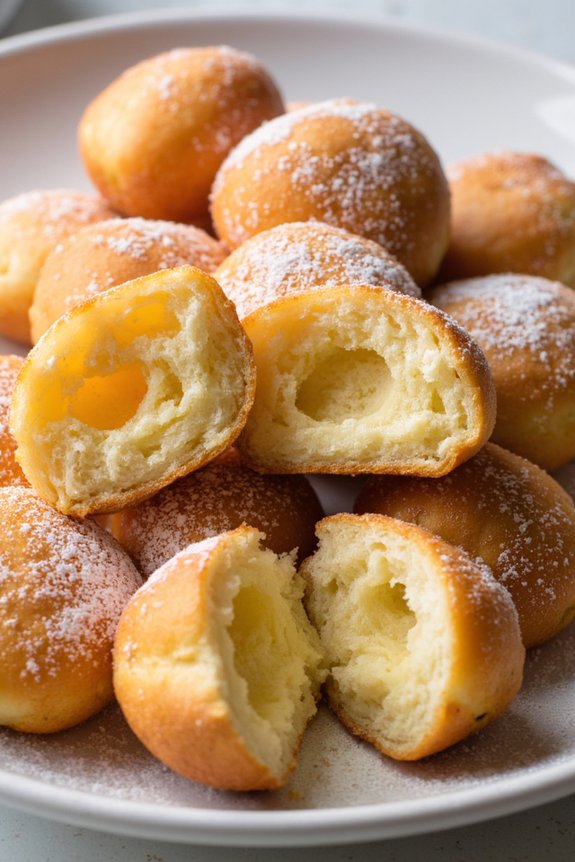
Buñuelos De Viento are a beloved Spanish treat, often enjoyed during festive occasions and as a delightful dessert. These light and airy fritters are named “de viento,” meaning “of the wind,” due to their fluffy and hollow nature. Traditionally, they’re dusted with powdered sugar or filled with pastry cream. The delicate texture and subtle sweetness make them an irresistible indulgence for those with a sweet tooth.
Creating Buñuelos De Viento at home is a rewarding culinary experience that can be shared with family and friends. The process involves preparing a choux pastry, similar to the one used for éclairs and cream puffs, which is then fried to golden perfection. Whether you’re serving them as a standalone dessert or as part of a larger spread, these buñuelos are bound to impress with their light, ethereal quality.
Ingredients for 4-6 servings:
- 1 cup water
- 1/2 cup unsalted butter
- 1 tablespoon sugar
- Pinch of salt
- 1 cup all-purpose flour
- 4 large eggs
- Vegetable oil, for frying
- Powdered sugar, for dusting
Instructions:
- Prepare the Choux Pastry: In a medium saucepan over medium heat, combine the water, butter, sugar, and salt. Stir occasionally until the butter melts. Once the mixture reaches a gentle simmer, remove it from heat.
- Add the Flour: Quickly add the flour to the saucepan, stirring vigorously with a wooden spoon until the mixture forms a smooth ball and pulls away from the sides of the pan.
- Incorporate the Eggs: Allow the dough to cool for a few minutes. Then, add the eggs one at a time, thoroughly mixing each egg into the dough before adding the next. The dough should be smooth and glossy by the end.
- Heat the Oil: In a deep pan or fryer, heat the vegetable oil to 350°F (175°C). Use enough oil to allow the buñuelos to float and fry evenly.
- Fry the Buñuelos: Using a tablespoon or small ice cream scoop, drop spoonfuls of dough into the hot oil. Fry in batches, avoiding overcrowding, until the buñuelos are puffed and golden brown, about 5-7 minutes per batch. Use a slotted spoon to transfer them to a paper towel-lined plate.
- Dust with Sugar: Once the buñuelos are slightly cooled, generously dust them with powdered sugar before serving.
Extra Tips:
For best results, maintain the oil at a consistent temperature to avoid undercooked centers or overly browned exteriors. If you prefer filled buñuelos, consider injecting them with pastry cream or chocolate ganache after frying using a pastry bag with a small tip.
Additionally, buñuelos are best enjoyed fresh and warm, so plan to serve them shortly after frying for the ultimate experience.
Natillas
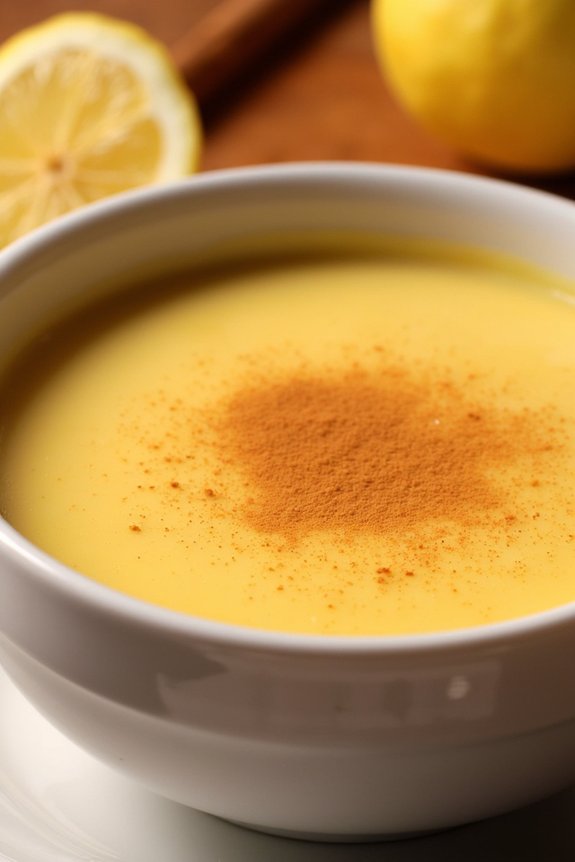
Natillas is a traditional Spanish dessert that’s both creamy and comforting, often enjoyed as a delightful end to a meal. This custard-like dish is flavored with vanilla and cinnamon, bringing a warm and fragrant aroma to your kitchen. The smooth texture of Natillas, combined with a sprinkle of cinnamon on top, makes it a favorite among both children and adults.
Whether served warm or cold, Natillas provides a rich and indulgent experience that captures the essence of Spanish cuisine.
The preparation of Natillas is straightforward, utilizing simple ingredients that are likely already in your pantry. The key to perfecting this dessert is patience and attention to detail, guaranteeing the custard reaches the ideal consistency. As you prepare this dish, you’ll find that the process of slowly thickening the mixture and infusing it with aromatic spices is both soothing and rewarding.
Now, let’s gather our ingredients and get started on making Natillas for a serving size of 4-6 people.
Ingredients:
- 4 cups whole milk
- 1 cup granulated sugar
- 4 large egg yolks
- 1 tablespoon cornstarch
- 1 teaspoon vanilla extract
- 1 cinnamon stick
- Ground cinnamon for garnish
- 1 strip of lemon peel (optional)
Instructions:
- Heat the Milk: In a medium saucepan, pour the whole milk and add the cinnamon stick and lemon peel. Heat the mixture over medium heat until it’s hot, but not boiling. Once hot, remove from heat and allow the flavors to infuse for 10 minutes.
- Prepare the Egg Mixture: In a mixing bowl, whisk together the egg yolks, granulated sugar, and cornstarch until the mixture is smooth and pale.
- Temper the Eggs: Gradually add a small amount of the warm milk into the egg mixture, whisking constantly to temper the eggs and prevent them from curdling. Slowly add the rest of the milk, continuing to whisk until fully combined.
- Thicken the Custard: Return the mixture to the saucepan and place over medium-low heat. Stir continuously with a wooden spoon until the mixture thickens and coats the back of the spoon. This should take about 10-15 minutes. Don’t allow the mixture to boil.
- Flavor and Cool: Once thickened, remove from heat and stir in the vanilla extract. Pour the Natillas into individual serving dishes and let them cool to room temperature. Refrigerate for at least 2 hours until fully set.
- Serve and Garnish: Before serving, sprinkle a light dusting of ground cinnamon over the top of each Natilla. Serve cold and enjoy!
Extra Tips:
When cooking Natillas, it’s essential to keep the heat at a medium to low setting to prevent the custard from curdling or forming lumps. Stirring continuously ensures that the mixture thickens evenly.
If you prefer a richer flavor, you can substitute a portion of the whole milk with cream. Additionally, for a more intense vanilla taste, consider using a vanilla bean instead of extract by scraping the seeds into the milk during the initial heating.
Enjoy making this classic Spanish dessert that’s sure to become a family favorite!
Pestiños
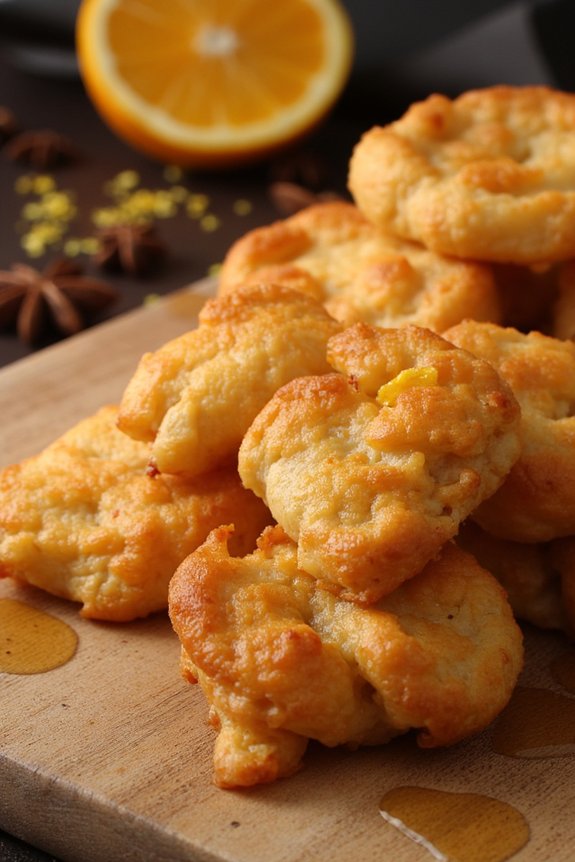
Pestiños are a delightful Spanish sweet treat, often enjoyed during holidays and special occasions. This traditional Andalusian pastry is made by frying dough, flavored with anise and orange, and then coating it in honey or sugar. Pestiños are perfect for sharing with family and friends, as they bring a touch of Spanish culture and warmth to any gathering. The combination of aromatic spices and the sweetness of honey will surely make this dessert a favorite for anyone who tries it.
Making Pestiños at home is a wonderful way to explore Spanish cuisine and its rich history. The recipe is quite simple, and the ingredients are commonly found in most kitchens. The process involves preparing a dough, flavoring it with anise seeds and orange zest, shaping it, and then frying it to golden perfection.
Once fried, the pestiños are traditionally coated in honey, which enhances their sweetness and gives them a shiny, appealing look. This recipe will guide you through each step to make approximately 20-24 pestiños, perfect for serving 4-6 people.
Ingredients:
- 500g all-purpose flour
- 125ml olive oil
- 125ml white wine
- 1 tablespoon anise seeds
- Zest of 1 orange
- 1 teaspoon ground cinnamon
- 1/2 teaspoon salt
- Olive oil for frying
- 250g honey
- 50ml water
- Optional: Granulated sugar for coating
Instructions:
- Infuse the Oil: In a small saucepan, heat 125ml of olive oil over medium heat. Add the anise seeds and orange zest. Allow the flavors to infuse for about 5 minutes, then remove from heat and let it cool.
- Prepare the Dough: In a large mixing bowl, combine the flour, ground cinnamon, and salt. Make a well in the center and pour in the cooled olive oil mixture and white wine. Mix until a dough forms.
- Knead the Dough: Transfer the dough to a floured surface and knead it for about 5-7 minutes until smooth and elastic. Cover it with a clean cloth and let it rest for 30 minutes.
- Roll and Shape the Dough: Divide the dough into small portions. Roll each portion into a thin rectangle or oval, about 1/8 inch thick. Fold each piece in half lengthwise and pinch the ends together to create the traditional pestiño shape.
- Fry the Pestiños: In a deep frying pan, heat enough olive oil to submerge the pestiños. Once the oil is hot, fry the pestiños in batches until they’re golden brown. Use a slotted spoon to transfer them to a paper towel-lined plate to drain excess oil.
- Coat with Honey: In a separate saucepan, gently heat the honey and water until combined. Dip each pestiño into the honey mixture, making sure they’re well coated. Alternatively, you can roll them in granulated sugar if preferred.
- Serve: Arrange the honey-coated pestiños on a serving platter. They can be enjoyed warm or at room temperature.
Extra Tips:
When preparing pestiños, make certain the dough is rolled thin enough to achieve a crisp texture when fried. Be careful not to overheat the oil to avoid burning the pestiños.
If using sugar for coating instead of honey, do so while the pestiños are still warm to guarantee the sugar adheres properly. For a richer flavor, you might consider adding a splash of anise liqueur to the honey mixture. Enjoy these delightful treats with a cup of coffee or tea for the perfect Spanish sweet experience.
Ensaimada
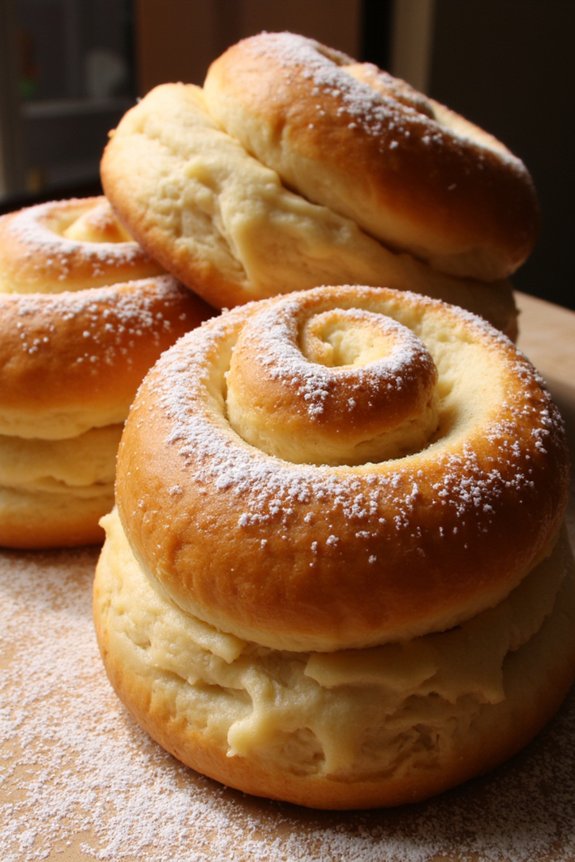
Ensaimada is a traditional Spanish pastry hailing from the Balearic Islands, specifically Mallorca. This delectable sweet treat is known for its soft, fluffy texture and delicate spiral shape, often dusted with powdered sugar or filled with a variety of indulgent fillings like custard, cream, or even savory options like sobrasada.
The uniqueness of ensaimada lies in its preparation, where the dough is carefully rolled and coiled to create its signature look. Though it may seem intricate, making ensaimada at home is a rewarding experience, offering a taste of Spanish culinary tradition right from your kitchen.
To prepare ensaimada for 4-6 people, you’ll need a few basic ingredients and a bit of patience to allow the dough to rise to perfection. The process involves creating a yeast-based dough that’s enriched with eggs and butter, resulting in a light, airy pastry. The dough is rolled out thin, spread with additional butter, and then rolled into a tight coil before baking. The final product is a beautifully golden pastry, perfect for breakfast or as a sweet snack. Here’s how you can make your own ensaimada at home.
Ingredients (Serves 4-6):
- 500g all-purpose flour
- 100g sugar
- 3 large eggs
- 25g fresh yeast or 12g active dry yeast
- 150ml lukewarm milk
- 100g unsalted butter (softened)
- 1/2 tsp salt
- Extra flour for dusting
- Powdered sugar for dusting
Cooking Instructions:
- Activate the Yeast: In a small bowl, dissolve the yeast in the lukewarm milk and let it sit for about 10 minutes, or until it becomes frothy. This step guarantees that the yeast is active and will help the dough rise properly.
- Prepare the Dough: In a large mixing bowl, combine the flour, sugar, and salt. Make a well in the center and add the eggs and the yeast mixture. Mix until the dough starts to come together.
- Knead the Dough: Transfer the dough to a lightly floured surface and knead for about 10 minutes until it becomes smooth and elastic. This step is essential for developing the gluten in the dough, giving the ensaimada its structure.
- First Rise: Place the dough in a greased bowl, cover it with a clean kitchen towel, and let it rise in a warm place for about 1.5 to 2 hours, or until it doubles in size.
- Roll and Shape: Once the dough has risen, punch it down to release the air. Divide the dough into equal portions (depending on the number of ensaimadas you want to make). Roll each piece into a thin rectangle, spread a layer of softened butter over the surface, and then roll it up tightly into a log. Coil the log into a spiral shape.
- Second Rise: Place the shaped dough on a baking sheet lined with parchment paper. Cover with a towel and let it rise again for about 30 minutes.
- Bake: Preheat your oven to 180°C (350°F). Bake the ensaimadas for 15-20 minutes, or until they’re golden brown. Keep an eye on them to prevent overbaking.
- Cool and Serve: Allow the ensaimadas to cool slightly on a wire rack. Dust generously with powdered sugar before serving.
Extra Tips: For the best results, make sure that all your ingredients are at room temperature before starting. This helps the dough to mix more evenly and rise better.
If you prefer a filled ensaimada, you can add your desired filling before rolling the dough into a log. Popular fillings include custard or chocolate. Additionally, if you don’t have fresh yeast, active dry yeast works well too, just remember to reduce the quantity accordingly.
Finally, patience is key; allowing the dough to rise sufficiently is vital for achieving that fluffy, airy texture ensaimadas are known for.
Rosquillas
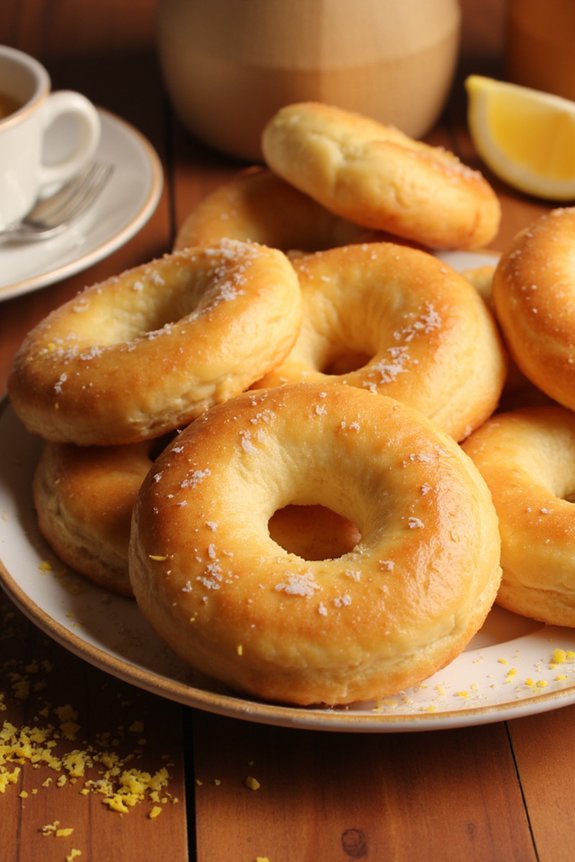
Rosquillas are a traditional Spanish sweet treat that’s often enjoyed during festivals and holidays. These delightful doughnut-like pastries are characterized by their light, fluffy texture and a hint of lemon and anise flavor. They can be enjoyed plain, dusted with sugar, or even dipped in chocolate for an extra layer of indulgence.
Originating from various regions of Spain, each area has its take on this classic recipe, but the essence of rosquillas remains the same – a comforting, sweet bite that brings people together.
Making rosquillas is a fun and rewarding process, perfect for a weekend baking project with friends or family. The recipe involves creating a simple dough, shaping it into rings, and then frying until golden brown. After frying, the rosquillas are typically coated in sugar, giving them their signature sweetness.
Whether you’re new to making these Spanish doughnuts or a seasoned baker looking to try a traditional recipe, this guide will walk you through the steps to create delicious rosquillas for a serving size of 4-6 people.
Ingredients for 4-6 servings:
- 3 cups all-purpose flour
- 1/2 cup granulated sugar
- 2 teaspoons baking powder
- 1/2 teaspoon salt
- 2 large eggs
- 1/4 cup milk
- 1/4 cup extra virgin olive oil
- 1 tablespoon anise liqueur (optional)
- Zest of 1 lemon
- Vegetable oil, for frying
- Additional granulated sugar, for coating
Cooking Instructions:
- Prepare the Dough: In a large mixing bowl, combine the all-purpose flour, granulated sugar, baking powder, and salt. In another bowl, whisk together the eggs, milk, olive oil, anise liqueur (if using), and lemon zest. Gradually add the wet ingredients to the dry ingredients, mixing until a soft dough forms. If the dough is too sticky, add a little more flour.
- Shape the Rosquillas: Lightly flour a clean surface and turn the dough out onto it. Knead the dough gently for a few minutes until smooth. Divide the dough into small balls, approximately the size of a walnut. Using your fingers, poke a hole in the center of each ball and stretch it slightly to form a ring.
- Heat the Oil: Pour vegetable oil into a large, deep frying pan or pot to a depth of about 2 inches. Heat the oil over medium heat until it reaches 350°F (175°C).
- Fry the Rosquillas: Carefully place the dough rings into the hot oil, a few at a time, making sure not to overcrowd the pan. Fry for about 2-3 minutes on each side or until golden brown and cooked through. Use a slotted spoon to remove the rosquillas from the oil and drain on a paper towel-lined plate.
- Coat with Sugar: While the rosquillas are still warm, roll them in granulated sugar until evenly coated. Allow them to cool slightly before serving.
Extra Tips:
When making rosquillas, it’s important to maintain the correct oil temperature to guarantee even cooking and prevent them from becoming greasy. A kitchen thermometer can be very helpful for this.
If you don’t have anise liqueur, you can substitute with a teaspoon of anise extract or omit it entirely if you prefer a milder flavor. For a different twist, consider adding a pinch of cinnamon to the sugar coating or dipping the rosquillas in melted chocolate for a richer taste.
Enjoy your homemade rosquillas with a cup of coffee or tea for a perfect afternoon treat!