

The festive season in Spain is a culinary delight filled with rich flavors and traditions. From the sweet crunch of Turrón De Alicante to the colorful surprise inside a Roscón De Reyes, each dish has its own special story. Polvorones offer a delicate crumb, while Cochinillo Asado brings savory allure. There’s something magical about these recipes. I’m excited to share more of these festive treasures with you.
Turrón De Alicante
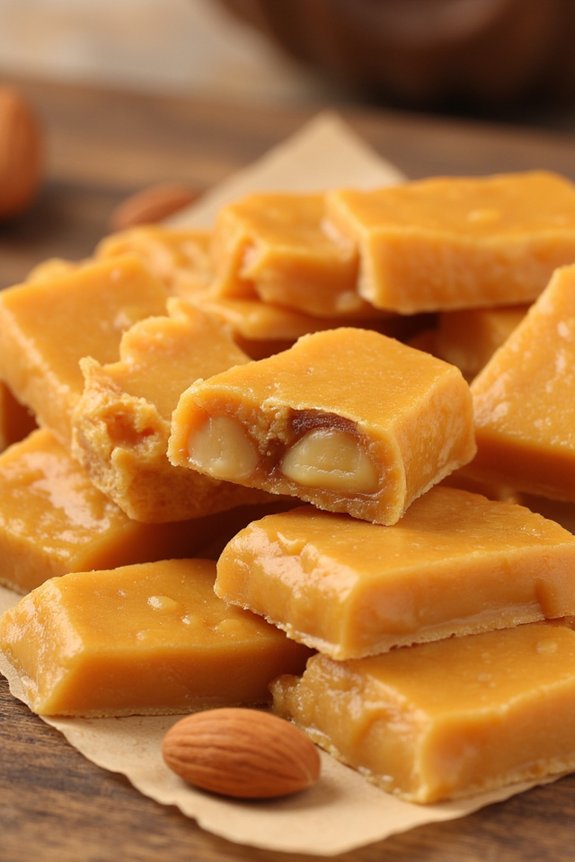
Turrón De Alicante, often referred to as “hard nougat,” is a traditional Spanish sweet typically enjoyed during the Christmas season. This delightful confection is characterized by its crunchy texture and is made from a simple blend of honey, sugar, egg whites, and whole almonds.
Originating from the Alicante region, turrón is a staple in Spanish households and is cherished for its rich flavor and satisfying crunch. Preparing Turrón De Alicante at home allows you to savor the authentic taste of this festive treat while adding a personal touch to your holiday celebrations.
Creating this classic Spanish dessert involves a few straightforward steps that result in a delectable sweet perfect for sharing with family and friends. The combination of roasted almonds and the honey-sweetened nougat creates a harmonious blend of flavors that’s both traditional and festive. This recipe yields a serving size of 4-6 people, making it an ideal addition to any holiday gathering.
Ingredients (Serves 4-6)
- 300 grams of whole blanched almonds
- 200 grams of honey
- 100 grams of granulated sugar
- 1 egg white
- 1 wafer paper sheet (optional)
- A pinch of salt
Cooking Instructions
- Prepare the Almonds: Preheat your oven to 350°F (175°C). Spread the whole blanched almonds evenly on a baking sheet. Roast them in the oven for about 10 minutes, or until they’re golden brown and fragrant. Remove from the oven and allow them to cool slightly.
- Make the Nougat Syrup: In a heavy-bottomed saucepan, combine the honey and granulated sugar over medium heat. Stir the mixture continuously until the sugar dissolves completely and the mixture reaches a smooth consistency. This should take about 5 minutes.
- Beat the Egg White: While the honey and sugar are cooking, beat the egg white with a pinch of salt in a separate bowl until soft peaks form. This will add a light and fluffy texture to your nougat.
- Combine Ingredients: Once the honey mixture is ready, slowly fold in the beaten egg white. Stir continuously to guarantee the egg white is fully incorporated. Continue cooking the mixture over low heat for another 10 minutes, stirring frequently until it thickens.
- Add the Almonds: Remove the saucepan from the heat and gently stir in the roasted almonds, ensuring they’re evenly coated with the nougat mixture.
- Assemble the Turrón: Line a rectangular mold or baking dish with the wafer paper, if using. Pour the nougat and almond mixture into the mold, spreading it evenly with a spatula. Press another sheet of wafer paper on top to create a smooth surface.
- Cool and Set: Allow the turrón to cool at room temperature for at least 2 hours, or until it’s firm. For best results, you can also refrigerate it for a firmer texture.
- Slice and Serve: Once set, remove the turrón from the mold and slice it into small squares or rectangles. Serve and enjoy this festive Spanish treat!
Extra Tips
For an authentic touch, consider using a wooden or silicone spatula when working with the nougat mixture, as it can help prevent sticking. If wafer paper isn’t readily available, you can skip it, but it does add a traditional look and ease of handling.
Guarantee the almonds are thoroughly roasted for the best flavor, as this enhances the overall taste of the turrón. Also, be mindful of the cooking time for the syrup; overcooking can lead to a hard, brittle texture instead of the desired chewy crunch.
Roscón De Reyes
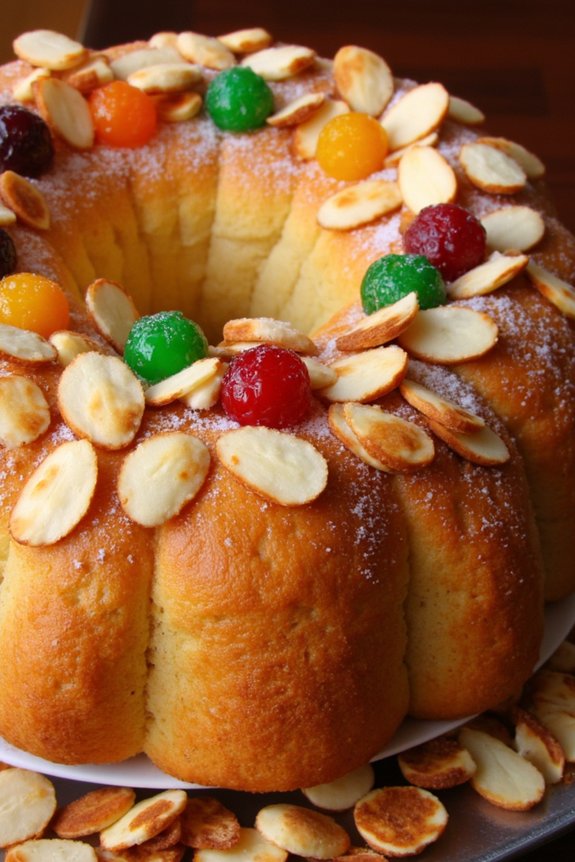
Roscón De Reyes, also known as the “King’s Ring,” is a traditional Spanish pastry that’s commonly enjoyed during the holiday season, especially on January 6th, the Day of the Three Kings. This delightful round cake isn’t only a treat for the taste buds but also a festive centerpiece adorned with candied fruits and sometimes filled with whipped cream or custard.
The tradition includes hiding a small toy or a dried bean inside the cake – whoever finds it’s believed to have good luck for the year and is often crowned king or queen for the day!
The Roscón De Reyes is light, fluffy, and has a hint of citrus flavor, thanks to the inclusion of orange zest. The preparation involves patience and love as the dough requires time to rise, guaranteeing its airy texture. While it may seem intricate, making this festive dessert at home is a rewarding experience that brings joy and a sense of tradition to your holiday celebrations.
Ingredients (serves 4-6 people):
- 500g all-purpose flour
- 100g sugar
- 25g fresh yeast or 8g dry yeast
- 150ml warm milk
- 2 large eggs
- 100g unsalted butter, softened
- 1 tablespoon orange blossom water
- Zest of 1 orange
- Zest of 1 lemon
- A pinch of salt
For decoration:
- 1 egg (for egg wash)
- Assorted candied fruits
- Sliced almonds
- Sugar crystals
Optional:
- 250ml heavy cream (for whipping, if filling)
- Small toy or dried bean (for tradition)
Cooking Instructions:
- Prepare the Yeast Mixture: Dissolve the yeast in the warm milk with a teaspoon of sugar and let it sit for about 10 minutes until it becomes frothy.
- Mix the Dough: In a large mixing bowl, combine the flour, sugar, salt, orange zest, and lemon zest. Make a well in the center and add the frothy yeast mixture, eggs, softened butter, and orange blossom water. Mix until the dough comes together.
- Knead the Dough: Transfer the dough to a floured surface and knead it for about 10 minutes until it becomes smooth and elastic. You can also use a stand mixer with a dough hook for this step.
- First Rise: Place the dough in a lightly oiled bowl, cover it with a damp cloth, and let it rise in a warm place for 1 to 2 hours or until it has doubled in size.
- Shape the Roscón: Once risen, punch down the dough and place it on a floured surface. Shape it into a large ring by poking a hole in the center and gently stretching it outwards. If you wish, insert the small toy or bean into the dough from the bottom.
- Second Rise: Transfer the ring to a baking sheet lined with parchment paper. Cover it with a cloth and let it rise again for about 1 hour or until it has doubled in size.
- Decorate: Preheat your oven to 180°C (350°F). Brush the ring with beaten egg for a glossy finish. Decorate with candied fruits, sliced almonds, and sugar crystals.
- Bake: Bake in the preheated oven for 25-30 minutes or until golden brown. If the top browns too quickly, cover it loosely with aluminum foil.
- Cool and Serve: Let the Roscón De Reyes cool on a wire rack. If desired, slice it horizontally and fill it with whipped cream before serving.
Extra Tips:
For the best results, verify all your ingredients are at room temperature before starting the recipe. If you’re filling the Roscón with cream, make sure it’s completely cool to prevent the cream from melting.
When using a toy or bean, verify it’s safe and clean before inserting it into the dough. Finally, remember that the dough’s rising times can vary depending on the room temperature, so be patient and allow it to double in size for the fluffiest texture.
Enjoy this festive treat with a cup of hot chocolate or coffee for the perfect holiday indulgence!
Polvorones
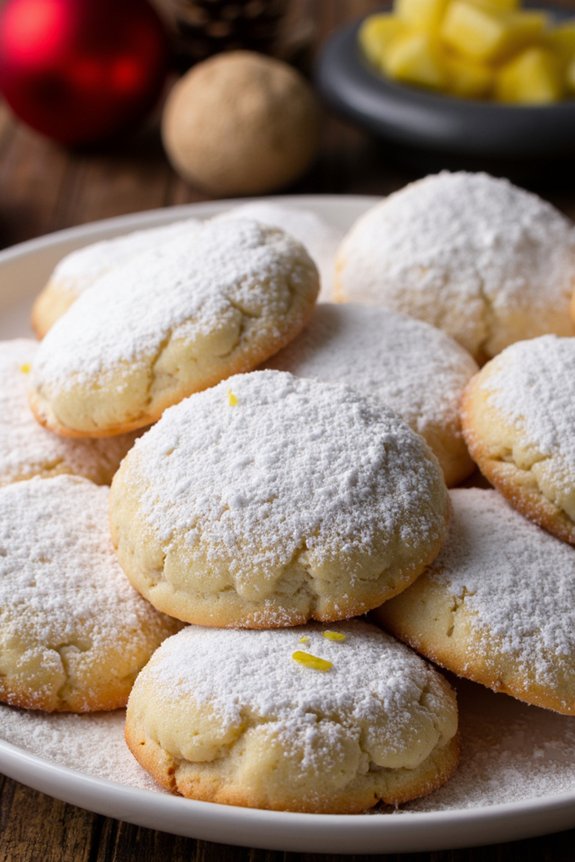
Polvorones are traditional Spanish Christmas cookies that are delicate, crumbly, and melt in your mouth. They’re a type of shortbread that’s popular during the holiday season in Spain and is often flavored with almonds, cinnamon, and a hint of lemon zest.
These cookies are named after the Spanish word “polvo,” which means dust, referring to the crumbly texture that leaves a delightful dust of crumbs with each bite. Polvorones are a festive treat that adds sweetness and charm to any Christmas celebration, making them a beloved holiday tradition.
To make these delicious cookies, you’ll start by combining flour, sugar, and ground almonds to create a rich and nutty flavor. The mixture is then flavored with cinnamon and lemon zest, adding a warm and aromatic touch to the cookies.
Once the dough is prepared, it’s shaped into small rounds and baked until lightly golden. After cooling, the polvorones are dusted with a generous amount of powdered sugar, which not only enhances their sweetness but also gives them their characteristic snowy appearance. This recipe yields enough polvorones to serve 4-6 people, guaranteeing everyone gets to enjoy these delightful holiday treats.
Ingredients:
- 2 cups all-purpose flour
- 1 cup ground almonds
- 1 cup unsalted butter, softened
- 3/4 cup granulated sugar
- 1 teaspoon ground cinnamon
- Zest of 1 lemon
- 1 teaspoon vanilla extract
- 1/4 teaspoon salt
- Powdered sugar, for dusting
Instructions:
- Preheat the Oven: Begin by preheating your oven to 350°F (175°C). Line a baking sheet with parchment paper to prevent the cookies from sticking.
- Prepare the Dry Ingredients: In a medium bowl, combine the all-purpose flour, ground almonds, ground cinnamon, and salt. Mix well and set aside.
- Cream the Butter and Sugar: In a large mixing bowl, use an electric mixer to cream the softened butter and granulated sugar together until light and fluffy. This should take about 3-4 minutes on medium speed.
- Add Flavorings: Add the lemon zest and vanilla extract to the butter mixture and beat until well incorporated.
- Combine Wet and Dry Ingredients: Gradually add the dry ingredients to the butter mixture, mixing on low speed until a soft dough forms. Be careful not to overmix, as this can affect the texture of the cookies.
- Shape the Cookies: Take small portions of the dough and roll them into balls, about 1 inch in diameter. Place the balls onto the prepared baking sheet, spacing them about 2 inches apart.
- Bake: Place the baking sheet in the preheated oven and bake for 15-18 minutes, or until the cookies are lightly golden around the edges.
- Cool and Dust: Allow the cookies to cool on the baking sheet for about 5 minutes before transferring them to a wire rack to cool completely. Once cooled, generously dust the polvorones with powdered sugar.
Extra Tips:
To ascertain your polvorones have the perfect crumbly texture, it’s important not to overwork the dough. Handle it gently and avoid kneading excessively.
If you can’t find ground almonds, you can make your own by processing whole blanched almonds in a food processor until finely ground. For an extra festive touch, you can add a pinch of nutmeg or swap the lemon zest for orange zest.
Additionally, these cookies can be stored in an airtight container at room temperature for up to a week, making them an ideal make-ahead treat for holiday gatherings.
Mazapán
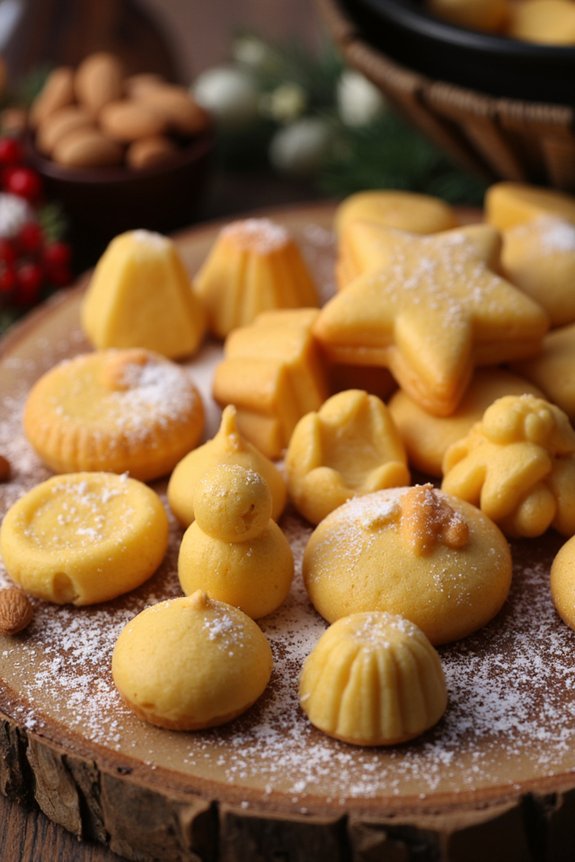
Mazapán, also known as marzipan, is a traditional Spanish confection that’s especially popular during the Christmas season. This sweet treat, made from almonds and sugar, has been a staple in Spanish households for generations. The origins of mazapán are thought to date back to the Arab occupation of the Iberian Peninsula, where almonds and sugar were widely used.
In Spain, the town of Toledo is particularly renowned for its high-quality mazapán, and families across the country recreate this delicacy to share with loved ones during the festive season.
The beauty of mazapán lies in its simplicity and versatility. The basic recipe includes just a few ingredients, yet it can be molded into various shapes and decorated for an extra festive touch. Whether shaped into small figurines, fruits, or traditional forms, mazapán makes for a delightful and charming addition to any holiday dessert table. This recipe will guide you through making approximately 24 pieces of mazapán, perfect for serving 4-6 people.
Ingredients (serving size: 4-6 people)
- 250 grams of blanched almonds
- 250 grams of powdered sugar
- 1 egg white
- 1 teaspoon of almond extract
- 1 tablespoon of water
- Optional: food coloring, decorative toppings such as nuts or chocolate
Cooking Instructions
- Prepare the Almonds: If your almonds aren’t blanched, start by blanching them. Boil water in a saucepan, add the almonds for about 1-2 minutes, and then drain. Once cool, remove the skins by pinching each almond between your fingers.
- Grind the Almonds: Place the blanched almonds in a food processor and grind them until they become a fine powder. Be careful not to over-process, as this can turn the almonds into a paste.
- Mix with Sugar: In a large bowl, combine the almond powder with the powdered sugar. Mix thoroughly to guarantee an even distribution.
- Form the Dough: Add the egg white and almond extract to the almond-sugar mixture. Begin to knead the ingredients together until a smooth dough forms. If the dough is too dry, add a bit of water, one teaspoon at a time, until you achieve the desired consistency.
- Shape the Mazapán: Divide the dough into small portions and shape them into your desired forms. You can use molds for uniform shapes or sculpt them by hand. For a more festive presentation, consider adding food coloring or decorative toppings.
- Bake the Mazapán: Preheat your oven to 180°C (350°F). Place the shaped mazapán on a baking sheet lined with parchment paper. Bake for about 5-8 minutes, just until the tops are lightly golden. Be careful not to over-bake, as this can dry out the mazapán.
- Cool and Serve: Allow the mazapán to cool completely on a wire rack before serving. They can be stored in an airtight container for up to a week.
Extra Tips
For a more intense almond flavor, consider toasting the almonds lightly before grinding them. Be aware that the dough can be quite sticky; dusting your hands with a little powdered sugar can make shaping easier.
If you’d like to add a personal touch, try incorporating different flavor extracts or spices like cinnamon or lemon zest to the dough. Finally, mazapán can also be dipped in chocolate or decorated with edible gold leaf for an elegant finish.
Enjoy crafting these sweet delights and sharing them with family and friends during your festive celebrations!
Pavo Trufado De Navidad
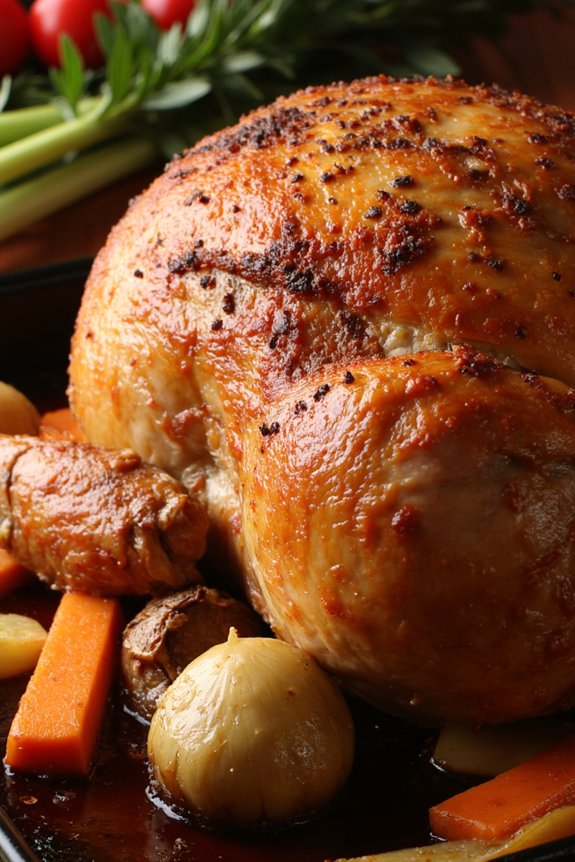
Pavo Trufado De Navidad is a classic Spanish Christmas recipe that brings a touch of elegance and festivity to the holiday table. This dish is a flavorful roasted turkey, traditionally filled with a rich truffle stuffing, which adds an earthy and luxurious taste to the meat.
The combination of succulent turkey and aromatic stuffing makes it a perfect centerpiece for your Christmas feast, offering a delightful culinary experience that your guests will surely remember.
The preparation of Pavo Trufado De Navidad involves a few steps, but the result is a beautifully roasted turkey with a moist and savory filling. The dish is a celebration of seasonal flavors, with the truffles playing a starring role, complemented by other ingredients that enhance the overall taste profile.
To achieve the best results, it’s crucial to follow the recipe closely and allow ample time for marinating and cooking. This recipe serves 4-6 people, making it ideal for family gatherings or intimate holiday dinners.
Ingredients
- 1 whole turkey (about 10-12 pounds)
- 4 ounces black truffles, finely chopped
- 1 cup unsalted butter, softened
- 3 cloves garlic, minced
- 1 teaspoon fresh thyme, chopped
- 1 teaspoon fresh rosemary, chopped
- Salt and pepper to taste
- 1 cup white wine
- 1 onion, quartered
- 2 carrots, cut into chunks
- 2 celery stalks, cut into chunks
- 1 bay leaf
- 3 cups chicken broth
Cooking Instructions
- Prepare the Turkey: Begin by preheating your oven to 325°F (165°C). Clean the turkey thoroughly under cold running water, then pat it dry with paper towels.
- Make the Truffle Butter: In a bowl, mix the softened butter with the chopped truffles, minced garlic, thyme, rosemary, salt, and pepper until well combined.
- Stuff the Turkey: Gently loosen the skin of the turkey without tearing it. Spread the truffle butter evenly under the skin, making sure it covers the breast and thigh areas. Rub any remaining butter over the outside of the turkey.
- Season the Turkey: Season the cavity of the turkey with salt and pepper, then stuff it with the quartered onion, carrot chunks, celery, and bay leaf.
- Roast the Turkey: Place the turkey on a rack in a roasting pan. Pour the white wine and chicken broth into the bottom of the pan. Cover the turkey loosely with aluminum foil.
- Cook the Turkey: Roast the turkey in the preheated oven for about 3 to 3.5 hours, or until the internal temperature reaches 165°F (75°C) in the thickest part of the thigh. Remove the foil during the last 30 minutes of cooking to allow the skin to crisp and brown.
- Rest and Carve: Once cooked, remove the turkey from the oven and let it rest for at least 20 minutes before carving. This allows the juices to redistribute, guaranteeing a moist and flavorful turkey.
Extra Tips
For an even more intense truffle flavor, consider marinating the turkey in advance with truffle oil. This can be done a day before cooking to allow the flavors to fully permeate the meat.
Additionally, basting the turkey occasionally with the pan juices will help keep it moist and enhance the richness of the dish. If you have any leftover truffle butter, serve it alongside the turkey for an extra touch of decadence.
Remember to use a meat thermometer to confirm the turkey is cooked to perfection, as precise temperature control is key to achieving the best texture and flavor.
Cochinillo Asado

Cochinillo Asado, also known as roast suckling pig, is a classic Spanish dish that exudes festive cheer and culinary tradition. It’s a centerpiece that brings families together during Christmas celebrations, with its crispy skin and tender, juicy meat.
Originating from the region of Castilla y León, particularly Segovia, Cochinillo Asado is a dish that highlights simplicity in its preparation, allowing the natural flavors of the pork to shine. The key to this dish is the quality of the suckling pig and the technique of slow roasting to achieve a delightful contrast between the crackling skin and succulent meat.
The preparation of Cochinillo Asado requires minimal ingredients, emphasizing the importance of sourcing a high-quality suckling pig. Traditionally, this dish is roasted in a wood-fired oven, but a conventional oven will also yield excellent results. The slow roasting process not only enhances the flavors but also guarantees that the meat remains tender and moist.
This dish can be served with simple accompaniments like a fresh salad or roasted potatoes, allowing the Cochinillo to be the star of the meal. Here’s how you can prepare this festive feast for 4-6 people.
Ingredients (Serves 4-6):
- 1 suckling pig (about 4-5 kg)
- 4 tablespoons of olive oil
- Coarse sea salt
- 2 cloves of garlic, finely minced
- 1 sprig of fresh rosemary
- 1 cup of water
Cooking Instructions:
- Prepare the Pig: Start by preheating your oven to 160°C (320°F). Rinse the suckling pig under cold water and pat it dry with paper towels. Make sure the pig is thoroughly dry to help achieve crispy skin.
- Place it on a large cutting board, and with a sharp knife, make small incisions on the skin.
- Season the Pig: Rub the entire surface of the pig with olive oil, guaranteeing even coverage. Generously sprinkle coarse sea salt all over, making sure to get into the incisions. This will help draw out moisture from the skin, enhancing its crispiness.
- Insert the minced garlic and rosemary into the cavity of the pig to infuse it with subtle flavors.
- Roasting The Cochinillo: Place the pig on a large roasting tray, belly side down. Pour a cup of water into the tray to maintain moisture during roasting. Transfer the tray to the preheated oven. Roast the pig for approximately 3-4 hours, basting occasionally with the pan juices to guarantee the meat remains moist.
- Crisp the Skin: After the initial roasting period, increase the oven temperature to 200°C (392°F) to crisp up the skin. This should take an additional 30-45 minutes. Keep an eye on it to guarantee the skin doesn’t burn.
- Once the skin is golden brown and crackling, remove the tray from the oven.
- Rest and Serve: Let the Cochinillo rest for about 20 minutes before carving. This allows the juices to redistribute throughout the meat. Serve with your choice of sides and enjoy this festive dish.
Extra Tips:
For best results, use a fresh suckling pig from a reputable butcher. The freshness of the meat greatly impacts the dish’s flavor and texture.
If possible, use a meat thermometer to guarantee the internal temperature reaches around 75°C (167°F) for safely cooked meat. Additionally, if you find the skin isn’t crispy enough, you can place the pig under a grill for a few minutes, but be vigilant to prevent burning.
Cordero Asado
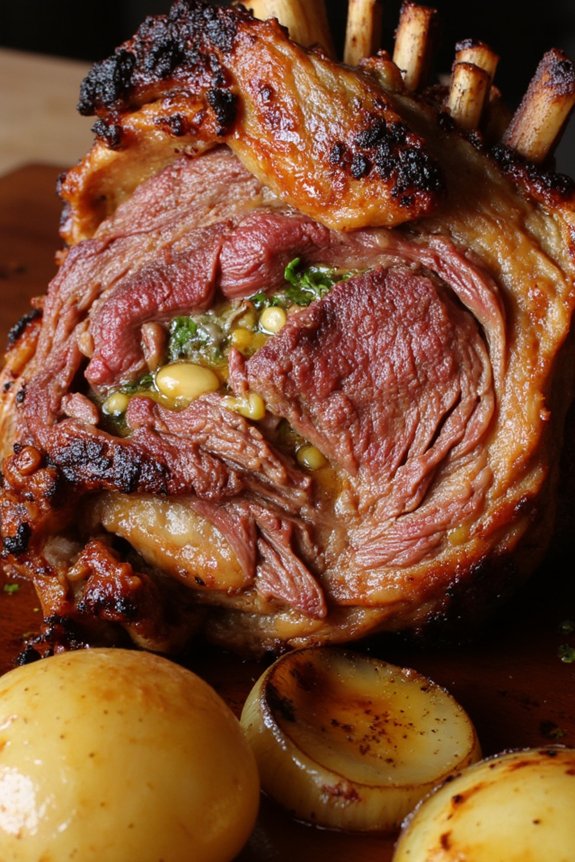
Cordero Asado, or Roast Lamb, is a traditional Spanish dish often savored during the festive Christmas season. It’s renowned for its succulent and tender meat, infused with aromatic flavors that come from marinating the lamb with herbs and spices. The slow-roasting process allows the meat to develop a rich, savory taste that’s both comforting and indulgent, making it a perfect centerpiece for any holiday feast.
Served alongside traditional Spanish sides such as roasted potatoes or a fresh salad, Cordero Asado is bound to impress and delight your family and friends during the holiday celebrations.
The key to a perfect Cordero Asado is in the preparation and patience involved in the cooking process. Selecting a high-quality cut of lamb, such as a leg or shoulder, is essential to guarantee the best flavor and texture. Marinating the lamb overnight allows the flavors to penetrate deeply into the meat, resulting in a more pronounced and delicious taste.
The herbs, garlic, and olive oil used in the marinade highlight the natural flavors of the lamb, while the slow-roasting guarantees a tender and juicy outcome. Follow this recipe to create a memorable and authentic Spanish dish that will be the highlight of your Christmas dinner.
Ingredients (serves 4-6):
- 1 leg of lamb (approximately 2-2.5 kg)
- 6 cloves garlic
- 2 tablespoons fresh rosemary leaves
- 2 tablespoons fresh thyme leaves
- 1 tablespoon dried oregano
- 1/4 cup extra virgin olive oil
- 1/4 cup lemon juice
- Salt and freshly ground black pepper to taste
- 4 large potatoes, peeled and quartered
- 2 onions, sliced
- 1 cup white wine
- 1 cup vegetable or chicken stock
Cooking Instructions:
- Prepare the Marinade: In a mortar and pestle, crush the garlic cloves with a pinch of salt until it forms a paste. Add the rosemary, thyme, oregano, olive oil, lemon juice, salt, and pepper. Mix well to combine.
- Marinate the Lamb: Rub the marinade all over the lamb leg, making sure it’s evenly coated. Place the lamb in a large dish or a sealed plastic bag and refrigerate overnight or for at least 6 hours to allow the flavors to develop.
- Preheat the Oven: Preheat your oven to 160°C (320°F).
- Prepare the Vegetables: Arrange the quartered potatoes and sliced onions in a large roasting pan. Drizzle with olive oil and season with salt and pepper.
- Roast the Lamb: Place the marinated lamb leg on top of the vegetables in the roasting pan. Pour the white wine and stock around the lamb.
- Cook Slowly: Roast the lamb in the preheated oven for about 3 to 4 hours, basting occasionally with the pan juices. The lamb should be tender and falling off the bone.
- Rest and Serve: Once cooked, remove the lamb from the oven and let it rest for 15-20 minutes before carving. Serve the lamb with the roasted potatoes and onions, along with any additional side dishes of your choice.
Extra Tips:
To achieve the best results, confirm that you allow the lamb to come to room temperature before roasting. This helps in even cooking and prevents the meat from being shocked by the heat.
It’s also essential to let the lamb rest after roasting, as this allows the juices to redistribute throughout the meat, ensuring a juicy and flavorful result. If you prefer a more pronounced citrus flavor, consider adding some freshly grated lemon zest to the marinade.
Finally, feel free to adjust the herbs and seasonings to your personal taste, as this recipe is versatile and can be tailored to suit different preferences.
Sopa De Almendra

Sopa De Almendra, or Spanish Almond Soup, is a delightful and creamy dish that brings warmth and comfort during the festive Christmas season. This traditional Spanish recipe is often served as a starter in holiday meals, and its rich, nutty flavor combined with a hint of garlic and saffron makes it an unforgettable experience. The dish is particularly popular in Andalusia, where almonds are a staple in many culinary creations.
Whether you’re a fan of Spanish cuisine or trying it for the first time, Sopa De Almendra is certain to impress with its unique blend of ingredients and flavors.
The origins of Sopa De Almendra trace back to Moorish influences on Spanish cooking, which brought a variety of nuts and spices into the country’s culinary repertoire. The soup is typically made with ground almonds, which provide a creamy texture without the need for dairy.
The addition of garlic, saffron, and sometimes even a splash of sherry or white wine elevates the taste, making it both luxurious and comforting. This recipe is for a serving size of 4-6 people, perfect for sharing with family and friends during the holidays.
Ingredients:
- 1 cup blanched almonds
- 3 tablespoons olive oil
- 1 medium onion, finely chopped
- 3 cloves garlic, minced
- 1/2 teaspoon saffron threads
- 4 cups chicken or vegetable broth
- 1/2 cup dry white wine or sherry (optional)
- Salt and pepper to taste
- 1/2 cup heavy cream (optional)
- Fresh parsley, chopped, for garnish
- Croutons or toasted bread slices, for serving
Instructions:
- Prepare the Almonds: Begin by toasting the blanched almonds in a dry skillet over medium heat until they’re golden brown, stirring frequently to avoid burning. Once toasted, let them cool slightly before grinding them into a fine powder using a food processor or blender.
- Sauté the Aromatics: In a large pot, heat the olive oil over medium heat. Add the chopped onion and sauté until it becomes translucent, about 5 minutes. Then, add the minced garlic and saffron threads, cooking for an additional 1-2 minutes until fragrant.
- Combine Ingredients: Stir in the ground almonds and mix well with the onion and garlic. Gradually pour in the chicken or vegetable broth, stirring constantly to guarantee the almonds are evenly distributed in the liquid. If using, add the white wine or sherry at this point.
- Simmer the Soup: Bring the soup to a gentle simmer and let it cook for about 20-25 minutes, allowing the flavors to meld together. Stir occasionally to prevent any sticking at the bottom of the pot. Season with salt and pepper to taste.
- Finish with Cream (Optional): For a richer soup, stir in the heavy cream and let it heat through for about 5 minutes, without bringing it to a boil.
- Serve: Ladle the soup into bowls and garnish with freshly chopped parsley. Serve with croutons or toasted bread slices on the side for added texture.
Extra Tips:
When making Sopa De Almendra, it’s important to use fresh saffron for the best flavor. Saffron can be quite expensive, so a little goes a long way; make sure to store it in an airtight container away from light to preserve its potency.
Additionally, if you prefer a thicker consistency, you can reduce the amount of broth or simmer the soup longer to allow it to thicken naturally. For those looking to add a bit more complexity, consider incorporating a pinch of nutmeg or a splash of lemon juice before serving to enhance the flavors further.
Besugo Al Horno
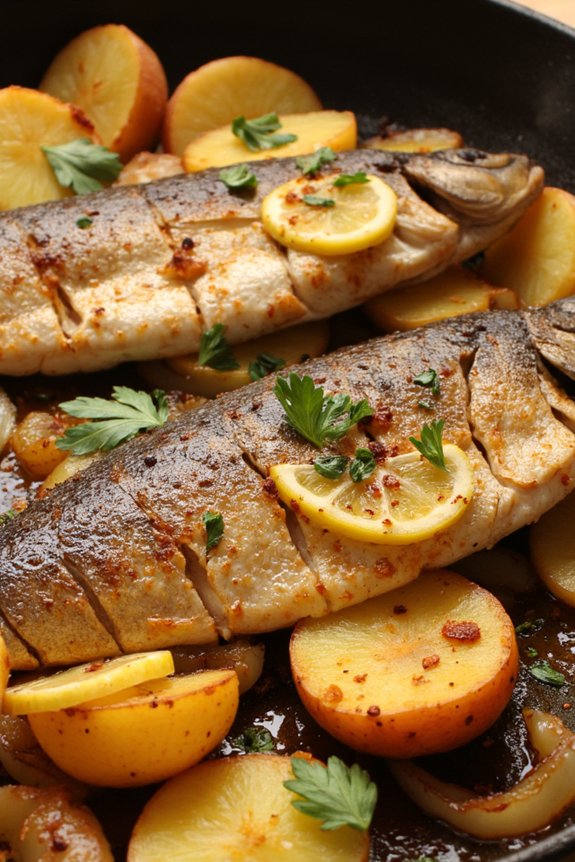
Besugo al Horno, or oven-baked sea bream, is a traditional Spanish dish often served during the festive Christmas season. Known for its simplicity and rich flavors, this dish showcases the natural taste of fresh sea bream complemented by aromatic herbs and olive oil. The preparation might seem straightforward, but the result is a delicious and hearty meal that embodies the spirit of a Spanish Christmas dinner.
The key to a perfect Besugo al Horno is sourcing the freshest sea bream available. The fish is typically dressed with garlic, lemon, and parsley, and then baked to perfection. The subtle infusion of flavors enhances the delicate taste of the fish without overpowering it. This delightful dish is often accompanied by roasted potatoes or a simple green salad, making it a complete and satisfying meal for the whole family.
Ingredients (serving size: 4-6 people)
- 2 whole sea bream (about 1.5 pounds each), cleaned and scaled
- 4 cloves of garlic, thinly sliced
- 1 large lemon, sliced
- Fresh parsley, chopped (about 1/4 cup)
- 1/2 cup of extra virgin olive oil
- Salt and freshly ground black pepper to taste
- 1/2 cup of dry white wine
- 2 large potatoes, thinly sliced
- 1 onion, thinly sliced
Cooking Instructions
- Preheat the Oven: Preheat your oven to 375°F (190°C) to guarantee it’s hot and ready for baking the fish.
- Prepare the Fish: Rinse the sea bream under cold water and pat them dry with paper towels. Make three or four slashes on each side of the fish with a sharp knife. This allows the flavors to penetrate the fish better.
- Season the Fish: Rub the fish inside and out with salt and freshly ground black pepper. Insert slices of garlic and lemon into the slashes and inside the cavity of each fish. Sprinkle with half of the chopped parsley.
- Prepare the Baking Dish: Drizzle a little olive oil in a large baking dish. Arrange the potato and onion slices in an even layer in the dish, then place the seasoned sea bream on top.
- Add Remaining Ingredients: Drizzle the remaining olive oil over the fish and potatoes. Pour the white wine into the dish, ensuring the liquid surrounds the fish but doesn’t cover it.
- Bake the Fish: Place the baking dish in the preheated oven. Bake for about 30-35 minutes, or until the fish is cooked through and the potatoes are tender. Baste the fish with the juices from the baking dish halfway through cooking.
- Finish and Serve: Once cooked, remove the dish from the oven and sprinkle the remaining parsley over the fish. Let it rest for a few minutes before serving.
Extra Tips
When preparing Besugo al Horno, choosing a good quality, dry white wine will enhance the flavor of the dish. Additionally, if you prefer a more intense flavor, you can add a few sprigs of fresh thyme or rosemary to the baking dish.
Always make sure to check the fish for doneness by gently pressing the thickest part to see if it flakes easily. Remember, overcooking can cause the fish to become dry, so keep a close eye on it as it bakes. Enjoy this classic Spanish Christmas recipe with a side of your choice for a festive and delicious meal.
Gambas Al Ajillo
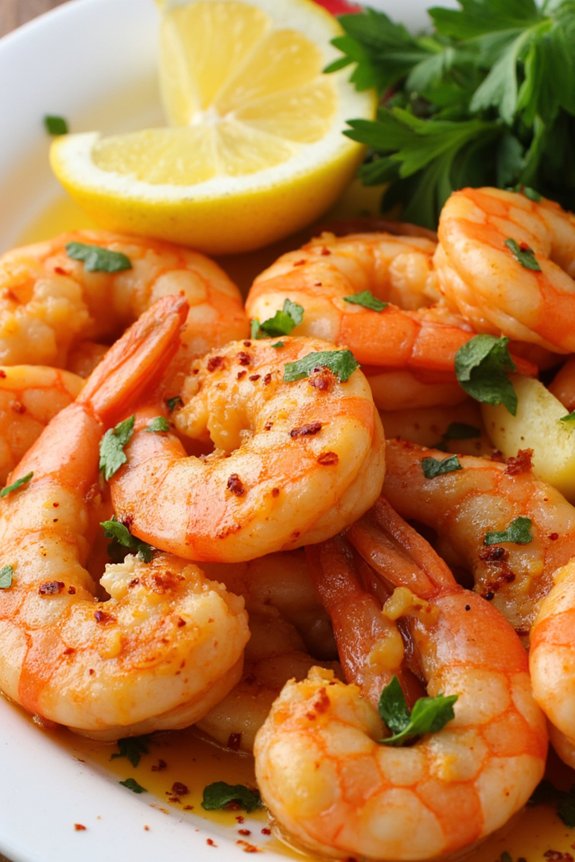
Gambas Al Ajillo, or Garlic Shrimp, is a quintessential Spanish dish that’s both simple and bursting with flavor. This dish is perfect for festive occasions like Christmas, where the warm aroma of garlic and the succulent taste of shrimp can bring the essence of Spain to your celebration.
Traditionally served as a tapa, Gambas Al Ajillo can also be a delightful appetizer or a main course when paired with crusty bread or a side of rice. The key to achieving the perfect Gambas Al Ajillo lies in using fresh shrimp and high-quality olive oil, which together create a deliciously fragrant and flavorful dish.
This recipe is designed for a serving size of 4-6 people, making it ideal for a family gathering or a festive dinner party. The preparation is straightforward, and the cooking time is relatively short, allowing you to enjoy more time with your guests.
With just a few simple ingredients, you can create a dish that will transport you to the coastal regions of Spain, where seafood is a staple and flavors are bold and vibrant.
Ingredients (Serves 4-6):
- 1 pound (about 500 grams) large shrimp, peeled and deveined
- 1/4 cup extra virgin olive oil
- 8-10 cloves garlic, thinly sliced
- 1/2 teaspoon red pepper flakes
- Salt, to taste
- Freshly ground black pepper, to taste
- 1/4 cup dry white wine (optional)
- 2 tablespoons fresh parsley, chopped
- Lemon wedges, for serving
Cooking Instructions:
- Prepare the Shrimp: Begin by ensuring the shrimp are thoroughly cleaned. Peel and devein the shrimp, then pat them dry with paper towels. This will help them cook evenly and absorb the flavors better.
- Heat the Olive Oil: In a large skillet, heat the olive oil over medium heat. Make sure the oil is hot but not smoking, as you want to gently cook the garlic without burning it.
- Cook the Garlic: Add the thinly sliced garlic to the hot oil. Stir frequently and cook until the garlic becomes fragrant and starts to turn golden, about 1-2 minutes. Be careful not to let the garlic burn, as it will become bitter.
- Add the Shrimp and Spices: Add the shrimp to the skillet in a single layer. Sprinkle the red pepper flakes, salt, and black pepper over the shrimp. Stir to coat the shrimp in the garlic oil and spices.
- Cook the Shrimp: Cook the shrimp for about 2-3 minutes on one side until they start turning pink and opaque. Flip the shrimp and cook for another 2-3 minutes on the other side. The shrimp should be cooked through but still tender.
- Deglaze with Wine: (Optional) If using, add the dry white wine to the skillet and let it simmer for an additional 1-2 minutes, allowing the alcohol to evaporate and the flavors to meld.
- Garnish and Serve: Remove the skillet from the heat. Sprinkle the freshly chopped parsley over the shrimp and toss to combine. Serve the Gambas Al Ajillo immediately with lemon wedges on the side for squeezing over the shrimp.
Extra Tips:
For the best flavor, use shrimp that are as fresh as possible. If fresh shrimp aren’t available, frozen shrimp can be used, but make sure they’re fully thawed and patted dry to prevent excess moisture.
Adjust the amount of garlic and red pepper flakes to suit your taste preference; more garlic will enhance the aroma, while more red pepper flakes will add a spicier kick. If you prefer a richer sauce, you can add a bit more olive oil or even a pat of butter at the end for extra richness.
Serve with plenty of crusty bread to soak up the delicious garlic-infused oil.
Pulpo a La Gallega
Pulpo a La Gallega, also known as Galician-style octopus, is a traditional Spanish dish that hails from the region of Galicia in the northwest of Spain. This festive dish is renowned for its simplicity and the rich, savory flavors that emerge from the use of quality ingredients.
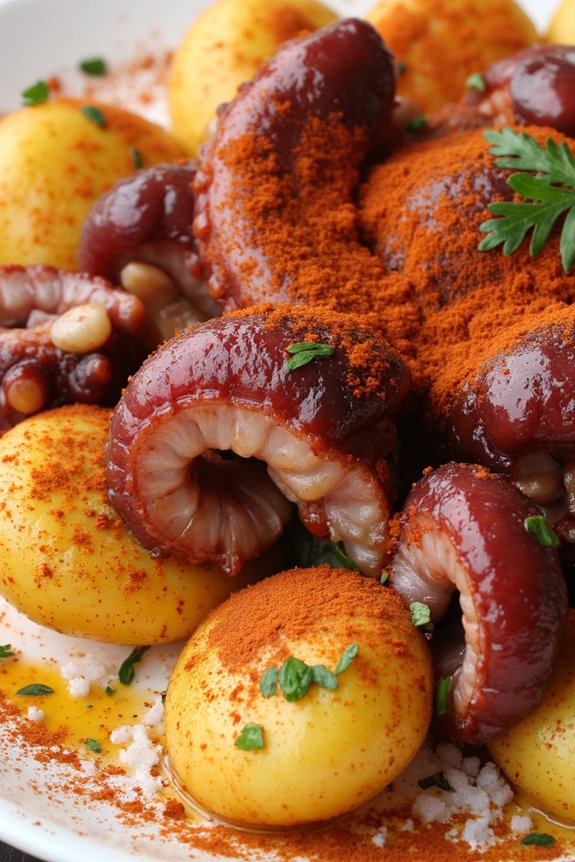
It’s a perfect dish to serve during a holiday gathering, capturing the essence of Spanish cuisine by highlighting the natural taste of the octopus adorned with a touch of paprika and olive oil.
This dish is typically served as a tapa or a light main course, often accompanied by sliced potatoes and sprinkled with coarse sea salt. The secret to Pulpo a La Gallega‘s success lies in its preparation — the octopus is boiled to tender perfection, ensuring a melt-in-mouth texture that pairs beautifully with the smoky paprika.
Whether you’re looking to bring a taste of Spain to your Christmas table or simply want to try something new, Pulpo a La Gallega is a delightful choice.
Ingredients for 4-6 people:
- 2.2 lbs (1 kg) of octopus
- 4 medium-sized potatoes
- 2 bay leaves
- 1 tablespoon of sweet paprika
- 1 tablespoon of hot paprika
- 1/4 cup of extra virgin olive oil
- Coarse sea salt
- Fresh parsley (optional, for garnish)
Cooking Instructions:
- Prepare the Octopus: Begin by cleaning the octopus thoroughly under cold water to remove any sand or impurities. If the octopus hasn’t been previously frozen, you may want to freeze it overnight to tenderize the meat. Thaw completely before cooking.
- Boil the Octopus: Fill a large pot with water and add the bay leaves. Bring the water to a boil. Once boiling, dip the octopus into the water three times (each dip should be quick). This helps the tentacles curl nicely. Finally, submerge the octopus completely and let it simmer for about 45 minutes or until tender. Check tenderness by inserting a fork into the thickest part of the tentacles.
- Cook the Potatoes: While the octopus is cooking, peel and slice the potatoes into rounds about 1/2 inch thick. In a separate pot, boil the potato slices until they’re tender but still firm, approximately 10-15 minutes. Drain and set aside.
- Slice the Octopus: Once the octopus is cooked, remove it from the pot and let it cool slightly. Slice the tentacles into 1/4 inch thick rounds. Arrange them on a platter or individual plates atop the sliced potatoes.
- Season the Dish: Drizzle the extra virgin olive oil generously over the octopus and potatoes. Sprinkle both sweet and hot paprika evenly over the top. Finish with a good pinch of coarse sea salt. Garnish with fresh parsley if desired.
- Serve: Serve the dish warm, allowing the flavors to meld. It can be enjoyed as a main dish or appetizer.
Extra Tips:
For the best results, consider using a high-quality Spanish extra virgin olive oil, as it enhances the overall flavor profile of the dish. If you prefer a milder version, adjust the amount of hot paprika.
Additionally, ensuring the octopus is cooked to the right tenderness is essential; if it’s too chewy, it may need more time in the pot. Finally, if you’re using fresh octopus, ask your fishmonger to clean it, saving you preparation time.
Ensalada De Nochebuena
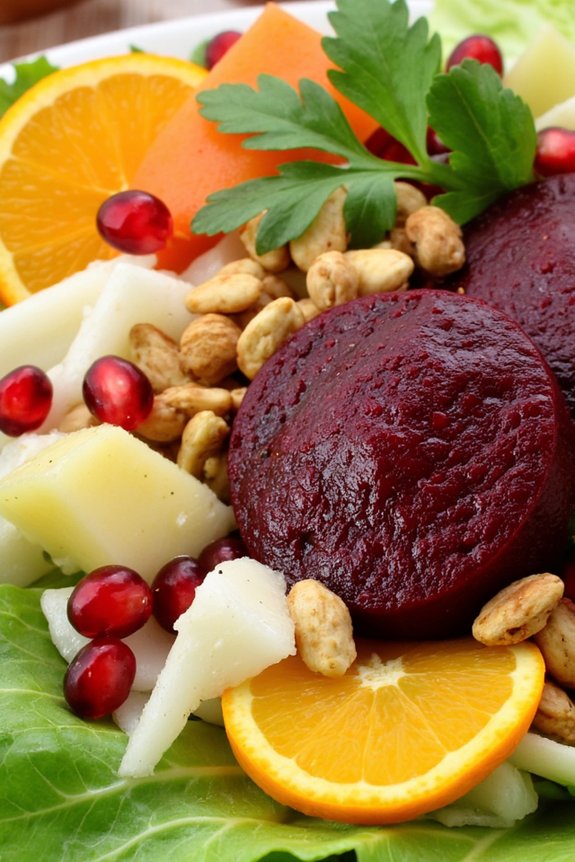
Ensalada De Nochebuena, also known as Christmas Eve Salad, is a vibrant and invigorating dish traditionally served during the festive season in Mexico. It brings together a delightful combination of colors, textures, and flavors, making it a feast for both the eyes and the palate. This salad typically features a medley of fruits and vegetables, harmoniously blended with a light citrus dressing, making it a perfect accompaniment to heavier holiday meals.
The origins of Ensalada De Nochebuena are deeply rooted in Mexican Christmas traditions, where it’s served on the night of December 24th as part of the festive celebrations. The salad isn’t only delicious but also symbolizes the unity of diverse ingredients, mirroring the spirit of togetherness during the holiday season.
Whether you’re looking to add a touch of Mexican flair to your Christmas dinner or simply want to try something new, this salad is sure to be a hit with family and friends.
Ingredients (Serves 4-6):
- 2 medium-sized beets
- 2 oranges, peeled and segmented
- 1 jicama, peeled and sliced into thin strips
- 1 cup romaine lettuce, chopped
- 1 cup fresh pineapple, cubed
- 1/2 cup pomegranate seeds
- 1/2 cup roasted and salted peanuts
- 1/4 cup fresh cilantro, chopped
- 1/4 cup lime juice
- 2 tablespoons orange juice
- 2 tablespoons olive oil
- 1 tablespoon honey
- Salt and pepper to taste
Instructions:
- Prepare the Beets: Start by washing the beets thoroughly. Place them in a pot of water and bring to a boil. Cook the beets until they’re tender, about 30-40 minutes. Once cooked, drain and allow them to cool. Peel and slice them into thin rounds.
- Prepare the Dressing: In a small bowl, whisk together lime juice, orange juice, olive oil, honey, salt, and pepper. Taste and adjust the seasoning as needed.
- Assemble the Salad: In a large serving bowl, layer the romaine lettuce as the base. Arrange the beet slices, orange segments, jicama strips, pineapple cubes, and pomegranate seeds over the lettuce.
- Add the Peanuts and Cilantro: Sprinkle the roasted peanuts and fresh cilantro over the top of the salad for added texture and flavor.
- Dress the Salad: Drizzle the prepared citrus dressing evenly over the salad. Toss gently to guarantee all ingredients are well coated with the dressing.
- Chill and Serve: For best results, refrigerate the salad for about 20-30 minutes before serving. This will allow the flavors to meld together beautifully.
Extra Tips:
When preparing Ensalada De Nochebuena, feel free to customize the ingredients to suit your taste preferences or dietary needs. For a little extra crunch, consider adding sliced radishes or cucumber.
If you prefer a sweeter salad, increase the amount of honey in the dressing or add more pineapple. When serving, remember that the salad is best enjoyed cold, so be sure to chill it before bringing it to the table.
This colorful and delicious dish can be a stunning centerpiece for any festive gathering.
Churros Con Chocolate

Churros Con Chocolate is a classic Spanish treat that’s especially popular during the festive season. These delightful fried dough pastries are paired with a rich and creamy chocolate sauce, making them an irresistible holiday indulgence. Perfect for breakfast or as a dessert, churros con chocolate are certain to bring a touch of Spanish warmth to your Christmas celebrations.
The key to making perfect churros is achieving a light and airy texture on the inside while having a crispy, golden exterior. When combined with the decadent chocolate dipping sauce, you’ll have a heavenly treat that will be remembered long after the holidays are over.
To make churros con chocolate for 4-6 people, you’ll need a few simple ingredients that come together to create this festive dish. The churros are made from a basic dough that’s fried to perfection before being generously dusted with sugar. The chocolate sauce, on the other hand, is a luxurious blend of dark chocolate, milk, and a touch of cinnamon, offering a rich and fragrant complement to the churros. This recipe guarantees that you’ll have plenty to share, so gather your loved ones and enjoy this traditional Spanish delight.
Ingredients:
For the churros:
- 1 cup water
- 2 1/2 tablespoons granulated sugar
- 1/2 teaspoon salt
- 2 tablespoons vegetable oil
- 1 cup all-purpose flour
- Vegetable oil for frying
- 1/2 cup granulated sugar (for coating)
For the chocolate sauce:
- 1 cup whole milk
- 100g dark chocolate (at least 70% cocoa), finely chopped
- 1 tablespoon cornstarch
- 1-2 tablespoons sugar (to taste)
- 1/2 teaspoon ground cinnamon
Instructions:
- Prepare the Dough: In a medium saucepan, combine 1 cup of water, 2 1/2 tablespoons of sugar, 1/2 teaspoon of salt, and 2 tablespoons of vegetable oil. Bring the mixture to a boil over medium heat. Remove from heat and immediately stir in 1 cup of flour until the mixture forms a ball.
- Heat the Oil: Fill a large pot or deep fryer with vegetable oil and heat to 375°F (190°C).
- Pipe the Churros: Transfer the dough into a piping bag fitted with a large star tip. Carefully pipe 4-6 inch strips of dough into the hot oil, using scissors to cut the dough after each length.
- Fry the Churros: Fry the churros in batches until they’re golden brown and crispy, about 2-3 minutes per batch. Remove them with a slotted spoon and drain on paper towels.
- Coat with Sugar: While still warm, roll the churros in the 1/2 cup of granulated sugar to coat them evenly.
- Make the Chocolate Sauce: In a small saucepan, whisk together the milk and cornstarch until smooth. Heat over medium heat, stirring constantly, until the mixture begins to thicken. Add the chopped dark chocolate, sugar, and cinnamon, and continue to stir until the chocolate is completely melted and the sauce is smooth.
- Serve: Pour the chocolate sauce into a serving bowl and serve alongside the warm churros for dipping.
Extra Tips:
When making churros, it’s important to maintain the oil temperature at 375°F (190°C) to ascertain they cook evenly without becoming greasy. If the oil is too cool, the churros will absorb more oil and become soggy. If it’s too hot, they may burn on the outside before cooking through.
Additionally, the chocolate sauce can be adjusted to taste by adding more sugar or cinnamon based on personal preference. Enjoy your churros con chocolate fresh for the best experience, as they’re at their crispiest when freshly fried.
Crema Catalana
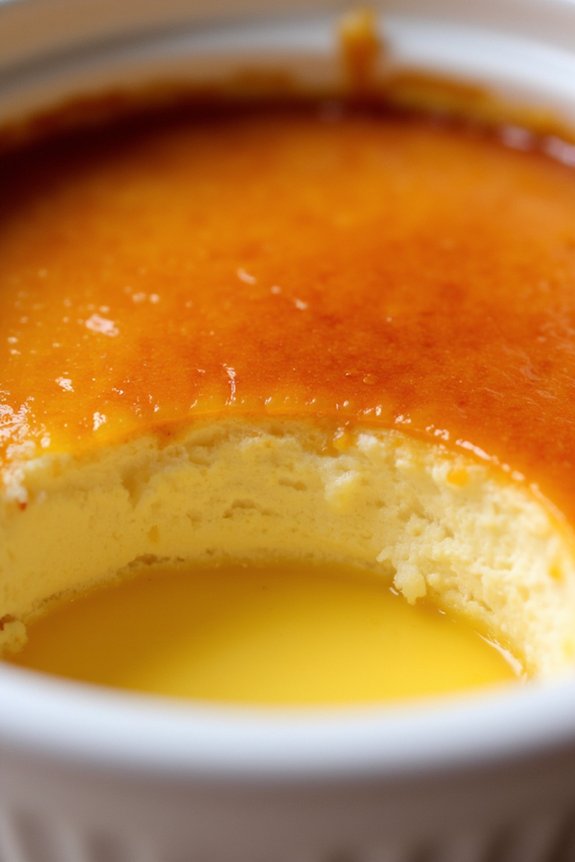
Despite its luxurious taste and presentation, Crema Catalana is relatively simple to make at home. The key is patience and attention to detail, guaranteeing the custard is perfectly smooth and the sugar topping is evenly caramelized. Traditionally, this dessert is prepared using a special iron to caramelize the sugar, but a kitchen torch works just as well. Serve this delightful treat in small ramekins to maintain its classic charm and enhance the dining experience.
Ingredients for 4-6 servings:
- 500 ml whole milk
- 1 cinnamon stick
- Zest of 1 lemon
- 5 egg yolks
- 125 g granulated sugar
- 20 g cornstarch
- 1/2 teaspoon vanilla extract
- Extra granulated sugar for caramelizing
Cooking Instructions:
- Infuse the Milk: In a medium saucepan, combine the whole milk, cinnamon stick, and lemon zest. Heat the mixture over medium heat until it just begins to simmer. Remove from heat, cover, and let it steep for about 10 minutes to infuse the flavors.
- Prepare the Egg Mixture: In a separate bowl, whisk together the egg yolks, sugar, and cornstarch until smooth and well combined. The mixture should be pale and slightly thick.
- Combine and Cook: Slowly strain the infused milk into the egg mixture, stirring constantly to prevent curdling. Once combined, return the mixture to the saucepan and cook over low heat. Stir continuously with a wooden spoon or spatula, making sure to scrape the bottom and sides of the pan to avoid sticking, until the custard thickens. This should take about 10 minutes.
- Flavor and Cool: Once thickened, remove from heat and stir in the vanilla extract. Pour the custard into individual ramekins. Allow it to cool to room temperature before transferring to the refrigerator. Chill for at least 2 hours or until fully set.
- Caramelize the Sugar: Just before serving, evenly sprinkle a layer of granulated sugar over the surface of each custard. Use a kitchen torch to carefully caramelize the sugar until it forms a crisp, golden-brown crust. Let the sugar harden for a minute before serving.
Extra Tips:
For the best results, verify that the milk isn’t too hot when combining it with the egg mixture to prevent curdling. If a kitchen torch is unavailable, you can briefly place the ramekins under a hot broiler, watching closely to prevent burning.
Additionally, Crema Catalana can be prepared a day in advance, allowing the flavors to develop further. Simply store the custards in the refrigerator and caramelize the sugar just before serving. Enjoy the delightful contrast between the creamy custard and the crunchy caramel topping!