

Have you ever strolled through the charming streets of Spain and felt the irresistible pull of a cozy bakery? The enticing aroma of freshly baked pastries is enough to make anyone stop in their tracks. From the sugary spiral of an *ensaimada* to the golden perfection of churros dipped in chocolate, each treat tells a story of Spanish heritage. These classic pastries can turn any moment into a delightful celebration of flavor and culture. Let’s explore these luxurious recipes and bring a taste of Spain into your kitchen.
Pastelitos De Carne
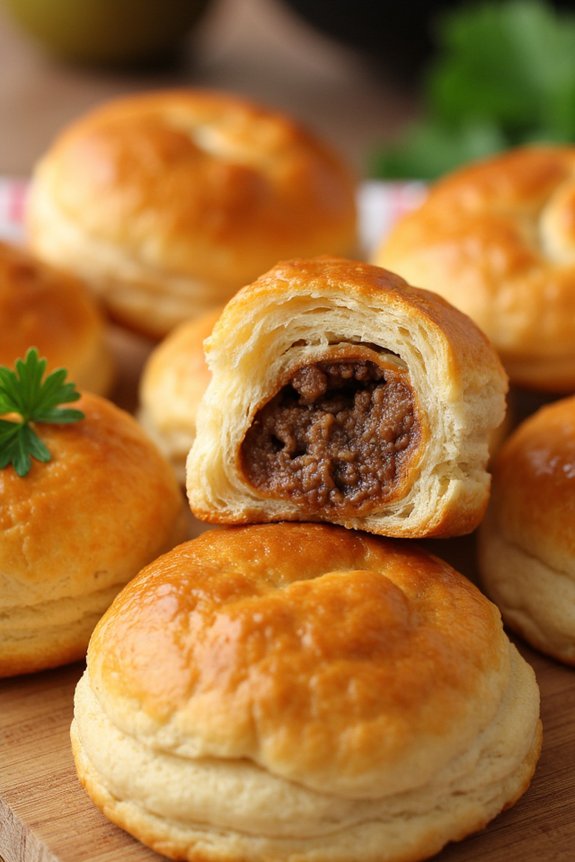
Pastelitos De Carne, or meat pastries, are a delightful Spanish pastry often enjoyed as a snack or appetizer. These savory pastries are filled with a delicious mixture of seasoned meat and spices, enveloped in a flaky, buttery crust. Perfect for gatherings or a cozy family dinner, Pastelitos De Carne offer a burst of flavor with every bite. The combination of tender, flavorful meat and the delicate pastry shell makes this dish a favorite among those who enjoy Spanish cuisine.
To make Pastelitos De Carne for 4-6 people, you’ll prepare a filling that typically includes ground beef or pork, along with a variety of spices and aromatics. The filling is then wrapped in pastry dough, which can be either homemade or store-bought, and baked until golden brown. This recipe is both simple and satisfying, offering an authentic taste of Spain that’s sure to impress your guests or family members.
Ingredients:
- 1 pound ground beef or pork
- 1 medium onion, finely chopped
- 2 cloves garlic, minced
- 1 red bell pepper, finely chopped
- 1 teaspoon paprika
- 1 teaspoon ground cumin
- 1/2 teaspoon salt
- 1/4 teaspoon black pepper
- 1/4 teaspoon cayenne pepper (optional for heat)
- 2 tablespoons tomato paste
- 1/4 cup beef broth
- 1 tablespoon olive oil
- 1 package puff pastry (enough for 12 pastries)
- 1 egg, beaten (for egg wash)
- Fresh parsley, chopped (for garnish)
Cooking Instructions:
- Prepare the filling: In a large skillet over medium heat, add olive oil and sauté the onion and red bell pepper until softened, about 5 minutes. Add the minced garlic and cook for an additional minute, until fragrant.
- Cook the meat: Add the ground beef or pork to the skillet, breaking it apart with a spoon. Cook until browned, approximately 8-10 minutes. Drain any excess fat from the skillet.
- Season the filling: Stir in the paprika, ground cumin, salt, black pepper, and cayenne pepper (if using). Add the tomato paste and beef broth, then mix well to combine. Reduce the heat to low and let the mixture simmer for another 5 minutes, allowing the flavors to meld. Remove from heat and let cool slightly.
- Preheat the oven: While the filling cools, preheat your oven to 400°F (200°C).
- Prepare the pastry: Roll out the puff pastry on a lightly floured surface. Cut the pastry into 4-inch squares.
- Assemble the pastelitos: Spoon about 1-2 tablespoons of the meat filling onto the center of each pastry square. Fold the pastry over the filling to create a triangle or rectangle, and press the edges with a fork to seal.
- Egg wash and bake: Place the assembled pastries on a baking sheet lined with parchment paper. Brush each pastry with the beaten egg to guarantee a golden, shiny finish. Bake in the preheated oven for 15-20 minutes or until the pastries are golden brown and puffed up.
- Garnish and serve: Allow the pastelitos to cool slightly before garnishing with fresh parsley. Serve warm and enjoy!
Extra Tips:
When making Pastelitos De Carne, it’s important to verify that the filling isn’t too wet, as this can make the pastries soggy. If the filling seems too liquid, cook it longer to reduce the moisture.
Additionally, using cold puff pastry helps achieve a flakier texture, so keep it chilled until you’re ready to assemble. For a touch of sweetness, consider adding a small amount of raisins to the filling for a unique flavor contrast.
Finally, these pastries can be prepared in advance and frozen; just bake them straight from the freezer, adding a few extra minutes to the baking time.
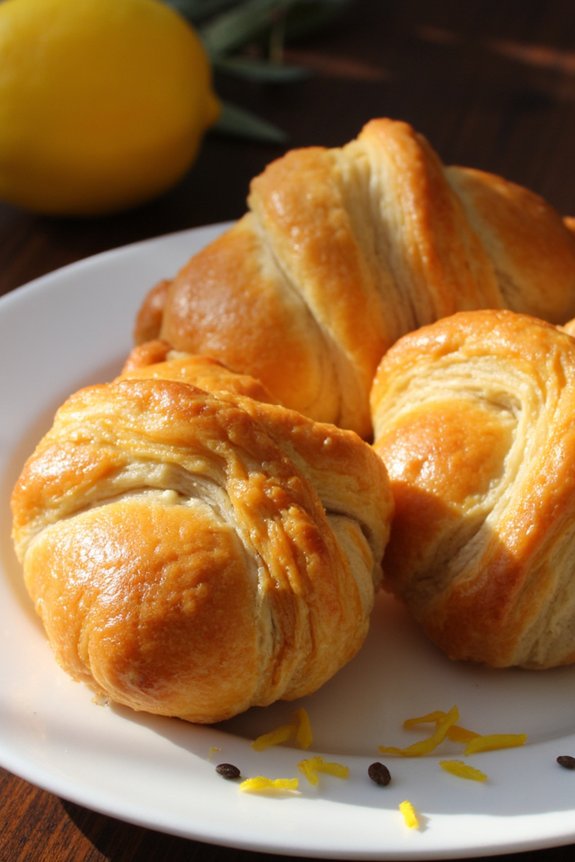
Ensaimada
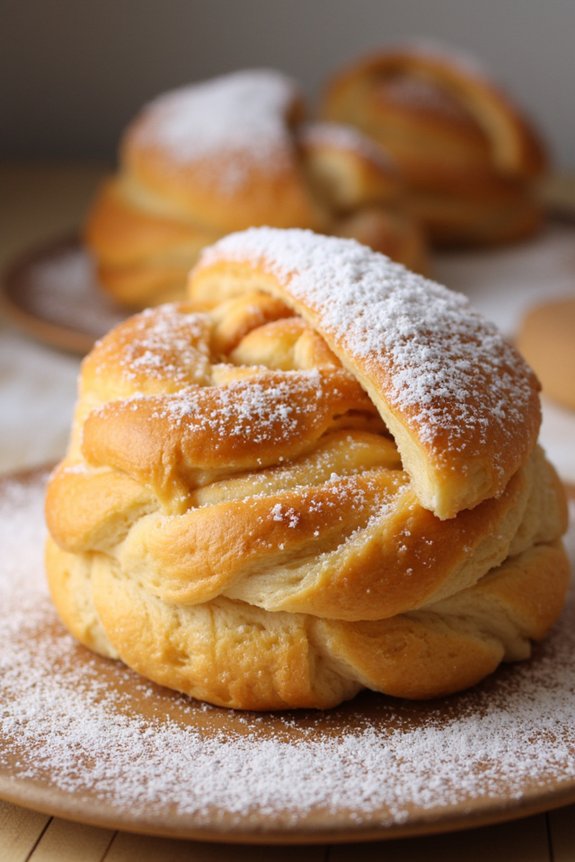
Ensaimada is a traditional Spanish pastry hailing from the Balearic Islands, particularly associated with Mallorca. This sweet, coiled bread is beloved for its light, fluffy texture and its slightly sweet, buttery flavor. Often dusted with powdered sugar, Ensaimadas can be enjoyed plain or filled with a variety of sweet or savory fillings such as cream, chocolate, or even sobrasada, a type of cured sausage. This recipe will guide you through making this delightful pastry from scratch, perfect for a special breakfast or a delightful afternoon treat.
The process of making Ensaimada is a labor of love, requiring time and patience to achieve the perfect texture and flavor. The dough is enriched with eggs and lard, giving it a rich, tender crumb. It’s essential to allow the dough ample time to rise, giving the yeast a chance to develop the characteristic lightness of the pastry. This recipe serves 4-6 people, providing enough delicious Ensaimadas to share with family or friends.
Ingredients (Serves 4-6):
- 500g all-purpose flour
- 150g sugar
- 2 large eggs
- 60ml warm water
- 60ml warm milk
- 15g fresh yeast (or 7g active dry yeast)
- 100g lard (or unsalted butter, softened)
- 1/2 teaspoon salt
- Powdered sugar for dusting
Cooking Instructions:
- Prepare the Yeast Mixture: In a small bowl, dissolve the yeast in warm water, adding a pinch of sugar to activate it. Let it sit for about 10 minutes until it becomes frothy.
- Make the Dough: In a large mixing bowl, combine the flour, sugar, and salt. Create a well in the center, adding in the eggs, warm milk, and the activated yeast mixture. Mix everything together until a dough begins to form.
- Knead the Dough: Transfer the dough to a lightly floured surface and knead for about 10 minutes until it’s smooth and elastic. If the dough is sticky, sprinkle a little more flour as needed.
- First Rise: Place the dough in a lightly greased bowl, cover it with a clean cloth, and let it rise in a warm place for 1-2 hours, or until it has doubled in size.
- Roll Out the Dough: Once risen, punch down the dough to release air. Divide it into 4-6 equal portions. Roll each portion thinly into a rectangle on a floured surface.
- Spread the Lard: Generously spread softened lard (or butter) over the surface of each rectangle. This will help create the flaky texture.
- Shape the Ensaimadas: Roll each rectangle tightly into a log, then coil the log into a spiral shape, tucking the end underneath. Place each coil on a baking tray lined with parchment paper.
- Second Rise: Cover the shaped Ensaimadas with a cloth and let them rise again for about 1 hour until they’re puffy.
- Bake the Ensaimadas: Preheat your oven to 180°C (350°F). Bake the Ensaimadas for 15-20 minutes or until they’re golden brown.
- Cool and Dust: Allow them to cool slightly on a wire rack before dusting generously with powdered sugar.
Extra Tips:
For a richer flavor, consider adding a teaspoon of vanilla extract or a pinch of cinnamon to the dough. You can also experiment with different fillings such as sweetened cream or chocolate spread before rolling the dough into logs.
Ensaimadas are best enjoyed fresh, but they can be stored in an airtight container for a day or two. If they lose their softness, a brief reheat in the oven will revive their delightful texture.
Churros Con Chocolate
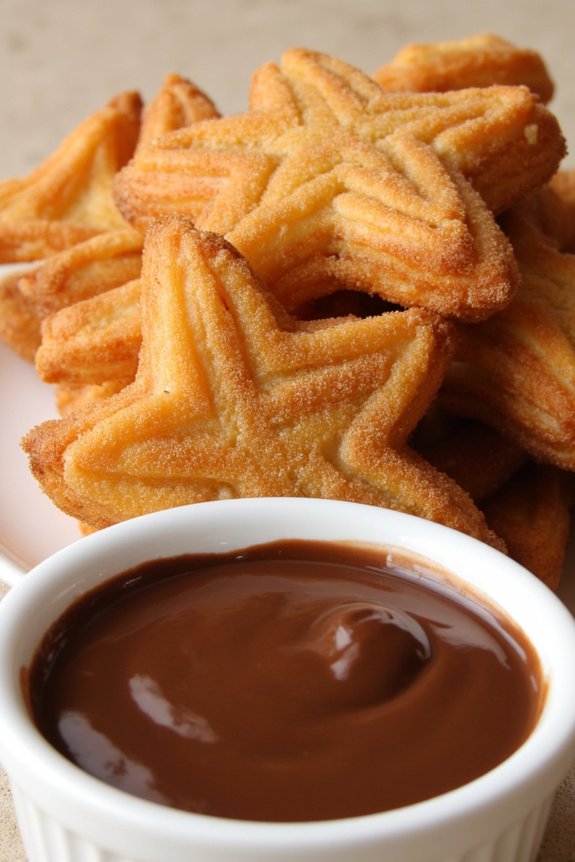
Churros Con Chocolate is a classic Spanish treat, perfect for breakfast or an indulgent snack. These delightful pastries are made by piping dough into hot oil to create crispy, golden-brown churros which are then typically coated in sugar. To complement their texture and sweetness, they’re served with a rich, velvety chocolate sauce for dipping.
Originating from Spain, churros have become a beloved delicacy around the world, known for their simplicity and irresistible flavor. This recipe will guide you through the process of making churros at home, as well as preparing a luscious chocolate sauce to accompany them. Designed to serve 4-6 people, the following instructions guarantee that you achieve the perfect balance of crispy churros and smooth chocolate.
Whether you’re hosting a brunch or looking to surprise your family with a special dessert, Churros Con Chocolate is sure to delight everyone at the table.
Ingredients:
For the churros:
- 1 cup water
- 2 1/2 tablespoons white sugar
- 1/2 teaspoon salt
- 2 tablespoons vegetable oil
- 1 cup all-purpose flour
- Oil for frying (about 1-2 cups, depending on the frying pan size)
- 1/2 cup white sugar, or to taste
- 1 teaspoon ground cinnamon
For the chocolate sauce:
- 1 cup heavy cream
- 8 ounces dark chocolate, chopped
- 1 tablespoon sugar
- 1/2 teaspoon vanilla extract
Instructions:
- Prepare the dough for the churros: In a medium saucepan over medium heat, combine the water, 2 1/2 tablespoons sugar, salt, and 2 tablespoons vegetable oil. Bring the mixture to a boil, then remove from heat and stir in the flour until the mixture forms a ball.
- Heat the oil for frying: In a deep skillet or frying pan, heat about 1-2 cups of oil to 375°F (190°C). The oil should be deep enough to allow the churros to float and fry evenly.
- Pipe the churros: Transfer the dough to a pastry bag fitted with a large star tip. Carefully pipe strips of dough directly into the hot oil, cutting with scissors to your desired length. Fry the churros until golden brown and crispy, about 2-3 minutes per side.
- Coat the churros in sugar and cinnamon: Remove the churros from the oil using a slotted spoon and drain on paper towels. In a shallow dish, mix 1/2 cup sugar with 1 teaspoon cinnamon. Roll the warm churros in the cinnamon sugar to coat.
- Prepare the chocolate sauce: In a small saucepan over medium heat, combine the heavy cream and sugar. Bring to a simmer, then remove from heat and add the chopped dark chocolate. Stir until the chocolate is melted and the mixture is smooth. Stir in the vanilla extract for added flavor.
- Serve: Arrange the churros on a platter and serve immediately with the warm chocolate sauce for dipping.
Extra Tips:
When making churros, it’s important to verify the oil is at the correct temperature; too hot and the churros will burn, too cool and they’ll absorb excess oil and become greasy. Use a thermometer for accuracy.
For the chocolate sauce, high-quality dark chocolate will yield the best results regarding richness and flavor. If you find the sauce too thick, you can thin it with a little more cream until you reach the desired consistency.
Enjoy your homemade Churros Con Chocolate while they’re fresh and warm for the best texture and taste.
Tarta De Santiago
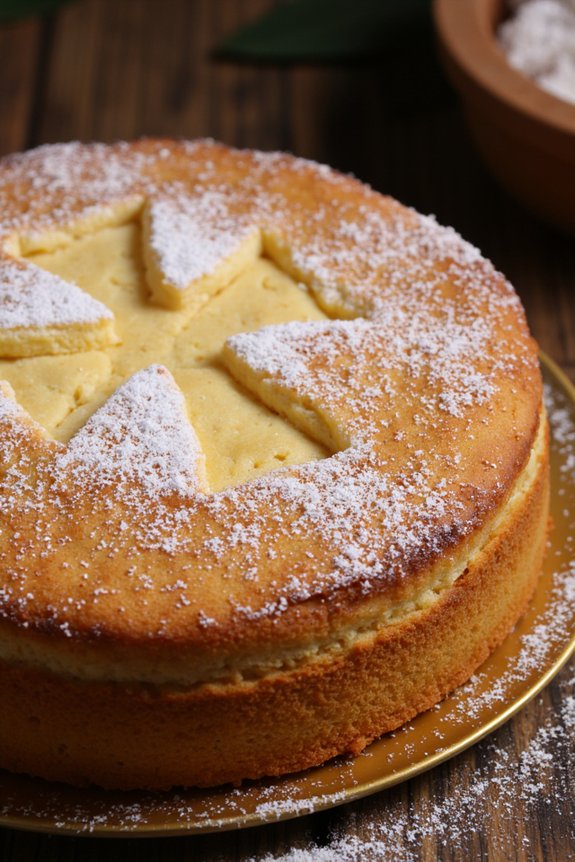
Tarta De Santiago is a traditional Spanish almond cake originating from the region of Galicia. Named after St. James, this delightful dessert is known for its simplicity and rich almond flavor. Typically adorned with the Cross of Saint James, Tarta De Santiago is a symbolic and delicious treat often enjoyed during religious festivals, but it can be savored at any time to bring a taste of Spain to your home.
With a crumbly texture and a sweet aroma, this pastry is perfect for those who appreciate the subtle yet distinct flavor of almonds. Making Tarta De Santiago at home is surprisingly straightforward and requires only a few basic ingredients. This recipe is meant for serving 4-6 people, making it ideal for small gatherings or family dinners.
Whether you’re an experienced baker or someone trying this for the first time, you’ll find the process enjoyable and rewarding. Follow these simple steps to create a classic Spanish delicacy that will impress your guests and leave them wanting more.
Ingredients:
- 250g ground almonds
- 250g sugar
- 5 large eggs
- Zest of 1 lemon
- 1/2 teaspoon ground cinnamon
- Powdered sugar for dusting
- Butter for greasing
- Flour for dusting the pan
Cooking Instructions:
- Preheat the oven: Begin by preheating your oven to 175°C (350°F). This guarantees that the oven is at the right temperature for baking the cake evenly.
- Prepare the cake pan: Grease a 9-inch round cake pan with butter and lightly dust it with flour. This prevents the cake from sticking to the pan, making it easier to remove once baked.
- Mix the dry ingredients: In a large mixing bowl, combine the ground almonds, sugar, lemon zest, and ground cinnamon. Stir them together until they’re well mixed, guaranteeing an even distribution of flavors.
- Add the eggs: In a separate bowl, lightly beat the eggs. Gradually add the beaten eggs to the dry ingredients, mixing gently with a spatula until you achieve a smooth batter with no lumps.
- Pour the batter into the pan: Carefully pour the prepared batter into the greased and floured cake pan, using a spatula to evenly spread it out.
- Bake the cake: Place the pan in the preheated oven and bake for 30-35 minutes, or until the top is golden and a toothpick inserted in the center comes out clean.
- Cool and decorate: Allow the cake to cool completely in the pan before removing it. Once cooled, dust the top generously with powdered sugar. For a traditional touch, use a stencil to create the Cross of Saint James design with the powdered sugar.
Extra Tips:
To guarantee the best flavor, use fresh, high-quality almonds and make sure to grind them finely. If you prefer a more pronounced lemon flavor, you can add a bit more lemon zest.
When decorating with powdered sugar, make sure the cake is completely cooled to avoid the sugar melting. If you want to make it more authentic, you can create a stencil of the Cross of Saint James using parchment paper.
Crema Catalana
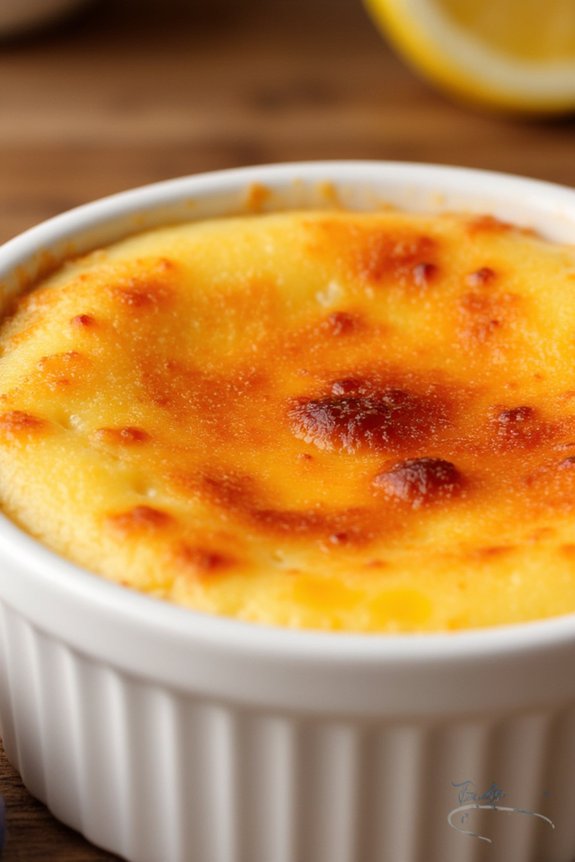
Crema Catalana is a classic Spanish dessert known for its rich and creamy texture with a deliciously caramelized sugar crust. Often compared to the French crème brûlée, Crema Catalana distinguishes itself with its unique flavor profile, typically enhanced with citrus zest and cinnamon. This dessert has its roots in the Catalonia region of Spain and has been a traditional treat enjoyed by many for centuries.
It’s a perfect finish to any meal, offering a delightful balance of sweet and creamy flavors with a hint of aromatic spices.
To create the perfect Crema Catalana, it’s crucial to start with high-quality ingredients. The dessert is made from a base of milk, eggs, and sugar, with the fragrant addition of lemon and orange zest, as well as a touch of cinnamon. The key to achieving the signature crunchy top is to sprinkle sugar over the set custard and then caramelize it with a kitchen torch or under a broiler.
This recipe will guide you through the process of making Crema Catalana for a serving size of 4-6 people, ensuring a satisfying end to your meal.
Ingredients for Crema Catalana (Serves 4-6):
- 4 cups whole milk
- 1 cinnamon stick
- Zest of 1 lemon
- Zest of 1 orange
- 8 large egg yolks
- 1 cup granulated sugar (divided)
- 3 tablespoons cornstarch
- Pinch of salt
Cooking Instructions:
- Infuse the Milk: In a medium saucepan, combine the whole milk, cinnamon stick, lemon zest, and orange zest. Place the saucepan over medium heat and bring the mixture to a gentle simmer, but don’t let it boil. Once it reaches a simmer, remove it from the heat and let it steep for about 15 minutes to allow the flavors to infuse.
- Prepare the Egg Mixture: In a large mixing bowl, whisk together the egg yolks, 3/4 cup of the granulated sugar, cornstarch, and a pinch of salt until the mixture is smooth and pale.
- Combine and Cook the Custard: Gradually strain the infused milk into the egg yolk mixture, whisking constantly to prevent the eggs from curdling. Once fully combined, pour the mixture back into the saucepan.
- Thicken the Custard: Place the saucepan over medium-low heat and cook the mixture, stirring constantly with a wooden spoon or heat-resistant spatula, until it thickens and coats the back of the spoon. This should take about 10-12 minutes. Be careful not to let the mixture boil.
- Chill the Custard: Remove the thickened custard from the heat and discard the cinnamon stick. Pour the custard into individual ramekins or a large serving dish. Allow it to cool to room temperature, then cover with plastic wrap and refrigerate for at least 2 hours, or until fully set.
- Caramelize the Sugar: Just before serving, sprinkle the remaining 1/4 cup of granulated sugar evenly over the top of the chilled custard. Use a kitchen torch to caramelize the sugar until it forms a hard, golden crust. Alternatively, place the ramekins under a preheated broiler for a few minutes, watching carefully to avoid burning.
Extra Tips:
For the best flavor, consider making the custard a day ahead to allow the flavors to develop fully. If you don’t have a kitchen torch, the broiler method works well, but be sure to keep a close eye on it to prevent the sugar from burning.
When zesting citrus fruits, avoid the white pith as it can impart a bitter taste. Finally, if you prefer a smoother texture, you can strain the custard through a fine-mesh sieve before pouring it into the ramekins.
Buñuelos
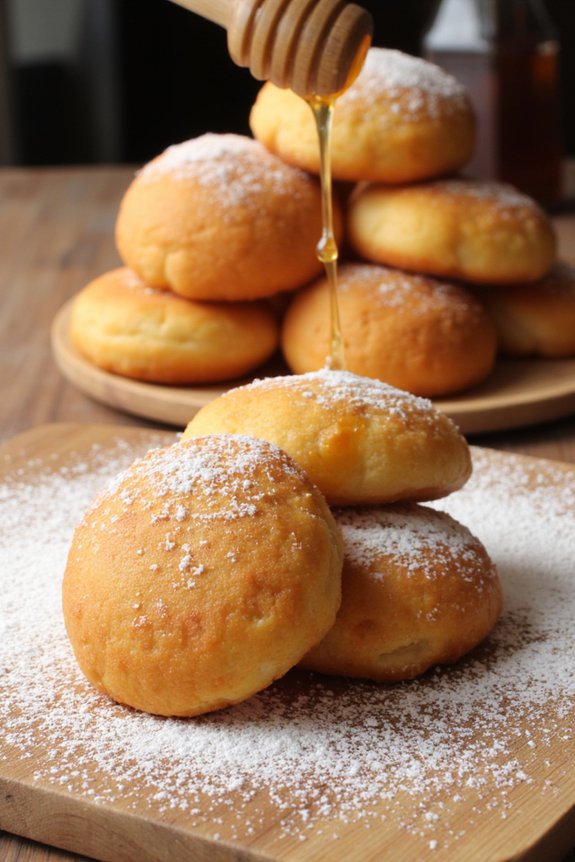
Buñuelos are a delightful Spanish pastry, typically enjoyed during festive occasions such as Christmas, Easter, and other celebrations. These light, crispy fritters are deep-fried to golden perfection and are often dusted with sugar or drizzled with honey, making them an irresistible treat.
Whether you enjoy them as a dessert or a sweet snack, Buñuelos bring a touch of Spanish tradition and flavor to your table. Originating from Spain, Buñuelos have spread to various cultures, each adding its own twist to the recipe. The Spanish version is known for its simplicity and delightful taste, making it a favorite among pastry lovers.
This recipe will guide you through creating a batch of these delicious pastries, perfect for serving 4-6 people, guaranteeing you have the perfect amount to share with family and friends or to enjoy all by yourself.
Ingredients for 4-6 servings:
- 2 cups all-purpose flour
- 1 tablespoon baking powder
- 1/4 teaspoon salt
- 3 tablespoons sugar
- 1/2 cup milk
- 2 large eggs
- 2 tablespoons butter, melted
- 1 teaspoon vanilla extract
- Vegetable oil, for frying
- Powdered sugar or honey, for topping
Cooking Instructions:
- Prepare the Dough: In a large mixing bowl, combine the all-purpose flour, baking powder, salt, and sugar. Mix well to guarantee the dry ingredients are evenly distributed.
- Mix Wet Ingredients: In a separate bowl, whisk together the milk, eggs, melted butter, and vanilla extract until smooth. Make sure the butter isn’t too hot to avoid cooking the eggs.
- Combine Ingredients: Gradually add the wet ingredients to the dry ingredients, stirring continuously until a smooth dough forms. The dough should be slightly sticky but easy to handle.
- Rest the Dough: Cover the bowl with a clean kitchen towel and let the dough rest for about 15-20 minutes. This allows the gluten in the flour to relax, making the dough easier to work with.
- Heat the Oil: In a large, deep skillet or pot, pour enough vegetable oil to fill about 2 inches deep. Heat the oil over medium-high heat to approximately 350°F (175°C).
- Shape the Buñuelos: Once the oil is hot, take small portions of the dough (about the size of a walnut) and roll them into balls. Flatten each ball slightly with your hands.
- Fry the Buñuelos: Carefully place the flattened dough pieces into the hot oil, working in batches to avoid overcrowding. Fry them until they’re golden brown on both sides, about 2-3 minutes per side.
- Drain and Cool: Use a slotted spoon to remove the buñuelos from the oil and place them on a plate lined with paper towels to drain any excess oil.
- Add the Toppings: While still warm, dust the buñuelos with powdered sugar or drizzle them with honey for added sweetness.
Extra Tips:
When making Buñuelos, it’s important to maintain a consistent oil temperature to guarantee even cooking. If the oil is too hot, the buñuelos may brown too quickly on the outside while remaining uncooked inside. Conversely, if the oil is too cool, the dough will absorb more oil, resulting in greasy fritters.
Consider using a thermometer to monitor the oil temperature closely. Additionally, you can get creative with toppings; try cinnamon sugar or a chocolate drizzle for a delicious variation. Enjoy your freshly made Buñuelos with a cup of hot chocolate or coffee for a truly authentic Spanish experience.
Rosquillas
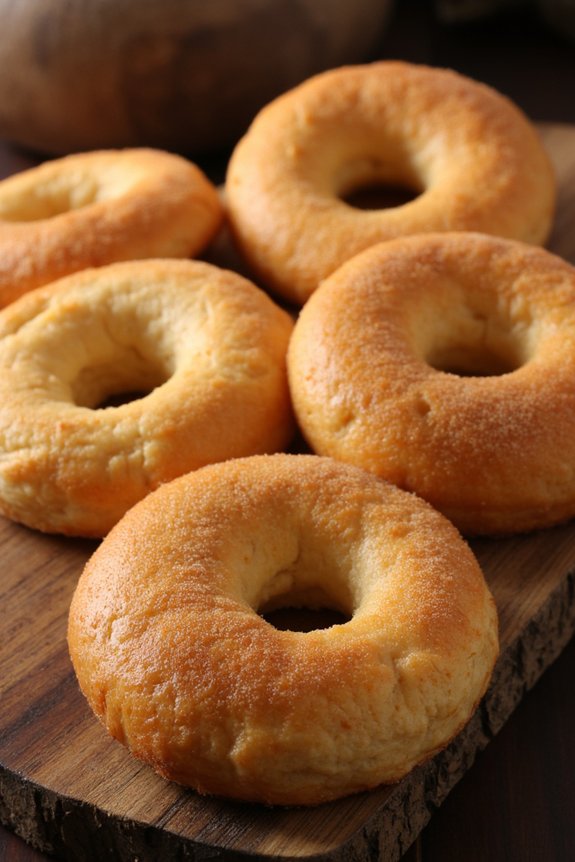
Rosquillas are a traditional Spanish pastry that has been enjoyed for generations. These delightful doughnuts are known for their slightly crunchy exterior and soft, fluffy interior. They’re often flavored with anise or lemon zest, giving them a unique and aromatic taste.
Rosquillas are perfect for breakfast or as a sweet treat with coffee or tea. While they’re commonly found at Spanish festivals and celebrations, with this recipe, you can easily make them at home to savor their authentic flavor.
This recipe serves 4-6 people and will guide you through creating these delicious treats from scratch. The process involves mixing a simple dough, shaping it into rings, frying until golden brown, and then optionally dusting with sugar. The result is a batch of irresistible rosquillas that will transport your taste buds straight to Spain.
Ingredients:
- 3 cups all-purpose flour
- 1/2 cup granulated sugar
- 1 teaspoon baking powder
- 1/2 teaspoon salt
- 2 large eggs
- 1/2 cup milk
- 1/4 cup olive oil
- 1 tablespoon anise liqueur (optional)
- Zest of 1 lemon
- Vegetable oil for frying
- Powdered sugar for dusting (optional)
Instructions:
- Prepare the Dry Ingredients: In a large mixing bowl, whisk together the flour, sugar, baking powder, and salt. This guarantees that all the dry ingredients are well incorporated and evenly distributed.
- Mix the Wet Ingredients: In a separate bowl, beat the eggs and then add the milk, olive oil, anise liqueur (if using), and lemon zest. Whisk until the mixture is smooth and the ingredients are well combined.
- Form the Dough: Gradually add the wet ingredients to the dry ingredients, stirring continuously until a dough forms. The dough should be soft and slightly sticky. If it’s too dry, add a little more milk; if it’s too wet, add a bit more flour.
- Shape the Rosquillas: On a lightly floured surface, roll small portions of dough into balls (about the size of a golf ball). Flatten each ball slightly and poke a hole in the center with your finger, stretching gently to form a ring.
- Heat the Oil: In a deep frying pan or pot, heat the vegetable oil over medium heat until it reaches about 350°F (175°C). It’s important to maintain this temperature to ascertain the rosquillas cook evenly.
- Fry the Rosquillas: Carefully place a few rosquillas into the hot oil, ensuring not to overcrowd the pan. Fry for about 2-3 minutes on each side, or until they’re golden brown. Use a slotted spoon to remove them from the oil and place them on paper towels to drain excess oil.
- Serve: Once all rosquillas are fried and slightly cooled, dust with powdered sugar if desired. Serve warm or at room temperature.
Extra Tips:
When making rosquillas, be sure to monitor the oil temperature closely. If the oil is too hot, the exterior will brown too quickly, leaving the inside undercooked. Conversely, if the oil isn’t hot enough, the rosquillas will absorb too much oil and become greasy.
Additionally, feel free to experiment with flavors by adding spices like cinnamon or substituting the anise liqueur with vanilla extract for a different taste profile. Enjoy these delightful pastries fresh for the best texture and flavor.
Tarta De Queso
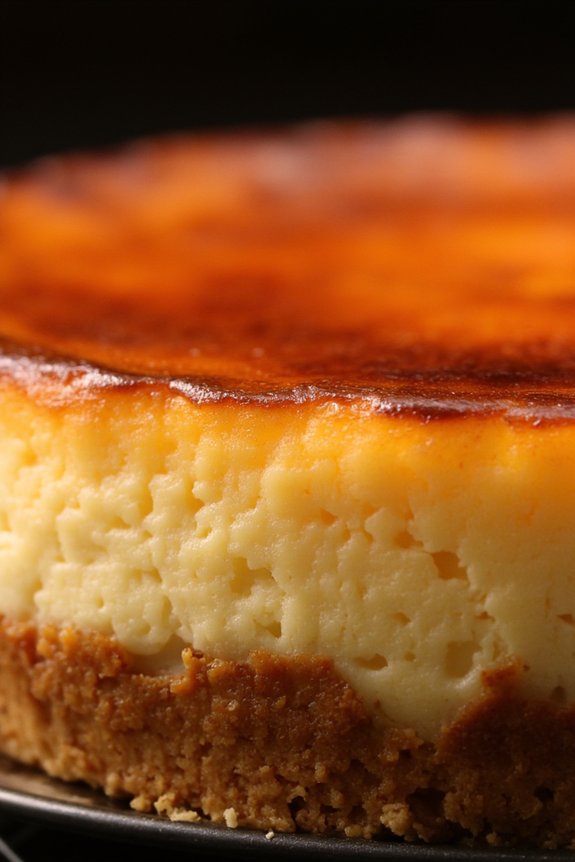
The beauty of Tarta De Queso lies in its ability to be prepared with minimal fuss, yet deliver maximum flavor. The use of cream cheese, eggs, sugar, and cream creates a dense yet fluffy texture that melts in your mouth.
It’s traditionally baked at a high temperature, which not only gives it its characteristic burnt top but also guarantees the inside remains creamy. This cheesecake is perfect for those who appreciate a dessert that doesn’t rely on a crust, allowing the cheese mixture to be the star of the show.
Here’s how you can make this delightful treat for 4-6 people.
Ingredients:
- 500g cream cheese
- 200g granulated sugar
- 4 large eggs
- 250ml heavy cream
- 1 tablespoon all-purpose flour
- 1 teaspoon vanilla extract
Cooking Instructions:
- Prepare the Oven and Pan: Preheat your oven to 200°C (390°F). Line a 9-inch (23 cm) springform pan with parchment paper, making sure the paper rises above the edges of the pan to contain the batter.
- Mix the Cream Cheese and Sugar: In a large mixing bowl, beat the cream cheese and sugar together until smooth and creamy. This should take about 3-4 minutes with an electric mixer on medium speed.
- Add the Eggs: Add the eggs one at a time, beating well after each addition. This guarantees the eggs are fully incorporated and the mixture remains smooth.
- Incorporate the Cream and Vanilla: Pour in the heavy cream and vanilla extract, and mix until fully combined. The batter should be smooth and slightly thick.
- Mix in the Flour: Sift the flour over the batter and gently fold it in using a spatula. This will help stabilize the batter while baking.
- Bake the Cheesecake: Pour the batter into the prepared springform pan and smooth the top with a spatula. Place in the preheated oven and bake for 40-45 minutes, or until the top is deeply golden brown and slightly burnt.
- Cool and Serve: Once baked, remove the cheesecake from the oven and allow it to cool in the pan for about an hour at room temperature. Transfer to the refrigerator to chill for at least 4 hours before serving.
Extra Tips:
For the best results, use high-quality cream cheese and make sure all ingredients are at room temperature before mixing. This will help achieve a smooth batter and even texture.
If you prefer a less burnt top, you can reduce the baking time slightly, but be aware that the center should still jiggle a bit when you remove it from the oven.
Tarta De Queso is traditionally served plain, but you can garnish it with fresh berries or a drizzle of honey for added flavor. Enjoy experimenting with this versatile recipe!
Torrijas
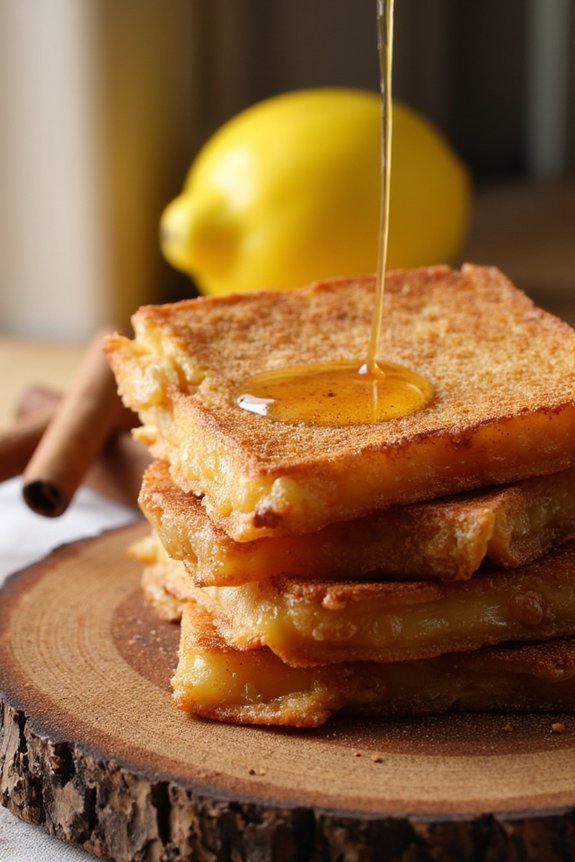
Torrijas are a traditional Spanish dessert that’s often enjoyed during Lent and Easter. This delectable treat is similar to French toast but with a unique twist, making it a beloved staple in Spanish kitchens. Torrijas are typically prepared by soaking slices of stale bread in a mixture of milk, sugar, and spices, then fried until golden brown and finally sprinkled with cinnamon sugar or drenched in honey. The result is a sweet, fragrant, and slightly crispy dessert that can be enjoyed either warm or cold.
Historically, torrijas were a way to use up stale bread, but they’ve since become a cherished dessert that’s often associated with family gatherings and celebrations. The simplicity of the recipe allows for variations, with some regions adding wine or citrus zest to the soaking mixture, while others prefer a more straightforward approach. No matter the variation, the essence of torrijas remains the same: a comforting and delicious way to enjoy a taste of Spanish tradition.
Ingredients for 4-6 servings:
- 1 loaf of stale bread (preferably a baguette or similar)
- 2 cups of whole milk
- 1 cup of sugar
- 1 cinnamon stick
- Peel of 1 lemon (avoid the white pith for less bitterness)
- 4 eggs
- Vegetable oil for frying
- Ground cinnamon for dusting
- Honey or additional sugar for topping
Cooking Instructions:
- Prepare the Bread: Slice the stale bread into thick slices, about 1 inch each. Stale bread is preferred as it absorbs the liquid mixture better without falling apart.
- Infuse the Milk: In a saucepan, combine the milk, half of the sugar, cinnamon stick, and lemon peel. Heat gently over medium heat until the mixture just begins to simmer. Remove from heat and let it steep for 10 minutes to allow the flavors to meld.
- Soak the Bread: Pour the milk mixture into a shallow dish, removing the cinnamon stick and lemon peel. Dip each slice of bread into the milk, ensuring both sides are well-soaked but not falling apart. Allow them to soak for a few minutes to fully absorb the flavors.
- Prepare the Egg Mixture: In another dish, beat the eggs. Carefully dip each milk-soaked bread slice into the beaten eggs, coating both sides.
- Fry the Torrijas: In a large frying pan, heat a generous amount of vegetable oil over medium-high heat. Once the oil is hot, carefully place the egg-coated bread slices into the pan. Fry until golden brown on each side, about 2-3 minutes per side. Work in batches if necessary to avoid overcrowding the pan.
- Drain and Serve: Remove the torrijas from the pan and drain on paper towels to remove excess oil. While still warm, sprinkle with ground cinnamon and the remaining sugar or drizzle with honey.
Extra Tips:
To achieve the best consistency, use day-old or stale bread as fresh bread can become too soggy. If you prefer a more decadent version, substitute half of the milk with cream for a richer taste. Additionally, if you want to add an extra layer of flavor, consider infusing the milk with a splash of vanilla extract or a pinch of nutmeg.
Torrijas can be served warm as a comforting dessert or allowed to cool and enjoyed chilled for a revitalizing treat.
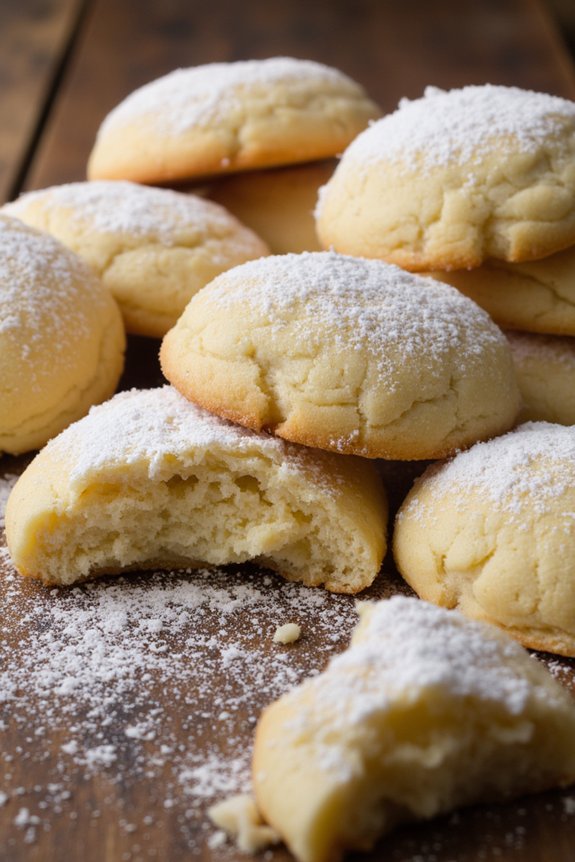
Polvorones

Polvorones, also known as Spanish almond cookies, are a traditional and beloved treat typically enjoyed during the festive season in Spain. These crumbly shortbread cookies are characterized by their rich, nutty flavor and melt-in-your-mouth texture, which is achieved by incorporating ground almonds into the dough.
Polvorones are often dusted with powdered sugar, giving them a delightful sweetness that balances the nuttiness perfectly. They’re a staple at many holiday gatherings and are loved by both children and adults alike.
Creating polvorones at home is a rewarding endeavor that fills your kitchen with the warm, inviting aroma of toasted almonds and butter. The process is straightforward, although it does require some patience as the dough needs to rest to achieve the perfect texture.
This traditional recipe will guide you through the steps to create authentic polvorones, guaranteeing you have a delightful batch to share with family and friends. The following ingredients will yield approximately 4-6 servings of these delicious Spanish cookies.
Ingredients:
- 2 cups all-purpose flour
- 1 cup ground almonds
- 1 cup unsalted butter, at room temperature
- 1 cup powdered sugar (plus extra for dusting)
- 1 teaspoon vanilla extract
- 1/2 teaspoon ground cinnamon
- 1/4 teaspoon salt
Cooking Instructions:
- Prepare the Almonds: Begin by preheating your oven to 350°F (175°C). Spread the ground almonds evenly on a baking sheet and toast them in the oven for about 5-7 minutes, or until they’re golden brown and fragrant. Allow them to cool completely before using.
- Mix the Dry Ingredients: In a medium-sized bowl, combine the toasted ground almonds, all-purpose flour, cinnamon, and salt. Whisk these ingredients together until they’re evenly distributed.
- Cream the Butter and Sugar: In a large mixing bowl, beat the unsalted butter and 1 cup of powdered sugar together using an electric mixer on medium speed until the mixture is light and fluffy, about 3-5 minutes. Add the vanilla extract and mix until incorporated.
- Combine Wet and Dry Mixtures: Gradually add the dry ingredients to the creamed butter mixture, mixing on low speed until just combined. Be careful not to overmix, as this can toughen the cookies.
- Chill the Dough: Divide the dough into two equal portions and shape each into a disk. Wrap them in plastic wrap and refrigerate for at least 2 hours, or overnight, to allow the dough to firm up.
- Shape and Bake the Cookies: Preheat your oven to 350°F (175°C) again. Line a baking sheet with parchment paper. Remove one dough disk from the refrigerator and roll it out on a lightly floured surface to about 1/2 inch thickness. Use a round cookie cutter to cut out cookies and place them on the prepared baking sheet. Repeat with the remaining dough. Bake the cookies for 12-15 minutes, or until the edges are lightly golden.
- Cool and Dust: Allow the cookies to cool on the baking sheet for about 5 minutes before transferring them to a wire rack to cool completely. Once cooled, generously dust the tops with additional powdered sugar.
Extra Tips:
To guarantee your polvorones have the best flavor and texture, it’s important to let the dough rest in the refrigerator for the full recommended time. This resting period allows the butter to firm up, making the dough easier to handle and the cookies less likely to spread during baking.
Additionally, toasting the almonds before incorporating them into the dough enhances their flavor, giving your cookies a more robust almond taste. If you don’t have a round cookie cutter, feel free to shape the dough into small balls and flatten them slightly before baking for a rustic look.
Enjoy your homemade polvorones with a hot cup of coffee or tea for a delightful Spanish treat!
Huesos De Santo
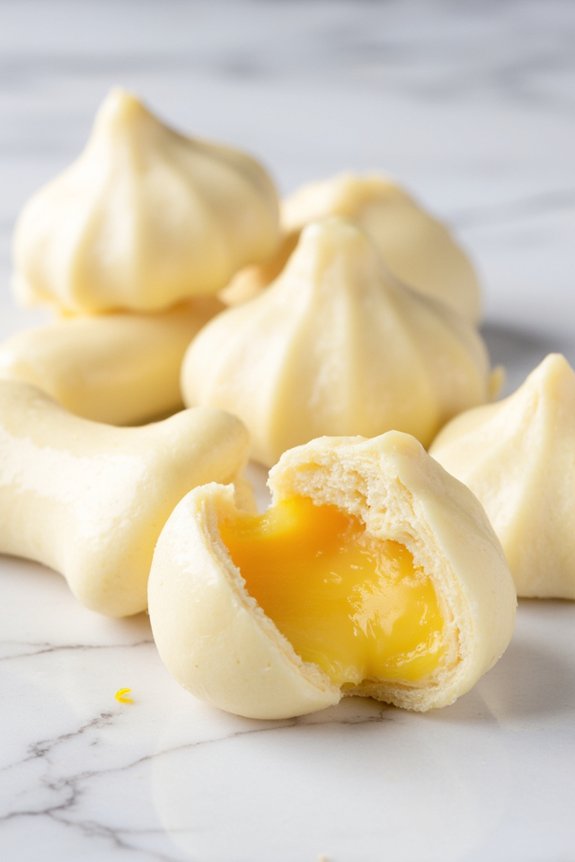
Huesos de Santo, or “Saint’s Bones,” is a traditional Spanish pastry typically made during All Saints’ Day. These sweet treats are named after their resemblance to bones and are filled with a deliciously sweet marzipan paste. The outer layer is made of a soft, sugary dough that’s rolled and filled with an egg yolk mixture, creating a rich, unique flavor that’s irresistible.
Huesos de Santo aren’t only a delight to eat but also a joy to prepare, as they allow bakers to engage in a creative and cultural experience. To prepare Huesos de Santo, you’ll need to dedicate some time to mastering the technique of rolling and filling the dough. It’s a rewarding process that results in a batch of pastries that can be enjoyed with family and friends.
The recipe can be adjusted to fit your taste preferences, whether you prefer a more intense almond flavor or a slightly sweeter filling. This recipe will guide you through creating Huesos de Santo for 4-6 people, guaranteeing you have enough to share.
Ingredients:
- 250g ground almonds
- 250g powdered sugar
- 100ml water
- 4 egg yolks
- 100g granulated sugar
- Zest of 1 lemon
- A drop of almond extract
- A pinch of salt
Cooking Instructions:
1. Prepare the Marzipan Dough:
In a medium-sized saucepan, combine the powdered sugar and water. Heat over low heat, stirring until the sugar has completely dissolved. Gradually add the ground almonds, stirring continuously to form a smooth dough.
Add a drop of almond extract and a pinch of salt, then remove from heat and let the dough cool.
2. Make the Egg Yolk Filling:
In another saucepan, mix the granulated sugar with the zest of one lemon and a small amount of water to create a syrup. In a separate bowl, beat the egg yolks lightly.
Slowly add the syrup to the egg yolks, stirring constantly to prevent curdling. Return the mixture to low heat, stirring until it thickens into a custard-like consistency. Allow it to cool completely.
3. Shape the Huesos:
Once the marzipan dough has cooled, roll it out into a thin layer on a sugar-dusted surface. Cut the dough into small rectangles, typically about 5×10 cm each.
Place a small amount of the egg yolk filling on one end of each rectangle.
4. Roll and Assemble:
Roll the rectangles into tubes, encasing the filling inside. Confirm the edges are sealed well to prevent the filling from leaking out.
Repeat this process until all the dough and filling are used.
5. Final Touches:
Arrange the completed Huesos de Santo on a tray and allow them to set for a few hours before serving. This allows the flavors to meld together beautifully.
Extra Tips:
When making the marzipan dough, it’s essential to make certain that the mixture remains smooth and free of lumps. If the dough becomes too sticky, lightly dust your hands with powdered sugar to handle it more easily.
Additionally, when working with the egg yolk filling, constant stirring is necessary to avoid curdling. If you find the filling is too runny, a brief stint in the refrigerator can help it firm up before you begin assembling the pastries.
Enjoy the process, as the creation of these traditional Spanish treats is as satisfying as their delightful taste.
Empanadillas Dulces
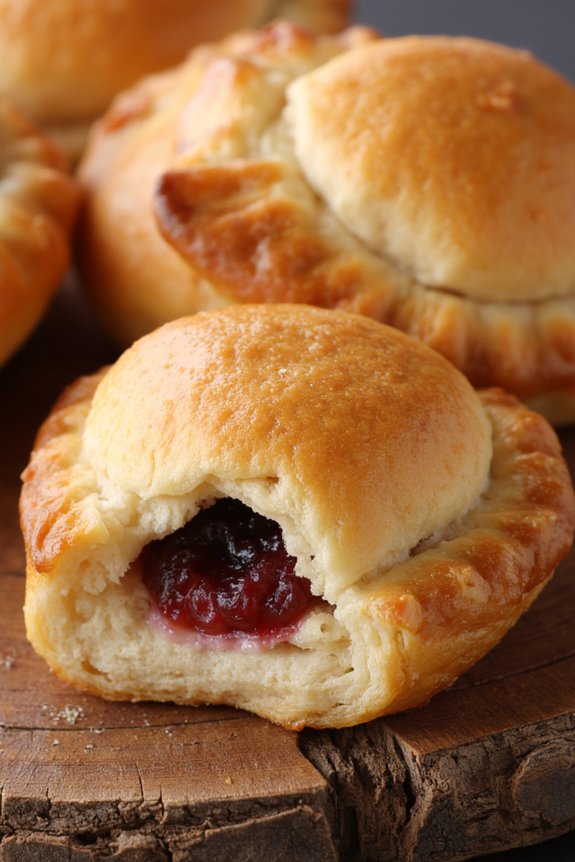
Empanadillas dulces are a delightful Spanish pastry that can be enjoyed as a sweet treat at any time of the day. These small pastries are typically filled with fruit preserves or sweetened cheese, enveloped in a flaky dough, and lightly fried or baked to perfection.
Originating from Spain, empanadillas have become a popular treat worldwide, loved for their versatility and delicious flavor combinations. They’re often served during celebrations and family gatherings, making them a cherished addition to any dessert spread.
To make empanadillas dulces, you’ll need to prepare a tender dough and a flavorful filling. The dough is usually made with simple ingredients like flour, butter, and water, while the filling can vary based on personal preferences. Common fillings include apple cinnamon, sweetened ricotta, or even pumpkin spice.
Once the empanadillas are filled and sealed, they can be either baked until golden brown or fried for a crispier texture. Here’s a recipe to make empanadillas dulces for 4-6 people.
Ingredients:
- 2 cups all-purpose flour
- 1/2 teaspoon salt
- 1/2 cup unsalted butter, chilled and diced
- 1/4 cup cold water
- 1 egg, beaten (for egg wash)
- 1 cup fruit preserves (such as apricot or raspberry)
- 1 tablespoon sugar (optional for dusting)
- Vegetable oil (if frying)
Instructions:
1. Prepare the dough: In a large bowl, combine the flour and salt. Add the diced butter and use a pastry cutter or your fingers to blend until the mixture resembles coarse crumbs. Gradually add the cold water, mixing until the dough comes together.
Form the dough into a ball, wrap it in plastic wrap, and refrigerate for at least 30 minutes.
2. Roll out the dough: On a lightly floured surface, roll out the dough to about 1/8 inch thickness. Use a round cutter (about 4 inches in diameter) to cut out circles from the dough.
3. Fill the empanadillas: Place a teaspoon of fruit preserves in the center of each dough circle. Be careful not to overfill. Fold the dough over the filling to create a half-moon shape and press the edges together to seal.
Use a fork to crimp the edges for a decorative touch.
4. Apply the egg wash: Brush the tops of the empanadillas with the beaten egg to give them a golden finish when baked.
5. Cook the empanadillas: If baking, preheat the oven to 375°F (190°C). Place the empanadillas on a baking sheet lined with parchment paper and bake for 15-20 minutes or until golden brown.
If frying, heat vegetable oil in a deep pan over medium heat and fry the empanadillas in batches for about 3-4 minutes on each side until golden and crispy. Drain on paper towels.
6. Finish and serve: Optionally dust the empanadillas with sugar before serving. Enjoy them warm or at room temperature.
Extra Tips:
To guarantee the dough is easy to work with, keep it chilled and handle it as little as possible to maintain its flakiness. If you prefer a healthier version, baking is a great alternative to frying, yielding a lighter texture.
Feel free to experiment with different fillings such as chocolate, nuts, or even savory options if you wish to try a different twist on this classic sweet pastry.
Leche Frita
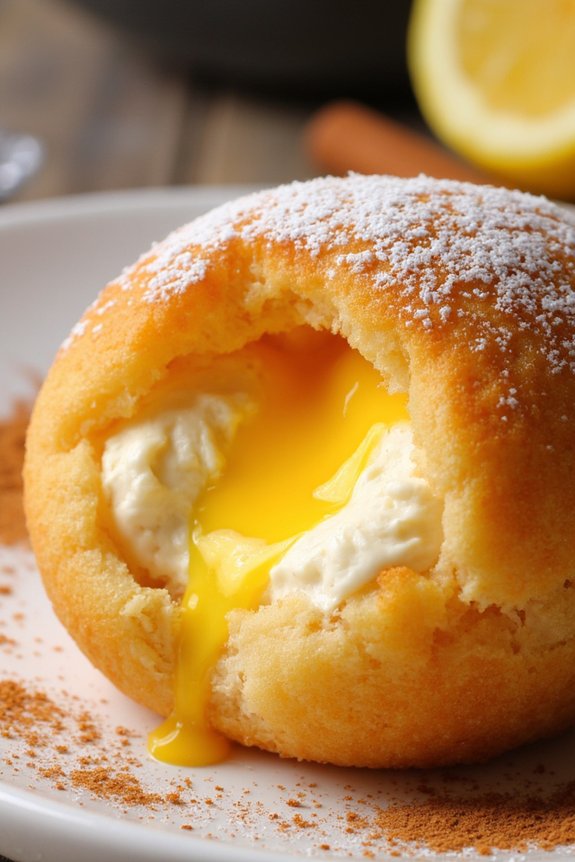
Leche Frita, which translates to “fried milk,” is a delightful Spanish dessert that has been enchanting taste buds for generations. Originating from the northern regions of Spain, this dessert is a perfect combination of creamy, crispy, and sweet. The dessert is made by creating a thick, sweetened milk pudding, which is then cut into squares, coated in breadcrumbs, and fried to golden perfection. The crispy exterior contrasts beautifully with the soft, creamy interior, making it a favorite treat for many.
Traditionally, Leche Frita is flavored with hints of lemon and cinnamon, giving it a fragrant aroma and a slightly spiced taste that complements its sweetness. It’s perfect for those who love rich and indulgent desserts, and it’s often served with a light dusting of powdered sugar or a drizzle of honey. This recipe will guide you through making this comforting dessert for 4-6 people, guaranteeing everyone can enjoy a taste of Spain in their own home.
Ingredients:
- 4 cups whole milk
- 1 cup granulated sugar
- 1 lemon peel (without the white pith)
- 1 cinnamon stick
- 1 cup cornstarch
- 1 cup all-purpose flour
- 2 large eggs
- 1 cup breadcrumbs
- Vegetable oil for frying
- Powdered sugar for dusting
- Ground cinnamon for dusting (optional)
Instructions:
- Infuse the Milk: In a medium saucepan, combine the milk, sugar, lemon peel, and cinnamon stick. Heat the mixture over medium heat until it just starts to simmer. Remove from heat and let it sit for 15 minutes to allow the flavors to infuse.
- Prepare the Pudding Base: Strain the milk to remove the lemon peel and cinnamon stick. Return the milk to the saucepan. In a small bowl, mix the cornstarch with a little cold milk to form a smooth paste. Slowly whisk the cornstarch mixture into the saucepan with the milk.
- Cook the Pudding: Place the saucepan back on medium heat and cook, stirring constantly, until the mixture thickens and becomes smooth and glossy. This should take about 8-10 minutes. Pour the thickened mixture into a greased square or rectangular dish and smooth the top. Let it cool to room temperature, then refrigerate for at least 2 hours or until firm.
- Prepare for Frying: Once the pudding is firm, cut it into squares or rectangles. Set up a breading station with three shallow dishes: one with flour, one with beaten eggs, and one with breadcrumbs.
- Bread the Pudding Squares: Dredge each pudding square first in flour, then dip in beaten eggs, and finally coat with breadcrumbs. Make sure each piece is well coated.
- Fry the Squares: In a deep frying pan or pot, heat vegetable oil over medium-high heat. Fry the coated squares in batches, turning occasionally, until golden brown on all sides. This should take about 2-3 minutes per side.
- Drain and Serve: Remove the squares from the oil and drain on paper towels. Dust with powdered sugar and a sprinkle of ground cinnamon if desired. Serve warm.
Extra Tips:
For best results, verify the pudding mixture is thick and fully cooled before cutting into squares. If the mixture is too soft, it will be difficult to handle during breading and frying.
Additionally, maintaining the oil at the right temperature is essential; too hot and the outside will burn before the inside warms, too cool and the dessert will be greasy.
Consider using a kitchen thermometer to keep the oil between 350°F to 375°F for ideal frying. Enjoying Leche Frita warm enhances its creamy texture, so plan to serve it shortly after frying.
Mantecados
Mantecados are a traditional Spanish pastry that’s especially popular during the holiday season. These shortbread-like treats are known for their crumbly texture and rich flavor, typically enhanced with a hint of cinnamon or lemon zest. Originating from the region of Andalusia, mantecados have become a staple in Spanish households, often served with a warm cup of coffee or tea.
The name “mantecados” comes from “manteca,” which means lard in Spanish, as lard is traditionally used to achieve their characteristic softness and flavor.
Baking mantecados at home allows you to infuse your own touch into these delightful pastries. With a few simple ingredients, you can recreate this authentic Spanish treat and bring a taste of Spain into your kitchen. The key to perfect mantecados lies in achieving the right balance between the flour, sugar, and fat, creating a dough that crumbles slightly yet holds together.
It’s crucial to handle the dough with care to maintain the delicate texture that makes mantecados so irresistible.
Ingredients for 4-6 servings:
- 2 cups all-purpose flour
- 1 cup powdered sugar
- 1 cup lard (or vegetable shortening)
- 1 tablespoon ground cinnamon
- 1 teaspoon lemon zest
- 1/4 teaspoon salt
- Powdered sugar for dusting
Cooking Instructions:
- Preheat the Oven: Begin by preheating your oven to 350°F (175°C). Line a baking sheet with parchment paper or a silicone baking mat to prevent sticking.
- Prepare the Flour: In a dry skillet over medium heat, toast the flour for about 5 minutes until it turns a light golden color, stirring constantly to avoid burning. This step helps to enhance the flavor of the flour. After toasting, let the flour cool to room temperature.
- Mix the Dough: In a large mixing bowl, combine the toasted flour, powdered sugar, and salt. Add the lard, cinnamon, and lemon zest. Use your hands to mix the ingredients until they form a smooth, homogenous dough. It should be slightly crumbly but hold together when pressed.
- Shape the Mantecados: Take small portions of dough and roll them into balls about 1 inch in diameter. Place them on the prepared baking sheet, spacing them about 2 inches apart. Gently flatten each ball with the palm of your hand or the bottom of a glass.
- Bake the Pastries: Place the baking sheet in the preheated oven and bake for approximately 12-15 minutes. Keep an eye on them, as they shouldn’t brown too much. The mantecados are ready when they’re firm to the touch but still pale in color.
- Cool and Dust: Remove the mantecados from the oven and let them cool on the baking sheet for a few minutes before transferring them to a wire rack. Once cooled, dust them generously with powdered sugar for a sweet finish.
Extra Tips:
When making mantecados, it’s important to use room temperature lard or shortening for easier mixing. If you prefer, you can substitute lard with butter or a combination of butter and shortening for a different flavor profile.
Be mindful not to overbake the mantecados; they should remain pale and delicate. For added flavor, consider incorporating other spices like nutmeg or vanilla extract to the dough. Store any leftover mantecados in an airtight container to maintain their freshness and crumbly texture. Enjoy these delightful pastries as a perfect accompaniment to your afternoon tea or coffee.
Pestiños
Pestiños are a traditional Spanish pastry, typically enjoyed during festive seasons such as Easter and Christmas. Originating from Andalusia, these sweet treats are known for their crispy texture and delightful flavor. The dough is infused with the aromatic essence of anise seeds and lemon zest, then fried to golden perfection and coated with a luscious honey glaze.
Pestiños are a representation of the rich culinary heritage of Spain, combining simple ingredients to create a delectable and satisfying dessert. Making pestiños at home allows you to experience a bit of Spanish culture in your own kitchen. These pastries are relatively straightforward to prepare, but they require attention to detail to achieve the perfect texture and flavor.
The process involves preparing a flavorful dough, shaping it into distinctive forms, and frying them until crisp. Once fried, the pestiños are coated in a mixture of honey and a hint of orange or lemon, adding a lovely sweetness that complements the subtly spiced dough.
Ingredients (for 4-6 people):
- 500g all-purpose flour
- 125ml olive oil
- 1 tablespoon anise seeds
- Zest of 1 lemon
- 125ml white wine
- 1 tablespoon sugar
- 1 teaspoon salt
- Vegetable oil for frying
- 200g honey
- Optional: 1 tablespoon orange or lemon juice
Instructions:
- Prepare the Flavor-Infused Oil: In a small saucepan, heat the olive oil over medium heat. Add the anise seeds and lemon zest, allowing them to infuse the oil for about 2-3 minutes. Remove from heat and let it cool slightly.
- Make the Dough: In a large bowl, combine the flour, sugar, and salt. Create a well in the center of the dry ingredients and add the infused oil mixture and white wine. Mix together until a dough forms.
- Knead the Dough: Transfer the dough to a lightly floured surface and knead it for about 5-7 minutes until it becomes smooth and elastic. Cover the dough with a damp cloth and let it rest for about 30 minutes.
- Shape the Pestiños: Roll the dough out to a thin layer (about 1/8 inch thick) using a rolling pin. Cut the dough into squares of approximately 3×3 inches. To shape the pestiños, fold two opposite corners of each square towards the center, pressing them firmly together.
- Fry the Pestiños: Heat vegetable oil in a deep pan or fryer to about 170°C (340°F). Carefully add the pestiños in batches, frying them until they’re golden brown and crispy, about 2-3 minutes per side. Remove them from the oil and drain on paper towels.
- Coat with Honey: In a separate saucepan, warm the honey over low heat, adding optional orange or lemon juice for extra zest. Dip each pestiño in the warm honey, making sure they’re well coated.
- Serve: Allow the honey-coated pestiños to cool slightly before serving them on a platter.
Extra Tips:
When making pestiños, be sure to monitor the oil temperature closely to avoid burning the pastries, as they cook quickly. If you’re using a candy thermometer, maintaining the oil temperature at a steady 170°C (340°F) will guarantee even frying.
If you don’t have anise seeds, you can substitute with a few drops of anise-flavored liqueur in the dough for a similar flavor profile. Finally, let the pestiños cool slightly before coating in honey to ensure the glaze adheres properly without making them too sticky.
Enjoy these delightful treats with a cup of coffee or tea for a truly authentic Spanish experience.