

Traveling through Spain left me with a heart full of memories and a palate craving those vibrant flavors. The crispy, golden Tortilla Española and the rich, creamy Croquetas De Jamón are just a couple of the cherished dishes that bring warmth to any gathering. Each recipe carries its own story, deeply rooted in tradition and crafted with care. Ever wondered how to sprinkle a bit of Spanish magic on your holiday table? Let’s explore these delightful recipes together!
Classic Spanish Tortilla
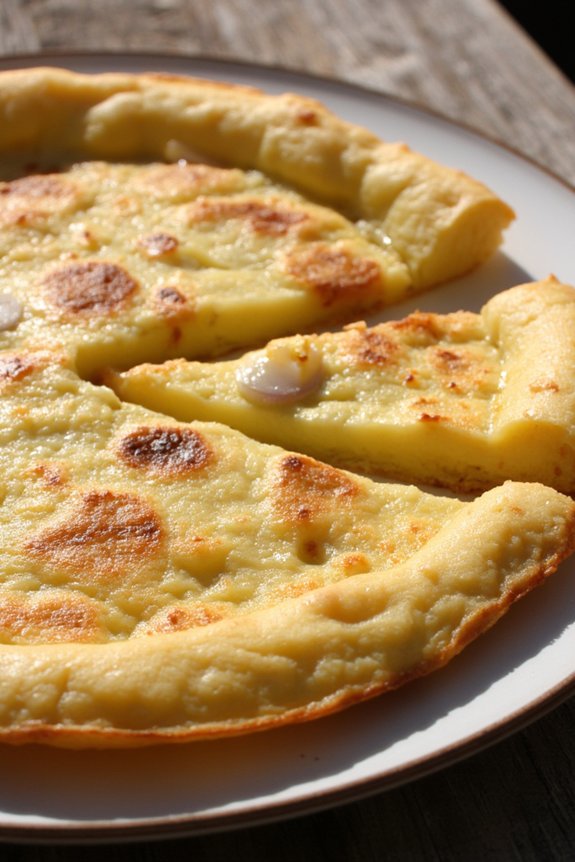
The Spanish Tortilla, also known as Tortilla Española or Tortilla de Patatas, is a beloved and iconic dish in Spain. It’s a simple yet flavorful potato omelette that showcases the beauty of basic ingredients. This dish is perfect for any occasion, whether you’re looking for a hearty breakfast, a satisfying lunch, or a delightful dinner. Its versatility and ease of preparation make it a staple in Spanish households, and it’s often served as part of tapas or as a main course.
The Spanish Tortilla consists of just a few ingredients—potatoes, onions, eggs, olive oil, and salt—yet its taste is rich and comforting. The process involves slowly cooking the potatoes and onions until they’re tender, then combining them with beaten eggs before cooking the mixture to create a thick, golden tortilla. This dish is traditionally served at room temperature, allowing the flavors to meld beautifully. With the right technique, you can achieve a perfect balance of a crispy outer layer and a soft, creamy interior.
Ingredients (Serves 4-6):
- 6 medium potatoes, peeled and thinly sliced
- 1 large onion, thinly sliced
- 8 large eggs
- 1 cup olive oil
- Salt to taste
Cooking Instructions:
- Prepare the Potatoes and Onions:
- Peel and thinly slice the potatoes. Confirm the slices are uniform for even cooking.
- Thinly slice the onion.
- Cook the Potatoes and Onions:
- In a large non-stick frying pan, heat the olive oil over medium heat.
- Add the sliced potatoes and onions to the pan. Cook them slowly, stirring occasionally, until the potatoes are tender and the onions are soft and translucent. This should take about 20-25 minutes. Season with salt to taste.
- Beat the Eggs:
- While the potatoes and onions are cooking, crack the eggs into a large bowl. Beat them until they’re well combined and slightly frothy.
- Combine Ingredients:
- Once the potatoes and onions are done, drain them from the oil using a slotted spoon and gently fold them into the beaten eggs. Mix well but carefully to avoid breaking the potatoes.
- Cook the Tortilla:
- Remove excess oil from the frying pan, leaving about 2 tablespoons. Heat the pan over medium heat.
- Pour the egg, potato, and onion mixture into the pan. Cook for about 5 minutes, gently shaking the pan occasionally to prevent sticking.
- Flip the Tortilla:
- Place a large, flat plate over the pan. Carefully flip the pan to transfer the tortilla onto the plate.
- Slide the tortilla back into the pan, uncooked side down, and cook for another 5 minutes until the tortilla is firm and lightly browned.
- Serve:
- Once cooked, slide the tortilla onto a serving plate. Allow it to cool slightly before slicing into wedges. Serve at room temperature.
Extra Tips:
To make the perfect Spanish Tortilla, patience is key. Cook the potatoes and onions slowly, allowing them to soften without browning. This will enhance the flavor and texture of the tortilla.
If you’re nervous about flipping the tortilla, you can use a lid instead of a plate to aid in the process. Additionally, feel free to experiment with variations by adding ingredients like bell peppers, chorizo, or herbs for extra flavor.
Croquetas De Jamón (Ham Croquettes)

Croquetas De Jamón, or Ham Croquettes, are a delightful Spanish treat that often grace the tables during holidays and festive gatherings. These golden, crispy bites are filled with a creamy, savory béchamel sauce mixed with diced jamón (Spanish ham), offering a perfect blend of textures and flavors.
While traditionally served as tapas, these croquettes can be enjoyed as an appetizer or a snack, bringing a touch of Spanish cuisine to any occasion.
Making Croquetas De Jamón at home might seem intimidating, but with some patience and attention to detail, you can recreate this classic Spanish dish in your own kitchen. The key to perfect croquettes lies in achieving the right béchamel consistency and guaranteeing the croquettes are well-coated to attain that irresistible crispiness.
Whether you’re a seasoned cook or a beginner, following this recipe will guide you through the process to create delicious and authentic croquettes.
Ingredients (Serves 4-6 people):
- 1 cup finely chopped jamón serrano (Spanish ham)
- 1/2 cup unsalted butter
- 3/4 cup all-purpose flour
- 2 cups whole milk
- Salt and pepper to taste
- Nutmeg (optional)
- 2 large eggs
- 1 1/2 cups breadcrumbs
- Vegetable oil for frying
Instructions:
1. Prepare the Béchamel Sauce: In a medium saucepan, melt the butter over medium heat. Once melted, add the flour and stir continuously for about 2-3 minutes to form a roux. Gradually add the milk, whisking constantly to avoid lumps, until a smooth sauce forms.
Continue to cook, stirring, until the sauce thickens and becomes creamy.
2. Incorporate the Jamón: Add the finely chopped jamón to the béchamel sauce, stirring well to evenly distribute the ham. Season with salt, pepper, and a hint of nutmeg if desired.
Cook for another 2-3 minutes. The mixture should be thick enough to hold its shape when scooped. Remove from heat and allow the mixture to cool to room temperature, then refrigerate for at least 2 hours or until firm.
3. Shape the Croquettes: Once the mixture is firm, use a tablespoon to scoop and shape the mixture into small logs or balls, about 2 inches long. Place them on a baking sheet lined with parchment paper.
4. Prepare for Frying: In a shallow dish, beat the eggs. In another dish, place the breadcrumbs. Dip each croquette first into the beaten eggs, then coat thoroughly with breadcrumbs.
Repeat to guarantee a thick, even coating, which will help achieve a crunchy exterior.
5. Fry the Croquettes: Heat vegetable oil in a deep skillet or fryer to 350°F (175°C). Carefully add the croquettes in batches, frying until they’re golden brown on all sides, about 3-4 minutes.
Use a slotted spoon to remove them and drain on paper towels.
6. Serve: Serve the croquettes warm, garnished with fresh parsley or a wedge of lemon if desired.
Extra Tips:
To guarantee the croquettes maintain their shape while frying, make sure the mixture is thoroughly chilled before shaping. If you find the béchamel too loose, refrigerate it longer or add a bit more flour during the cooking process.
Always test the oil temperature with a small piece of bread; it should sizzle and turn golden within a minute. Finally, experiment with different flavors by adding ingredients like cheese or herbs to the béchamel for a personal touch. Enjoy your homemade Croquetas De Jamón!
Gambas Al Ajillo (Garlic Shrimp)
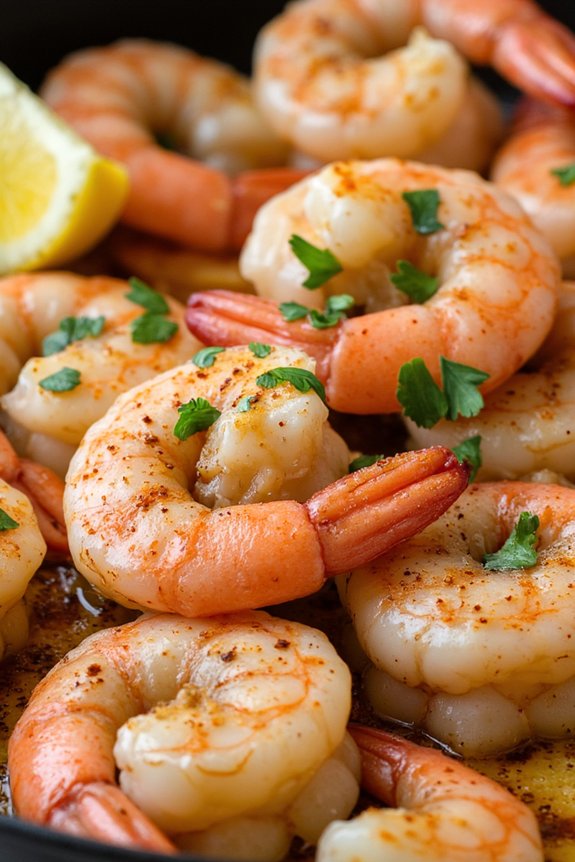
Gambas Al Ajillo, or Garlic Shrimp, is a classic Spanish tapas dish that’s certain to impress your guests. This dish is characterized by its simplicity yet rich flavors derived from fresh shrimp, garlic, and olive oil. Typically served as an appetizer, Gambas Al Ajillo pairs perfectly with a crispy baguette or a side of rice to soak up the delightful garlic-infused oil.
The dish is often enjoyed in the coastal regions of Spain, where seafood is a staple, making it a beloved choice during holiday gatherings.
The key to perfecting Gambas Al Ajillo is using high-quality, fresh ingredients. The shrimp should be plump and juicy, while the garlic should be fragrant and not overpowering. The dish is cooked quickly over high heat, allowing the shrimp to absorb the flavors of the garlic and olive oil without overcooking.
Paprika and red pepper flakes add a subtle heat, while a splash of lemon juice brightens the dish. This recipe serves 4-6 people, making it an ideal choice for a festive gathering or a small dinner party.
Ingredients:
- 1 pound of large shrimp, peeled and deveined
- 6 cloves of garlic, thinly sliced
- 1/3 cup of extra virgin olive oil
- 1 teaspoon of smoked paprika
- 1/2 teaspoon of red pepper flakes
- Salt, to taste
- Freshly ground black pepper, to taste
- 2 tablespoons of freshly squeezed lemon juice
- 2 tablespoons of chopped fresh parsley
- Lemon wedges, for garnish
Cooking Instructions:
- Prepare the Shrimp: Rinse the shrimp under cold water and pat them dry with paper towels. This step guarantees that the shrimp will sear properly in the oil without steaming.
- Heat the Oil: In a large skillet, heat the olive oil over medium-high heat. Once the oil is shimmering, add the sliced garlic. Sauté the garlic for about 1-2 minutes until it’s golden and fragrant, but be careful not to let it burn.
- Cook the Shrimp: Add the shrimp to the skillet in a single layer. Season with salt, black pepper, smoked paprika, and red pepper flakes. Cook the shrimp for about 2-3 minutes on each side, or until they turn pink and opaque.
- Finish with Lemon and Parsley: Once the shrimp are cooked, remove the skillet from the heat. Add the lemon juice and chopped parsley, tossing everything together to combine the flavors. Taste and adjust the seasoning if necessary.
- Serve: Transfer the shrimp and garlic oil to a serving dish. Garnish with lemon wedges and additional parsley if desired. Serve hot with slices of baguette or a side of rice.
Extra Tips: To enhance the flavor of the dish, consider marinating the shrimp in a little bit of the olive oil, garlic, and paprika for 15-30 minutes before cooking. This allows the shrimp to absorb more of the spices and garlic.
Make sure not to overcrowd the pan when cooking the shrimp; if necessary, cook them in batches to guarantee even cooking and a nice sear. Finally, always use fresh parsley and lemon juice for the best flavor.
Pimientos De Padrón (Padron Peppers)
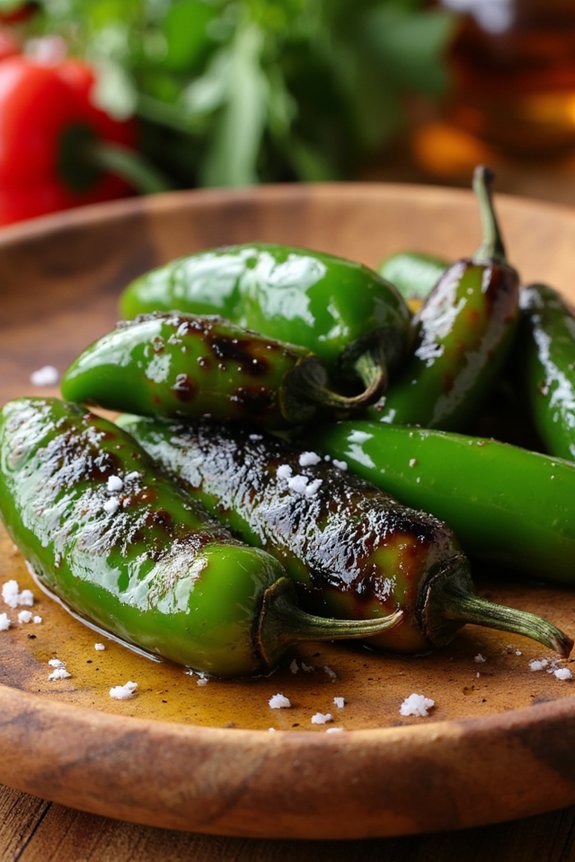
Pimientos De Padrón, or Padron Peppers, are a delightful Spanish dish often enjoyed as a tapas or appetizer. These small, green peppers have a mild flavor with the occasional pepper offering a surprising spicy kick. Originating from Galicia in northwestern Spain, Pimientos De Padrón have gained popularity worldwide due to their simplicity and unique taste.
The peppers are typically pan-fried in olive oil until blistered and then sprinkled with coarse sea salt. This dish is perfect for sharing and makes a wonderful addition to any Spanish-themed meal or holiday gathering.
Preparing Pimientos De Padrón is both quick and easy, making it an ideal choice when you want to serve something authentic yet uncomplicated. The key to achieving the perfect texture is to guarantee the peppers are cooked until blistered but not charred. This gives them a slightly smoky flavor while maintaining their natural sweetness.
Whether you’re an experienced cook or a beginner looking to explore Spanish cuisine, this recipe is an excellent starting point. Let’s plunge into the ingredients and instructions for preparing Pimientos De Padrón for 4-6 people.
Ingredients:
- 500 grams of Pimientos De Padrón
- 3 tablespoons of extra virgin olive oil
- Coarse sea salt to taste
Instructions:
- Preparation: Begin by thoroughly washing the Pimientos De Padrón under cold running water to remove any dirt or impurities. Pat them dry with a clean kitchen towel or paper towels to guarantee they fry evenly without excess water.
- Heating the Oil: Place a large frying pan or skillet over medium-high heat. Add the extra virgin olive oil and allow it to heat up until it starts to shimmer but not smoke.
- Cooking the Peppers: Carefully add the Pimientos De Padrón to the hot oil in a single layer. It’s important not to overcrowd the pan, as this will prevent the peppers from blistering properly. Fry them for about 5-7 minutes, turning occasionally with tongs or a spatula, until they’re blistered and slightly charred on all sides.
- Seasoning: Once the peppers are evenly blistered, remove them from the pan using a slotted spoon or tongs and transfer them to a serving dish lined with paper towels. This will absorb any excess oil. Immediately sprinkle the peppers with coarse sea salt to taste while they’re still hot.
- Serving: Serve the Pimientos De Padrón warm as a tapas dish or appetizer. They pair wonderfully with a glass of Spanish wine or alongside other traditional Spanish dishes.
Extra Tips:
When cooking Pimientos De Padrón, be cautious of the hot oil as it can splatter when the peppers are added. Using a splatter guard can help minimize mess and prevent burns.
Additionally, while most Pimientos De Padrón are mild, some can be unexpectedly hot. Inform your guests of this fun “Russian roulette” aspect of the dish to add an element of surprise.
Finally, if you want to add a bit of extra flavor, consider tossing the cooked peppers with a pinch of smoked paprika or a squeeze of fresh lemon juice before serving. Enjoy your culinary adventure into Spanish cuisine!
Chorizo a La Sidra (Chorizo in Cider)
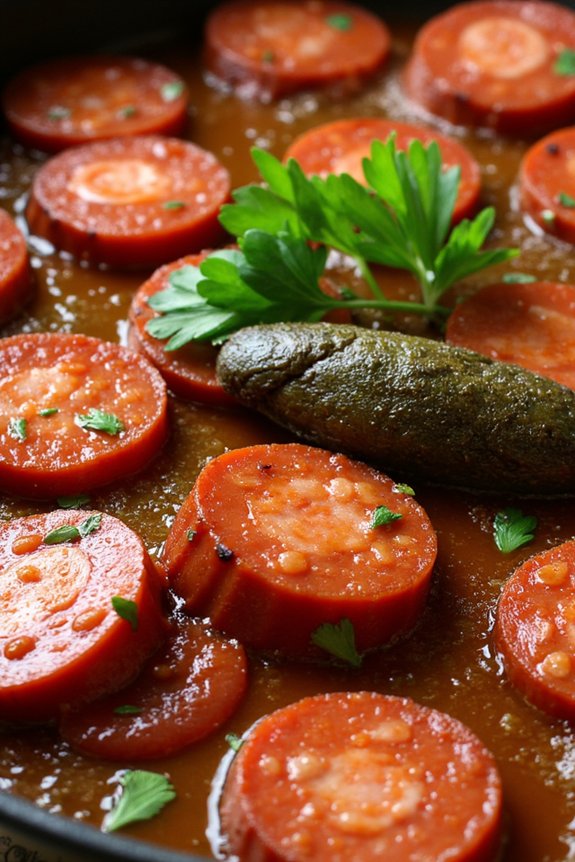
This dish isn’t only delicious but also incredibly easy to prepare, making it an ideal choice for those looking to impress their guests with minimal effort. The key is to use good-quality chorizo and a flavorful cider to guarantee the best results.
While traditionally served with crusty bread to soak up the juices, it can also be paired with a side of roasted vegetables or a fresh salad for a more complete meal. Chorizo a La Sidra is a reflection of the beauty of simplicity in cooking, where just a few ingredients come together to create something truly special.
Ingredients for 4-6 people:
- 500 grams of chorizo sausage (preferably Spanish)
- 500 ml of dry apple cider
- 2 tablespoons of olive oil
- 1 bay leaf
- Salt and pepper to taste
- Fresh parsley, chopped (for garnish)
Cooking Instructions:
- Prepare the Chorizo: Begin by slicing the chorizo into 1-inch thick pieces. This size guarantees they cook evenly and absorb the cider’s flavors effectively.
- Heat the Oil: In a large skillet, heat the olive oil over medium heat. Once the oil is hot, add the bay leaf. The bay leaf will infuse the oil with its flavor, adding a subtle aromatic note to the dish.
- Cook the Chorizo: Add the sliced chorizo to the skillet. Allow the chorizo to cook for about 5 minutes, stirring occasionally. The goal is to brown the chorizo slightly, which helps to enhance its flavor and texture.
- Add the Cider: Pour the cider into the skillet with the chorizo. Bring the mixture to a gentle simmer. This step allows the cider to infuse the chorizo with its sweet and tangy notes.
- Simmer: Reduce the heat to low and let the chorizo simmer in the cider for 15-20 minutes. This allows the flavors to meld together and the chorizo to become tender.
- Season and Garnish: Taste and season the dish with salt and pepper as needed. Remove from heat and sprinkle with fresh parsley before serving. The parsley adds a fresh contrast to the rich flavors of the dish.
Extra Tips:
For best results, choose a high-quality Spanish chorizo, as it contributes greatly to the overall flavor of the dish. Additionally, using a craft or artisanal cider can elevate the taste further, as these often have more complex flavor profiles.
If you prefer a spicier dish, opt for a spicy chorizo variety. Remember to serve the dish immediately after cooking to enjoy it at its best, and don’t forget the crusty bread to mop up the delicious sauce!
Patatas Bravas
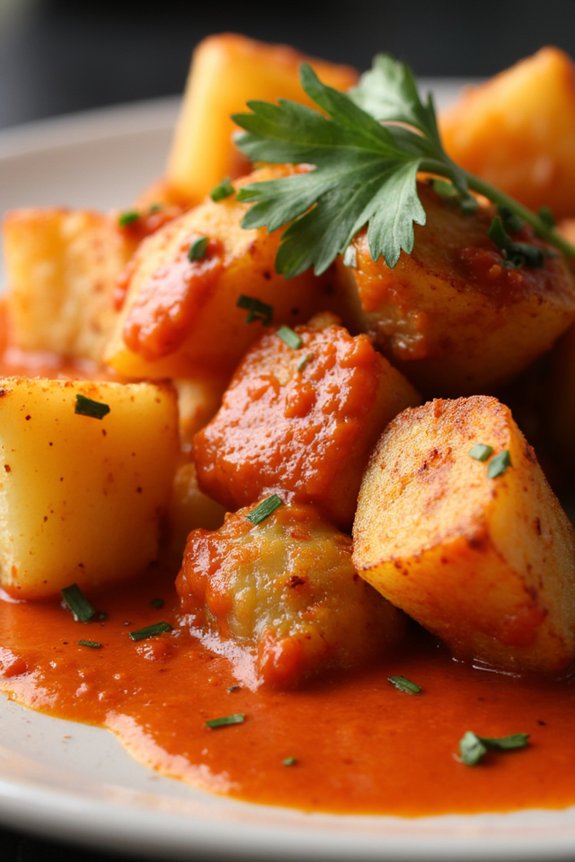
Patatas Bravas is a classic Spanish tapa dish that’s perfect for any occasion, from festive holiday gatherings to a casual dinner at home. Known for its crispy potatoes and spicy, flavorful sauce, this dish is a favorite in tapas bars across Spain. The name “Bravas” directly translates to “fierce,” which aptly describes the sauce’s slightly spicy kick.
Whether you’re a fan of Spanish cuisine or simply looking to try something new, Patatas Bravas is certain to impress both your taste buds and your guests.
The key to making excellent Patatas Bravas lies in perfectly cooking the potatoes to achieve a crispy exterior while keeping the inside fluffy. The sauce, which can range from mildly spicy to fiery hot, is what truly sets this dish apart. Typically made with tomatoes, paprika, and a touch of vinegar, the sauce is both savory and slightly tangy.
Served as a starter or a side dish, Patatas Bravas is versatile and can complement a variety of main courses.
Ingredients for 4-6 People:
- 4 large potatoes
- 1/4 cup olive oil
- Salt and pepper, to taste
- 1 onion, finely chopped
- 2 cloves garlic, minced
- 1 teaspoon smoked paprika
- 1/2 teaspoon cayenne pepper
- 1/4 teaspoon sugar
- 1 tablespoon red wine vinegar
- 1 cup canned crushed tomatoes
- Fresh parsley, chopped, for garnish
Cooking Instructions:
- Prepare the Potatoes: Start by peeling the potatoes and cutting them into 1-inch cubes. Rinse them under cold water to remove excess starch, then pat them dry with a paper towel to guarantee they fry up crispy.
- Fry the Potatoes: Heat the olive oil in a large frying pan over medium-high heat. Once the oil is hot, add the potato cubes in a single layer. Cook the potatoes for about 15-20 minutes, turning occasionally, until they’re golden brown and crispy on all sides. Remove from the pan and drain on paper towels. Season with salt and pepper while still hot.
- Make the Bravas Sauce: In the same frying pan, reduce the heat to medium and add the chopped onion and minced garlic. Sauté until the onion is translucent, about 5 minutes. Stir in the smoked paprika, cayenne pepper, and sugar, cooking for another minute to release the spices’ flavors.
- Simmer the Sauce: Add the red wine vinegar and crushed tomatoes to the pan. Stir well to combine and let the sauce simmer for about 10-15 minutes until it thickens. Adjust the seasoning with salt and pepper to taste.
- Combine and Serve: Place the fried potatoes in a serving dish and spoon the warm bravas sauce over the top. Garnish with fresh chopped parsley for a burst of color and freshness. Serve immediately to enjoy the full crispiness of the potatoes.
Extra Tips:
For an extra layer of flavor, consider roasting the potatoes instead of frying them. Preheat your oven to 425°F (220°C) and roast the potato cubes on a baking sheet lined with parchment paper, drizzled with olive oil and seasoned with salt and pepper, for about 30-40 minutes until crispy.
This method not only reduces the amount of oil used but also gives the potatoes a deep, roasted flavor. Additionally, if you prefer a milder sauce, reduce the amount of cayenne pepper and add a touch of cream or mayonnaise to the sauce for a smoother texture.
Albondigas (Spanish Meatballs)
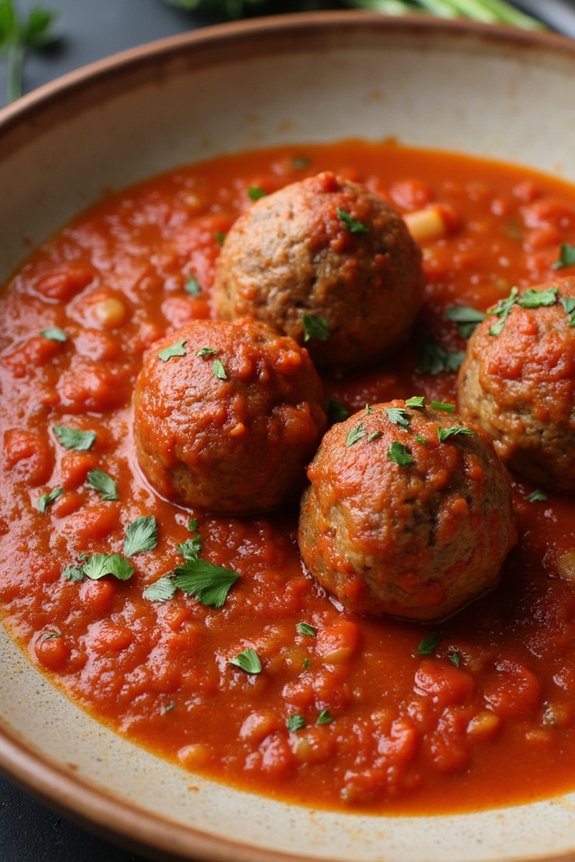
Albondigas are a classic Spanish comfort food, perfect for a family meal or as an appetizer at a festive gathering. These flavorful meatballs are typically made with a combination of ground meats, spices, and herbs that capture the essence of Spanish cuisine. The dish is often served in a rich, savory tomato sauce that complements the hearty flavors of the meatballs.
Whether you’re cooking for a holiday or simply want to enjoy a warm and satisfying meal, albondigas are bound to please. Originating from the Iberian Peninsula, albondigas have been a staple in Spanish kitchens for generations. They’re versatile and can be adjusted to suit different palates. Some variations include the addition of vegetables, rice, or even a touch of spice to give the dish an extra kick.
Cooking albondigas is an opportunity to bring a taste of Spain into your home and share a delicious tradition with family and friends. This recipe is designed to serve 4-6 people, making it perfect for a small gathering or family dinner.
Ingredients:
- 1 pound ground beef
- 1/2 pound ground pork
- 1/2 cup breadcrumbs
- 1/4 cup milk
- 1 egg
- 3 cloves garlic, minced
- 1 small onion, finely chopped
- 1 tablespoon fresh parsley, chopped
- 1 teaspoon smoked paprika
- Salt and pepper to taste
- 3 tablespoons olive oil
- 1 can (14 ounces) crushed tomatoes
- 1 cup beef or chicken broth
- 1 bay leaf
- 1/2 teaspoon sugar
Cooking Instructions:
- Prepare the Meatball Mixture: In a large bowl, combine the ground beef, ground pork, breadcrumbs, milk, egg, minced garlic, chopped onion, parsley, smoked paprika, salt, and pepper. Mix well until all the ingredients are thoroughly incorporated.
- Form the Meatballs: Roll the mixture into small balls, about the size of a walnut. Confirm they’re uniform in size to cook evenly. Place them on a plate or baking sheet.
- Brown the Meatballs: Heat the olive oil in a large skillet over medium heat. Add the meatballs in batches, making sure not to overcrowd the pan. Cook until they’re browned on all sides, about 5-7 minutes. Remove the browned meatballs and set aside.
- Make the Sauce: In the same skillet, add the crushed tomatoes, beef or chicken broth, bay leaf, and sugar. Stir to combine the ingredients, scraping up any browned bits from the bottom of the pan for extra flavor.
- Simmer the Meatballs: Return the meatballs to the skillet, ensuring they’re submerged in the tomato sauce. Cover the pan and let them simmer on low heat for about 20-25 minutes, or until the meatballs are cooked through and the sauce has thickened.
- Serve: Remove the bay leaf before serving. Serve the albondigas hot, garnished with additional chopped parsley if desired. They can be accompanied by crusty bread, rice, or pasta.
Extra Tips:
For an even richer flavor, consider preparing the meatball mixture a day in advance and letting it rest in the refrigerator. This allows the flavors to meld together beautifully.
If you prefer a spicier version, add a pinch of cayenne pepper or chili flakes to the meatball mixture. When forming the meatballs, wet your hands slightly to prevent the mixture from sticking. Ultimately, to guarantee the meatballs are tender, avoid over-mixing the ingredients.
Enjoy your albondigas, a delightful taste of Spanish culinary tradition!
Empanadas Gallegas (Galician Empanadas)

Empanadas Gallegas, or Galician Empanadas, are a classic Spanish dish originating from the region of Galicia. Known for their rich and savory fillings encased in a crisp, golden pastry, these empanadas are a staple at Spanish holiday feasts. They’re traditionally filled with a variety of ingredients such as meat, fish, or vegetables, making them a versatile addition to any festive table.
The dish is perfect for sharing, and its hearty flavors and textures are bound to delight guests of all ages. This recipe for Empanadas Gallegas serves 4-6 people and focuses on a classic tuna and vegetable filling. The dough is made from scratch, providing a deliciously flaky crust that pairs perfectly with the savory filling. Whether you’re hosting a holiday gathering or simply want to enjoy a taste of Spain at home, this recipe will guide you through creating the perfect empanada.
Ingredients for Empanadas Gallegas (serving size: 4-6 people):
*For the dough:*
- 500g all-purpose flour
- 150ml olive oil
- 150ml lukewarm water
- 1 teaspoon salt
- 1 packet (7g) active dry yeast
For the filling:
- 2 tablespoons olive oil
- 1 large onion, finely chopped
- 1 red bell pepper, chopped
- 1 green bell pepper, chopped
- 2 cloves garlic, minced
- 300g canned tuna, drained
- 3 hard-boiled eggs, chopped
- 1 teaspoon paprika
- Salt and pepper to taste
- 1/4 cup tomato sauce
For assembly:
– 1 egg, beaten (for egg wash)
Cooking Instructions:
- Prepare the Dough: In a large bowl, mix the flour and salt. Dissolve the yeast in the lukewarm water and let it sit for about 5 minutes until foamy. Add the yeast mixture and olive oil to the flour and mix until a dough forms. Knead the dough on a floured surface for about 10 minutes until smooth and elastic.
- Place the dough in a lightly oiled bowl, cover with a cloth, and let it rise in a warm place for about 1 hour or until doubled in size.
- Make the Filling: While the dough is rising, heat olive oil in a large skillet over medium heat. Add the chopped onion, red and green bell peppers, and garlic. Sauté until the vegetables are soft, about 10 minutes.
- Stir in the drained tuna, chopped eggs, paprika, salt, and pepper. Add the tomato sauce and cook for another 5 minutes. Set the filling aside to cool.
- Preheat the Oven: Preheat your oven to 180°C (350°F).
- Assemble the Empanadas: Once the dough has risen, punch it down and divide it into two equal parts. Roll out one portion of the dough on a floured surface to fit a baking sheet.
- Place the rolled dough on a parchment-lined baking sheet. Spread the filling evenly over the dough, leaving a border around the edges. Roll out the second portion of dough and place it over the filling. Seal the edges by crimping them together with a fork or your fingers.
- Apply the Egg Wash: Brush the top of the empanada with the beaten egg to give it a nice golden color when baked.
- Bake: Use a fork to prick the top of the empanada in several places to allow steam to escape. Bake in the preheated oven for 30-40 minutes or until golden brown.
- Serve: Allow the empanada to cool slightly before slicing and serving.
Extra Tips:
For a different twist, you can substitute the tuna with cooked chicken or beef, and add other vegetables like mushrooms or spinach for added flavor. If you prefer a spicier filling, a pinch of cayenne pepper can be added to the mix.
Verify the filling is cool before assembling the empanada to keep the dough from becoming soggy. Additionally, you can make the dough and filling in advance, allowing more time to enjoy the holiday festivities.
Pulpo a La Gallega (Galician Octopus)
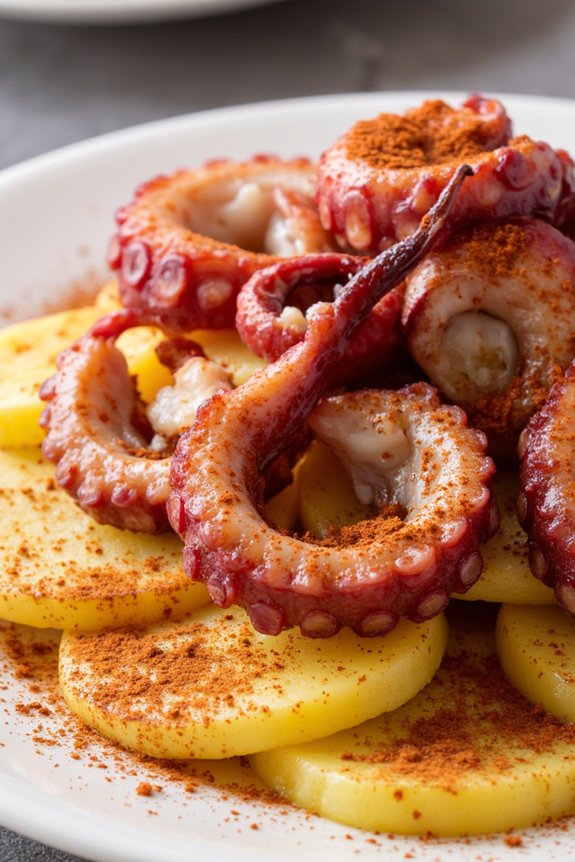
Pulpo a La Gallega, also known as Galician Octopus, is a traditional Spanish dish that hails from the northwestern region of Galicia. Known for its simplicity and robust flavors, this dish celebrates the natural taste of the octopus, enhanced by a handful of quality ingredients. It’s typically served as a tapa, but it can easily be a standout dish at any meal. The octopus is boiled until tender, sliced, and then garnished with olive oil, paprika, and sea salt, making it a true delicacy that’s both savory and satisfying.
The preparation of Pulpo a La Gallega is rooted in Galician culinary traditions, where the focus is on fresh seafood and minimalistic cooking techniques. This recipe requires some patience, especially during the boiling process, but the end result is well worth the effort. The key to a perfect Pulpo a La Gallega lies in the quality of the octopus and the balance of flavors from the toppings. Once you have mastered this dish, you’ll find that it’s a delightful addition to any gathering, offering a taste of Spain that’s both authentic and unforgettable.
Ingredients for 4-6 servings:
- 2 kg fresh or frozen octopus
- 4 medium potatoes, peeled and sliced
- 2 bay leaves
- 1 medium onion, peeled
- 1 tablespoon of sweet paprika (pimentón dulce)
- 1 tablespoon of hot paprika (pimentón picante)
- Extra virgin olive oil
- Coarse sea salt
Cooking Instructions:
- Prepare the Octopus: If using frozen octopus, allow it to thaw completely. This can take up to 24 hours in the refrigerator. Thawing the octopus helps tenderize the meat, making it easier to cook.
- Boil the Octopus: In a large pot, bring water to a boil, adding the bay leaves and onion for flavor. Grasp the octopus by the head and “scare” it by dipping it into the boiling water three times before submerging it completely. This helps to curl its tentacles. Once fully submerged, reduce the heat to a simmer and cook for about 45-60 minutes or until the octopus is tender when pierced with a fork.
- Cook the Potatoes: While the octopus is cooking, in a separate pot, boil the sliced potatoes until they’re tender but not falling apart, approximately 15-20 minutes. Drain and set aside.
- Slice the Octopus: Once the octopus is cooked, remove it from the pot and let it cool slightly. Slice the tentacles into bite-sized pieces, about 1/2 inch thick.
- Assemble the Dish: On a serving platter, arrange the sliced potatoes as a base. Place the octopus pieces on top of the potatoes. Drizzle generously with extra virgin olive oil.
- Season: Sprinkle both sweet and hot paprika over the octopus and potatoes, followed by a sprinkling of coarse sea salt to taste. The paprika and salt should coat the dish evenly.
- Serve: Pulpo a La Gallega is best enjoyed warm. Serve immediately with some crusty bread on the side to soak up the flavorful oil and juices.
Extra Tips:
For the best results, use high-quality extra virgin olive oil and fresh paprika, as these ingredients greatly influence the dish’s flavor. If you prefer a milder dish, adjust the amount of hot paprika to your liking. To guarantee even cooking, make sure the octopus is fully thawed if previously frozen. Additionally, the cooking time for the octopus may vary depending on its size, so test tenderness by piercing with a fork. Finally, if you have access to a traditional wooden plate for serving, it will absorb excess moisture and enhance the authenticity of the presentation.
Bacalao a La Vizcaína (Basque-Style Cod)
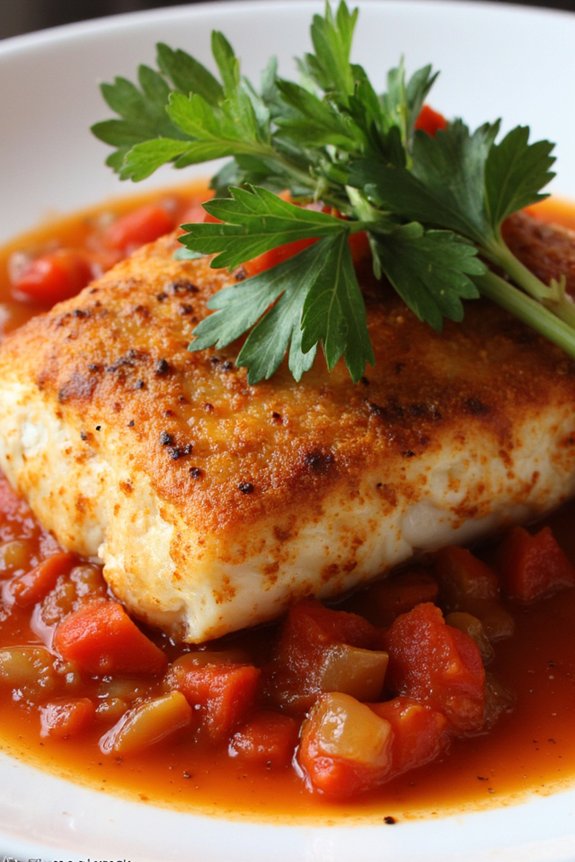
Bacalao a La Vizcaína, or Basque-Style Cod, is a traditional dish from the Basque region of Spain. This savory dish is a perfect blend of cod fish cooked in a rich, red sauce made from tomatoes, peppers, and onions. The use of dried peppers, typically ñora or choricero peppers, adds a unique depth of flavor that sets this dish apart.
Typically served during holidays or special occasions, Bacalao a La Vizcaína is an elegant and flavorful centerpiece that’s bound to impress your guests.
This dish is traditionally made with salted cod, which requires soaking to remove the excess salt and rehydrate the fish. The sauce is a harmonious blend of sweet and savory flavors, offering a delectable balance that complements the subtle taste of the cod. The combination of ingredients creates a vibrant, aromatic dish that pairs well with a variety of sides, such as roasted potatoes or a simple green salad.
Here is a recipe to serve 4-6 people.
Ingredients:
- 2 pounds of salted cod
- 4 large ripe tomatoes
- 2 red bell peppers
- 2 onions
- 3 cloves of garlic
- 4 dried ñora peppers or choricero peppers
- 1 cup olive oil
- 1 tablespoon flour
- Salt and pepper to taste
- 2 bay leaves
- Fresh parsley for garnish
Cooking Instructions:
- Prepare the Cod: Begin by soaking the salted cod in a large bowl of cold water for 24 to 48 hours, changing the water every 8 hours to remove excess salt. Once soaked, drain and pat dry with paper towels.
- Prepare the Peppers: Soak the dried ñora or choricero peppers in warm water for about 30 minutes until they soften. Remove seeds and stems, then scrape the flesh from the skins using a spoon.
- Make the Sauce: Heat half of the olive oil in a large pan over medium heat. Add finely chopped onions and garlic, sauté until soft and translucent. Add chopped tomatoes and bell peppers, stirring occasionally until the mixture becomes a thick sauce.
- Combine Ingredients: Stir in the scraped pepper flesh, bay leaves, and flour to thicken the sauce. Season with salt and pepper to taste. Simmer the sauce for 15-20 minutes to allow flavors to meld.
- Cook the Cod: In a separate skillet, heat the remaining olive oil over medium heat. Add the cod fillets and cook for 3-4 minutes on each side until they’re golden brown.
- Assemble the Dish: Transfer the cod fillets to the sauce pan, gently simmer for another 10 minutes, allowing the flavors to infuse the cod.
- Serve: Garnish with fresh parsley and serve hot with your choice of sides.
Extra Tips: When soaking the salted cod, make sure you start the soaking process well in advance, as this step is essential to achieving the desired flavor and texture.
If ñora or choricero peppers are unavailable, dried ancho peppers can be used as a substitute. Be mindful of the salt content in the dish, as the cod may still retain some saltiness even after soaking. Adjust seasoning accordingly.
Cochinillo Asado (Roast Suckling Pig)
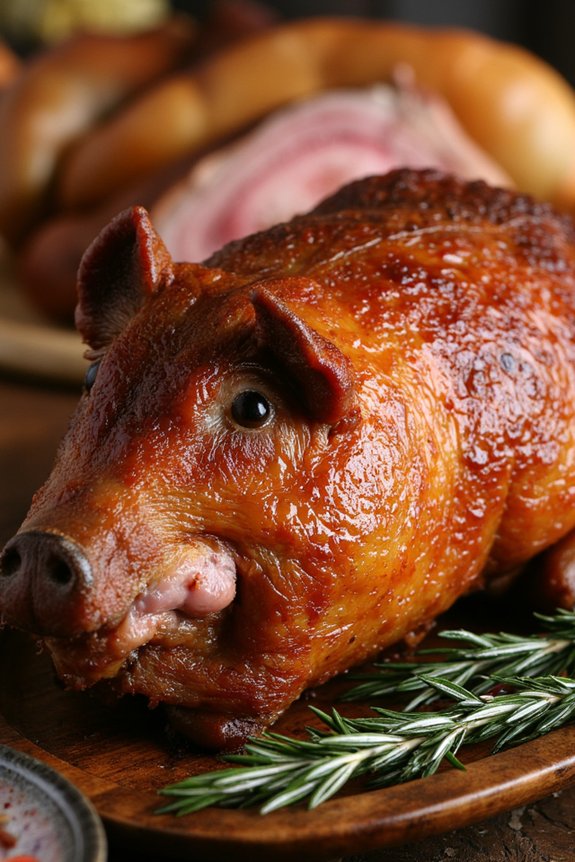
Cochinillo Asado, or Roast Suckling Pig, is a classic Spanish dish renowned for its succulent meat and crispy skin. Traditionally from the region of Castilla y León, this festive dish is often served during special occasions and holidays. The process of cooking a suckling pig requires patience and attention to detail, as it’s important to achieve the perfect balance of tender meat and crackling skin.
While the dish may seem sophisticated, with the right technique and preparation, it can easily be tackled in your own kitchen. The key to a successful Cochinillo Asado lies in the quality of the pig and the simplicity of the seasoning, allowing the natural flavors of the meat to shine. The pig is typically roasted whole in a wood-fired oven, but you can achieve excellent results in a conventional oven at home.
The roast is slow-cooked, guaranteeing that the meat is juicy and flavorful, while the skin is carefully crisped to perfection. Serve this show-stopping dish with simple sides like roasted potatoes, sautéed greens, or a fresh salad to let the Cochinillo Asado be the star of your holiday table.
Ingredients for 4-6 servings:
- 1 suckling pig (approximately 5-7 kg)
- 3 tablespoons of salt
- 3 tablespoons of olive oil
- 4 cloves of garlic, minced
- 2 tablespoons of fresh thyme, chopped
- 2 tablespoons of fresh rosemary, chopped
- 1 lemon, cut into wedges
- 1 cup of white wine
- 1 cup of water
Cooking Instructions:
- Preparation: Preheat your oven to 160°C (320°F). Rinse the suckling pig thoroughly under cold water and pat dry with paper towels. Make sure to clean the inside cavity well and remove any remaining organs.
- Seasoning: Mix the minced garlic, salt, olive oil, thyme, and rosemary in a small bowl to form a paste. Rub the paste all over the pig, including the inside cavity, making sure it’s evenly coated.
- Stuffing and Trussing: Place lemon wedges inside the cavity of the pig. Truss the pig by tying the legs together with kitchen twine to help it maintain its shape during roasting.
- Roasting Setup: Place the pig on a large roasting pan with a rack, belly side down. Pour the white wine and water into the bottom of the pan to create a moist environment which helps in tenderizing the meat.
- Roasting: Place the pan in the oven. Roast the pig for about 3-4 hours, basting occasionally with the pan juices. The skin should turn golden brown and crisp. If the skin browns too quickly, cover it with aluminum foil to prevent burning.
- Finishing Touches: Increase the oven temperature to 200°C (390°F) for the last 30 minutes to guarantee the skin crisps up without overcooking the meat. Check the internal temperature; it should reach at least 70°C (160°F).
- Resting and Serving: Remove from the oven and let the pig rest for 20 minutes before carving. Serve with the pan juices and your choice of sides.
Extra Tips: When selecting your suckling pig, opt for one that’s fresh and has a consistent layer of fat under the skin, as this will enhance the flavor and help achieve the desired crispy skin.
If possible, use a meat thermometer to guarantee the meat is cooked to the right temperature without being overdone. To achieve a perfect crackling, make sure the skin is dry before seasoning, and avoid opening the oven door too frequently during roasting, as this can alter the cooking temperature and impact the final result.
Turrón (Spanish Nougat)
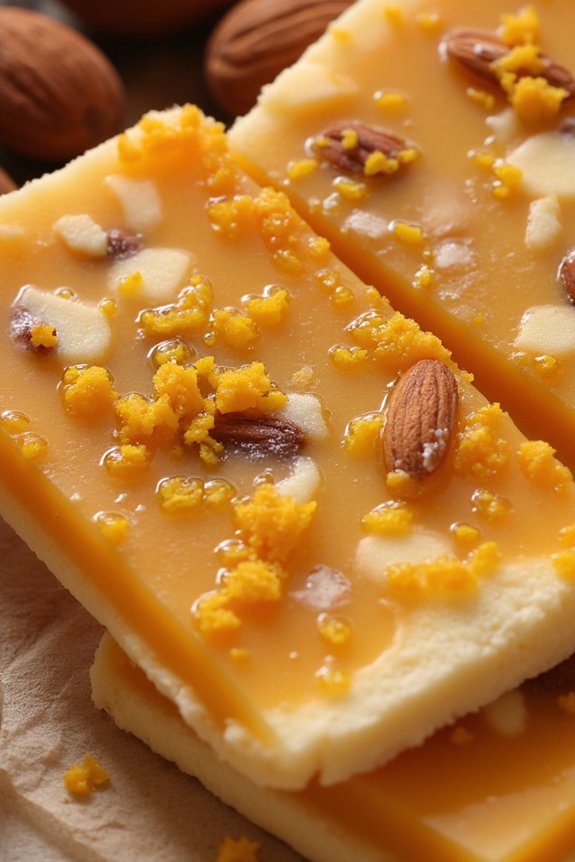
Creating turrón at home can be a rewarding experience, allowing you to customize the sweetness and texture to your liking. The process involves carefully managing the temperature of the ingredients to achieve the perfect consistency. Turrón comes in various forms, including the soft, chewy “blando” and the hard, brittle “duro.” In this recipe, we’ll focus on making the classic turrón de Alicante, the hard variety, to enjoy with family and friends.
Ingredients for 4-6 people:
- 250g whole blanched almonds
- 150g honey
- 100g granulated sugar
- 1 large egg white
- 1 lemon (zest only)
- Edible wafer paper (optional)
Cooking Instructions:
- Prepare the Almonds:
- Preheat your oven to 350°F (175°C). Spread the blanched almonds evenly on a baking sheet and toast them in the oven for about 10 minutes, or until they’re lightly golden and fragrant. Remove from the oven and let them cool.
- Create the Syrup:
- In a heavy-bottomed saucepan, combine the honey and granulated sugar. Heat the mixture over medium-low heat, stirring constantly until the sugar has completely dissolved. Continue to cook, without stirring, until the mixture reaches a temperature of 250°F (120°C) on a candy thermometer. This should take about 10-15 minutes.
- Whip the Egg White:
- While the syrup is cooking, beat the egg white in a clean, dry bowl until it forms stiff peaks. This will help stabilize the mixture and give the turrón a smooth texture.
- Combine Ingredients:
- Once the syrup reaches the correct temperature, remove it from the heat. Gradually fold the syrup into the whipped egg white, being careful not to deflate the mixture. Add the lemon zest and toasted almonds, and stir until the almonds are fully coated.
- Mold the Turrón:
- Line a rectangular mold or loaf pan with edible wafer paper if using. Pour the mixture into the mold, spreading it evenly with a spatula. Press down gently to remove any air pockets. If using wafer paper, place another sheet on top to cover the mixture.
- Cool and Set:
- Allow the turrón to cool at room temperature for at least 4 hours, or until it’s firm. Once set, remove it from the mold and cut it into small rectangles or squares for serving.
Extra Tips:
When making turrón, verify that all equipment is completely dry, as moisture can cause the sugar to crystallize improperly.
If you don’t have a candy thermometer, you can test the syrup by dropping a small amount into cold water; it should form a firm ball.
Keep a close eye on the syrup while it cooks to prevent burning, as honey can quickly caramelize.
For a personalized touch, consider adding a pinch of cinnamon or a splash of vanilla extract to the mixture.
Enjoy your homemade turrón with a cup of coffee or a glass of Spanish wine to enhance the holiday spirit.
Roscón De Reyes (Three Kings Cake)
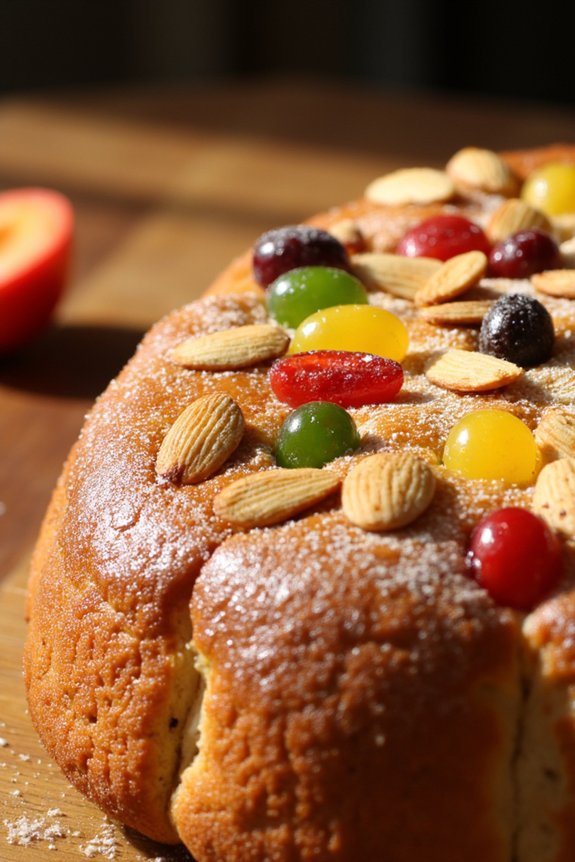
Roscón De Reyes, or Three Kings Cake, is a traditional Spanish pastry typically enjoyed on January 6th during the celebration of Epiphany. This delicious ring-shaped cake isn’t only a treat for the taste buds but also a fun experience for those who partake in eating it. Hidden inside the cake are small surprises, often a figurine and a dried fava bean. According to tradition, the person who finds the figurine is crowned king or queen for the day, while the one who finds the bean is expected to buy the Roscón the following year.
This festive cake is enriched with flavors of orange and almond and is often topped with candied fruits and sugar. The Roscón De Reyes is typically served with a cup of hot chocolate or coffee, making it a perfect accompaniment for a cozy family gathering. Whether you’re celebrating the Epiphany or simply want to indulge in a delightful Spanish treat, this recipe for Roscón De Reyes will guide you through the process of creating a memorable and delicious cake for 4-6 people.
Ingredients:
- 500g all-purpose flour
- 100g sugar
- 100g unsalted butter, softened
- 3 eggs
- 25g fresh yeast (or 7g dry yeast)
- 125ml whole milk
- Zest of 1 orange
- 1 tablespoon orange blossom water
- 1 teaspoon salt
- Candied fruits for decoration
- Sliced almonds for decoration
- Sugar to sprinkle
- 1 dried fava bean (optional)
- 1 small figurine (optional)
Cooking Instructions:
- Prepare the Dough: Begin by dissolving the yeast in warm milk and let it sit for about 10 minutes until frothy. In a large mixing bowl, combine the flour, sugar, and salt. Add the yeast mixture, 2 eggs, softened butter, orange zest, and orange blossom water. Mix until a dough forms.
- Knead the Dough: Transfer the dough to a floured surface and knead for about 10 minutes until it’s smooth and elastic. Place the dough in a greased bowl, cover with a cloth, and let it rise in a warm place for 2 hours or until it doubles in size.
- Shape the Roscón: Once risen, punch down the dough and knead lightly. Shape it into a large ring by forming a ball, then poke a hole in the center with your fingers and stretch it out. Place the dough on a baking sheet lined with parchment paper.
- Hide the Surprises: Insert the dried fava bean and figurine into the dough from the underside, being careful not to let them show on the surface.
- Second Rise: Cover the shaped dough with a cloth and let it rise again for about 1 hour or until it has doubled in size.
- Decorate and Bake: Preheat your oven to 180°C (350°F). Beat the remaining egg and brush it over the surface of the dough. Decorate with candied fruits and sliced almonds, pressing them lightly into the dough. Sprinkle with sugar.
- Bake the Roscón: Bake in the preheated oven for 25-30 minutes or until golden brown. Once baked, let it cool on a wire rack before serving.
Extra Tips:
For a richer flavor, consider adding a touch of vanilla extract to the dough. Be gentle when inserting the surprises into the dough to prevent tearing. If you’re using dry yeast, remember to adjust the liquid slightly since dry yeast requires less moisture than fresh yeast.
The Roscón De Reyes can also be filled with whipped cream or custard after baking for an extra indulgent treat. Enjoy it fresh for the best taste, and store any leftovers in an airtight container to maintain its moisture.
Polvorones (Spanish Almond Shortbread)

Polvorones, also known as Spanish Almond Shortbread, are a classic holiday treat that are delightfully crumbly and melt in your mouth. These traditional Spanish cookies are typically enjoyed during Christmas, but they’re perfect for any festive occasion.
The name “Polvorones” comes from the Spanish word “polvo,” which means powder or dust, referring to their crumbly texture. Made with ground almonds, flour, and sugar, these cookies have a delicate flavor and are often topped with a dusting of powdered sugar to enhance their sweetness.
The key to perfect Polvorones is in the texture. They should be light and crumbly, yet hold together just enough to be enjoyed without falling apart in your hands. This is achieved by carefully selecting the right balance of ingredients and handling the dough gently.
Traditionally, they’re shaped into thick discs or small rounds, making them a versatile addition to any holiday cookie platter. With a rich almond flavor and a hint of cinnamon, these cookies are sure to become a favorite among family and friends.
Ingredients (Serves 4-6):
- 250g all-purpose flour
- 125g ground almonds
- 200g unsalted butter, at room temperature
- 100g granulated sugar
- 1 teaspoon ground cinnamon
- 1/4 teaspoon salt
- 1 teaspoon vanilla extract
- Powdered sugar for dusting
Instructions:
- Prepare the oven and ingredients: Preheat your oven to 350°F (175°C). Line a baking sheet with parchment paper. Gather all your ingredients to confirm you have everything ready for the recipe.
- Toast the flour and almonds: In a skillet over medium heat, toast the all-purpose flour and ground almonds separately until they’re lightly golden and fragrant. This should take about 5-7 minutes each. Allow them to cool completely before using.
- Mix the dry ingredients: In a large mixing bowl, combine the toasted flour, ground almonds, cinnamon, and salt. Mix until well incorporated.
- Cream the butter and sugar: In another bowl, cream the unsalted butter and granulated sugar together using a hand mixer or stand mixer on medium speed until the mixture is light and fluffy. This should take about 3-4 minutes.
- Combine wet and dry ingredients: Add the vanilla extract to the butter mixture and mix well. Gradually add the dry ingredients to the creamed butter mixture. Mix on low speed until a soft dough forms.
- Shape the dough: Divide the dough into small portions and shape them into small rounds or discs, about 1 inch in diameter. Place them on the prepared baking sheet, leaving some space between each cookie.
- Bake the cookies: Bake in the preheated oven for 15-20 minutes, or until the edges are lightly golden. Be careful not to overbake as they continue to firm up as they cool.
- Cool and dust with sugar: Allow the cookies to cool on the baking sheet for about 5 minutes before transferring them to a wire rack to cool completely. Once cooled, dust them generously with powdered sugar.
Extra Tips:
When making Polvorones, confirming that the butter is at room temperature is essential for achieving the right consistency of the dough. If the dough feels too crumbly, add a tablespoon of milk or water to help bind it.
Additionally, toasting the flour and almonds enhances their flavors, so don’t skip this step for authentic taste. Finally, be patient while allowing the cookies to cool, as they’re quite delicate when warm and can easily break apart. Enjoy these delicious cookies with a cup of coffee or tea for a perfect holiday treat.
Flan De Turrón (Nougat Flan)
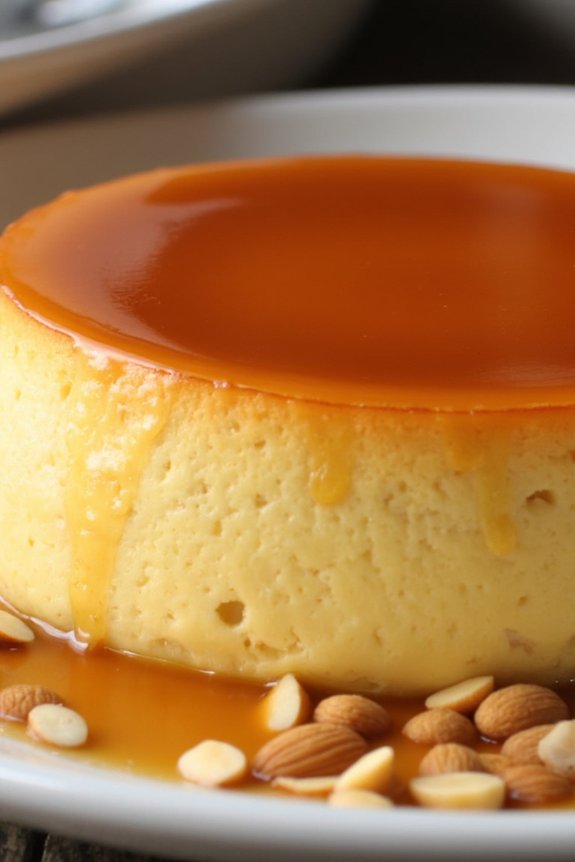
Flan De Turrón, also known as Nougat Flan, is a delightful Spanish dessert that combines the rich, nutty flavors of turrón, a traditional Spanish nougat, with the creamy, smooth texture of flan. This festive treat is often enjoyed during the holiday season, bringing warmth and sweetness to family gatherings.
The unique combination of ingredients creates a dessert that’s both comforting and indulgent, making it a perfect end to any celebratory meal.
The process of making Flan De Turrón is quite straightforward, yet the result is an impressive dessert that will surely wow your guests. The key to success lies in the use of high-quality turrón, which infuses the flan with its distinctive flavor. The flan is typically prepared in a caramel-lined mold, adding an extra layer of sweetness and complexity.
With just a few simple steps, you can create this exquisite dessert for a serving size of 4-6 people.
Ingredients:
- 1 cup of sugar (for caramel)
- 1 1/2 cups of whole milk
- 1 1/2 cups of heavy cream
- 5 large eggs
- 1 cup of crumbled turrón (soft almond nougat)
- 1/2 cup of granulated sugar
- 1 teaspoon of vanilla extract
Cooking Instructions:
- Prepare the Caramel: In a medium saucepan over medium heat, melt 1 cup of sugar until it turns golden brown. Carefully pour the caramel into the bottom of a flan mold or individual ramekins, tilting to cover the base evenly. Set aside to cool and harden.
- Combine Milk and Cream: In another saucepan, combine the whole milk and heavy cream. Heat over medium heat until just about to boil, then remove from heat.
- Mix Turrón: Stir in the crumbled turrón into the hot milk and cream mixture until fully dissolved. This will infuse the liquid with the nougat’s flavor.
- Beat Eggs and Sugar: In a large mixing bowl, whisk together the eggs, granulated sugar, and vanilla extract until well combined and slightly frothy.
- Combine Mixtures: Gradually pour the milk and turrón mixture into the egg mixture, stirring continuously to prevent the eggs from cooking.
- Strain the Mixture: Pass the mixture through a fine sieve into a clean bowl to guarantee a smooth texture, removing any undissolved bits of turrón.
- Fill the Mold: Pour the strained mixture into the prepared flan mold or ramekins, over the hardened caramel.
- Bake the Flan: Preheat the oven to 325°F (160°C). Place the mold or ramekins in a larger baking dish, and fill the dish with hot water until it reaches halfway up the sides of the mold. Bake for 45-55 minutes or until the flan is set but still jiggles slightly in the center.
- Cool and Serve: Remove from the oven and allow to cool at room temperature. Refrigerate for at least 4 hours or overnight. To serve, run a knife around the edges of the mold and invert onto a serving plate.
Extra Tips:
To guarantee a perfectly smooth Flan De Turrón, take the time to dissolve the turrón completely in the milk and cream mixture. This will prevent any grainy texture in the final product.
Additionally, baking the flan in a water bath (bain-marie) is essential for even cooking and preventing the eggs from curdling. If you’re short on time, you can prepare the flan a day in advance and keep it chilled until ready to serve.
This dessert is best enjoyed cool and can be garnished with a sprinkle of chopped almonds for added texture and visual appeal.