

I remember the first time I experienced the magic of an authentic Spanish paella. It was a sunny Sunday afternoon, and the aroma of saffron and seafood filled the air. Each bite was like a warm embrace. I’ve gathered 13 comforting Spanish recipes that bring that same sense of togetherness to the table. Curious about the rest?
Spanish Paella With Seafood and Chorizo
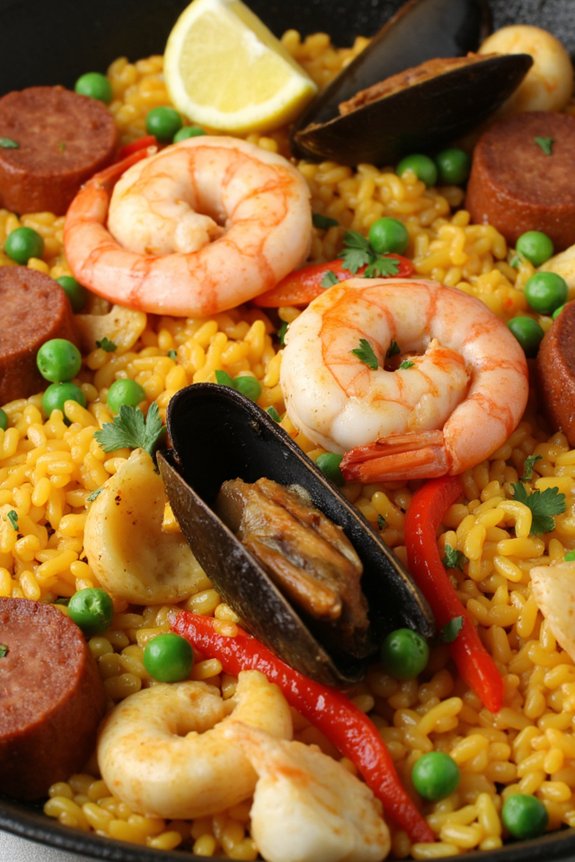
Spanish Paella is a celebrated dish that brings together the vibrant flavors of Spain in one colorful and aromatic meal. This particular version, featuring both seafood and chorizo, is a wonderful way to enjoy a rustic Spanish Sunday dinner with friends or family.
Paella is best known for its saffron-infused rice, which provides a beautiful golden color and a unique aroma that’s both enticing and comforting. The combination of fresh seafood and spicy chorizo creates a harmonious blend of flavors, making each bite a delightful experience.
Originating from the Valencia region, paella is traditionally cooked in a wide, shallow pan over an open flame, allowing the rice to cook evenly and develop a crispy bottom layer known as “socarrat.” This recipe is designed to serve 4-6 people, making it perfect for gatherings.
With the inclusion of various seafood like shrimp, mussels, and calamari, alongside the smoky, spiced chorizo, this paella is a true reflection of Spain’s culinary diversity. Whether you’re new to making paella or looking to refine your technique, this recipe will guide you through each step.
Ingredients (Serves 4-6):
- 2 tablespoons olive oil
- 1 onion, finely chopped
- 2 cloves garlic, minced
- 1 red bell pepper, sliced
- 1 teaspoon smoked paprika
- 1/2 teaspoon saffron threads
- 200g Spanish chorizo, sliced
- 300g paella or short-grain rice
- 1 liter chicken or seafood stock
- 200g shrimp, peeled and deveined
- 200g mussels, cleaned and debearded
- 150g calamari, cleaned and sliced into rings
- 1 cup frozen peas
- Salt and pepper to taste
- Lemon wedges, for serving
- Fresh parsley, chopped, for garnish
Cooking Instructions:
- Prep the Ingredients: Begin by preparing all your ingredients. Chop the onion and garlic, slice the red bell pepper and chorizo, and clean and prepare the seafood. Soak the saffron threads in a small amount of warm water to bring out their flavor and color.
- Cook the Chorizo: Heat the olive oil in a large paella pan or a wide, shallow skillet over medium heat. Add the sliced chorizo and cook until it starts to release its oils and becomes slightly crispy. Remove the chorizo and set it aside, leaving the oil in the pan.
- Sauté the Vegetables: In the same pan, add the chopped onion and garlic, and sauté until they’re soft and translucent. Stir in the red bell pepper and smoked paprika, cooking for another 2-3 minutes until the pepper is tender.
- Add the Rice and Saffron: Stir in the paella rice, making sure it’s well-coated with the oil and spices. Add the soaked saffron threads along with their liquid, stirring to combine.
- Pour in the Stock: Gradually add the chicken or seafood stock to the rice mixture, and bring it to a gentle simmer. Season with salt and pepper to taste. Allow the rice to cook uncovered, without stirring, for about 15-20 minutes, or until the rice is nearly tender and most of the liquid is absorbed.
- Add the Seafood and Chorizo: Arrange the shrimp, mussels, and calamari on top of the rice. Return the cooked chorizo to the pan, and scatter the frozen peas over the top. Cover with a lid or foil, and let it cook for another 10 minutes, allowing the seafood to steam and the flavors to meld together.
- Finish the Paella: After 10 minutes, check to ascertain the seafood is cooked through and the rice is tender. Remove the lid or foil and increase the heat for the last few minutes to develop the socarrat at the bottom.
- Serve: Remove the paella from the heat and let it rest for a few minutes. Garnish with chopped parsley and serve with lemon wedges on the side for squeezing over the top.
Extra Tips:
When cooking paella, it’s important not to stir the rice after adding the stock, as this helps form the desired socarrat—a crispy layer at the bottom of the pan, which is considered a delicacy.
If you don’t have a paella pan, a wide, shallow skillet will work well; just make sure that the rice is spread out evenly for even cooking. Finally, use the freshest seafood possible for the best flavor, and feel free to mix and match different types of seafood based on availability and preference.
Hearty Spanish Chicken and Chorizo Stew
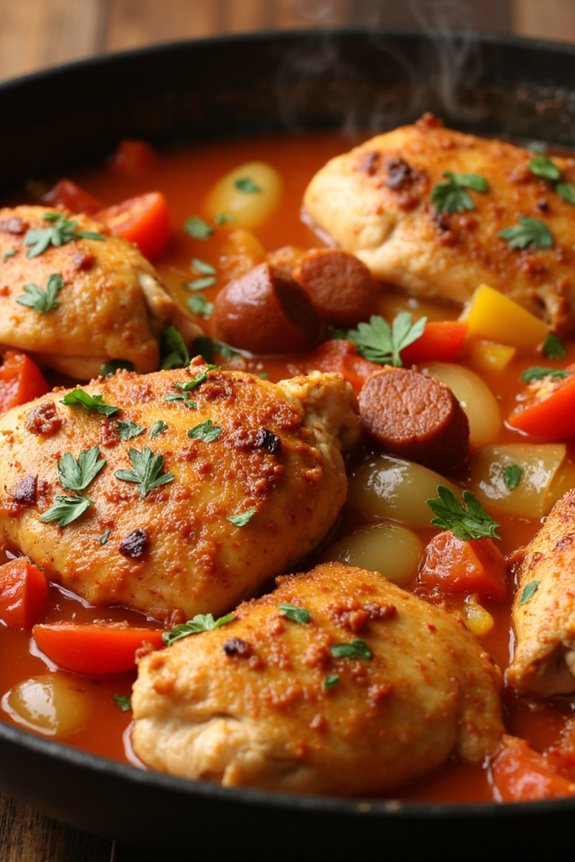
Transport yourself to the heart of Spain with this rustic and flavorful Hearty Spanish Chicken and Chorizo Stew. This comforting dish brings together succulent pieces of chicken, smoky chorizo, and a melody of classic Spanish spices to create a stew that’s both hearty and satisfying.
Perfect for a Sunday family dinner, this dish is sure to impress with its vibrant colors and rich flavors that capture the essence of Spanish cuisine. Ideal for serving 4-6 people, this stew combines the bold flavors of chorizo sausage with tender chicken to create a truly warming and robust meal.
The addition of vegetables like bell peppers and tomatoes not only enhances the taste but also adds a splash of color to your dining table. With simple ingredients and easy-to-follow steps, this dish is perfect for both novice and experienced cooks looking to explore Spanish culinary traditions.
Ingredients:
- 2 tablespoons olive oil
- 1 pound chicken thighs, skinless and boneless, cut into chunks
- 8 ounces Spanish chorizo, sliced
- 1 large onion, chopped
- 3 cloves garlic, minced
- 2 red bell peppers, sliced
- 14 ounces canned diced tomatoes
- 2 teaspoons smoked paprika
- 1 teaspoon ground cumin
- 1 cup chicken broth
- 1 cup dry white wine
- Salt and pepper to taste
- 1/2 cup chopped fresh parsley
- 1 bay leaf
Cooking Instructions:
1. Prepare the Ingredients: Begin by gathering all your ingredients. Cut the chicken thighs into bite-sized chunks and slice the chorizo. Chop the onion, mince the garlic, and slice the bell peppers.
2. Brown the Chicken and Chorizo: Heat the olive oil in a large pot or Dutch oven over medium heat. Add the chicken pieces and cook until browned on all sides, about 5-7 minutes. Remove the chicken and set aside.
In the same pot, add the sliced chorizo and cook until it releases its oils and starts to brown, about 3-4 minutes. Remove the chorizo and set aside with the chicken.
3. Sauté the Vegetables: In the same pot, add the chopped onion and minced garlic. Sauté until the onion becomes translucent, about 5 minutes. Add the sliced bell peppers and continue to cook for another 2 minutes.
4. Combine the Stew: Return the chicken and chorizo to the pot. Stir in the smoked paprika, ground cumin, and bay leaf. Add the diced tomatoes, chicken broth, and white wine. Season with salt and pepper to taste.
5. Simmer the Stew: Bring the mixture to a boil, then reduce the heat to low. Cover the pot and let it simmer for 30-40 minutes, stirring occasionally, until the chicken is tender and the flavors have melded together.
6. Finish and Serve: Remove the bay leaf and stir in the chopped fresh parsley just before serving. Taste and adjust seasoning if necessary. Serve hot with crusty bread or over rice.
Extra Tips:
For an even deeper flavor, consider marinating the chicken in a bit of olive oil, garlic, and smoked paprika for a few hours before cooking.
If you prefer a thicker stew, you can remove the lid in the last 10 minutes of cooking to allow some liquid to evaporate. Adding a splash of sherry vinegar at the end can also enhance the stew’s complexity.
Remember to taste and adjust the seasoning right before serving to guarantee the flavors are spot on.
Classic Spanish Tortilla With Potatoes and Onions
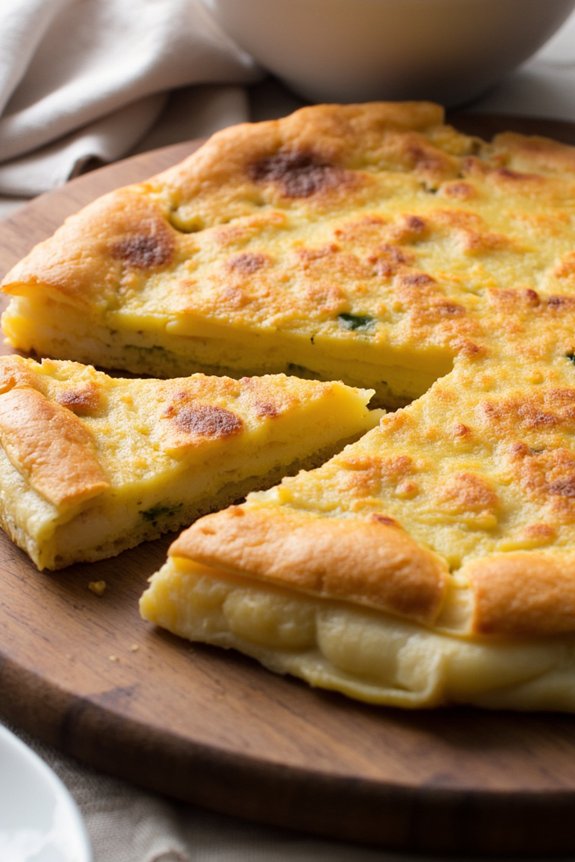
The classic Spanish Tortilla, or Tortilla Española, is a beloved dish that embodies the rustic charm of Spanish cuisine. This simple yet satisfying dish is fundamentally a thick omelet, filled with tender potatoes and sweet onions, offering a comforting blend of flavors and textures. It’s perfect for a Sunday dinner, whether served as a main course or a hearty side dish.
Originating from humble beginnings, the Spanish Tortilla has become a staple in households and tapas bars across Spain, cherished for its versatility and ease of preparation.
The beauty of the Spanish Tortilla lies in its minimal ingredient list and straightforward cooking process, making it an ideal dish for both novice and experienced cooks. The key to mastering this recipe is patience, as the potatoes and onions need to be slowly cooked to achieve the perfect texture.
When done right, the tortilla is golden on the outside, creamy and tender on the inside, and bursting with flavor. Here is a detailed recipe to guide you through creating this classic dish for 4-6 people.
Ingredients:
- 6 large eggs
- 500 grams of potatoes (about 1 pound)
- 1 large onion
- 125 ml olive oil (about 1/2 cup)
- Salt to taste
- Black pepper to taste
Instructions:
- Prepare the Potatoes and Onions: Peel the potatoes and slice them thinly, about 1/8 inch thick. Peel the onion and slice it thinly as well. This will guarantee even cooking and a balanced texture throughout the tortilla.
- Cook the Potatoes and Onions: In a large non-stick frying pan, heat the olive oil over medium heat. Add the sliced potatoes and onions, stirring to coat them with oil. Season lightly with salt and pepper. Reduce the heat to low and cook slowly for about 20-25 minutes, stirring occasionally, until the potatoes are tender but not browned.
- Beat the Eggs: While the potatoes and onions are cooking, crack the eggs into a large bowl. Season with salt and pepper, and beat them lightly until the yolks and whites are fully combined.
- Combine Ingredients: Once the potatoes and onions are cooked, drain them from the oil using a slotted spoon and add them to the beaten eggs. Stir gently to combine, making sure the potatoes are evenly distributed.
- Cook the Tortilla: Discard most of the oil from the pan, leaving about 1 tablespoon. Heat it over medium heat, then pour the egg, potato, and onion mixture into the pan. Cook for about 5-6 minutes, gently shaking the pan occasionally to prevent sticking, until the edges are set and the center is still slightly runny.
- Flip the Tortilla: Place a large plate over the pan and carefully flip the tortilla onto the plate. Slide the tortilla back into the pan, cooked side up, and continue cooking for another 3-4 minutes until the tortilla is set but still slightly soft in the center.
- Serve: Slide the tortilla onto a serving plate and allow it to cool slightly before slicing it into wedges. Serve warm or at room temperature.
Extra Tips:
For the best results, use a good quality non-stick pan to prevent the tortilla from sticking and to achieve a beautiful golden crust.
If you’re new to flipping a tortilla, practice with a smaller pan and fewer ingredients to build confidence. Remember, the tortilla continues to cook slightly after being removed from the heat, so aim for a slightly runny center for the perfect texture.
You can also customize your tortilla by adding ingredients like red peppers, chorizo, or spinach for added flavor and variety.
Traditional Gazpacho Andaluz
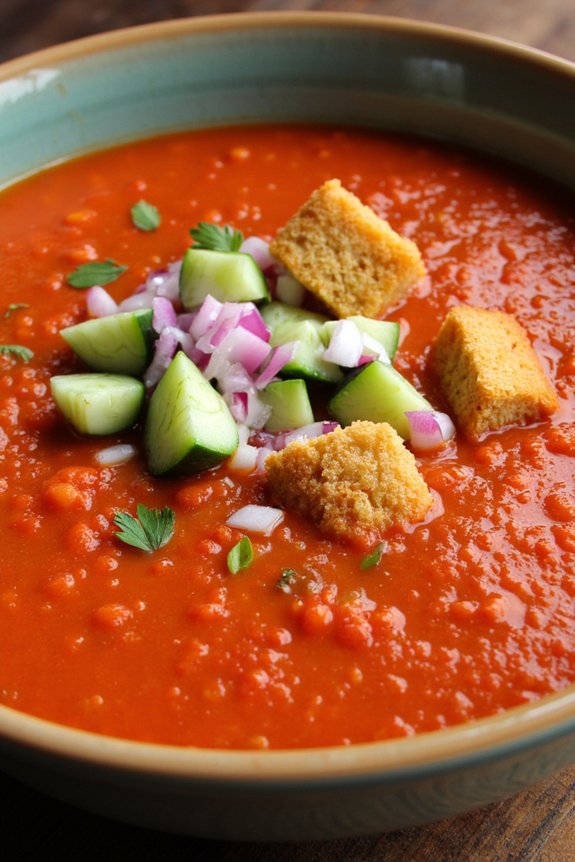
Traditional Gazpacho Andaluz is a revitalizing and vibrant cold soup that hails from the Andalusia region of Spain. This classic dish is perfect for a rustic Spanish Sunday dinner, especially during the warmer months when fresh tomatoes and vegetables are at their peak.
Gazpacho isn’t only simple to make but also offers a burst of flavors that are both satisfying and stimulating. By blending ripe tomatoes, cucumbers, bell peppers, onions, and garlic with olive oil and vinegar, you create a smooth, tangy, and deeply flavored soup that’s perfect for sharing with family and friends.
Gazpacho is traditionally served chilled, allowing the flavors to meld together beautifully. It’s an ideal starter that whets the appetite and prepares the palate for the rich flavors of Spanish cuisine. When preparing this dish, it’s important to use the freshest ingredients available to capture that authentic taste of Andalusia.
The process is straightforward and doesn’t require any cooking, making it an ideal choice for an effortless yet impressive dish.
Ingredients (Serving Size: 4-6 people):
- 2 pounds ripe tomatoes, cored and roughly chopped
- 1 cucumber, peeled and chopped
- 1 green bell pepper, seeded and chopped
- 1 small red onion, peeled and chopped
- 2 cloves garlic, peeled
- 1/4 cup extra-virgin olive oil
- 2 tablespoons red wine vinegar
- Salt and freshly ground black pepper to taste
- 1 cup cold water (optional, for desired consistency)
- Garnishes: diced cucumber, bell pepper, red onion, croutons
Instructions:
- Prepare the Vegetables: Start by washing and prepping all the vegetables. Core and roughly chop the tomatoes, peel and chop the cucumber, seed and chop the green bell pepper, and peel and chop the red onion. Peel the garlic cloves as well.
- Blend the Ingredients: In a blender or food processor, combine the chopped tomatoes, cucumber, bell pepper, onion, and garlic. Blend until the mixture becomes smooth. If your blender is small, you may need to do this in batches.
- Add Liquid Ingredients: With the blender running on a low speed, slowly pour in the olive oil and red wine vinegar. Blend until the mixture is fully emulsified and smooth. Season with salt and freshly ground black pepper to taste.
- Adjust Consistency: If you prefer a thinner gazpacho, add up to 1 cup of cold water to the blender and mix until you achieve your desired consistency. Taste and adjust seasoning if needed.
- Chill the Soup: Transfer the gazpacho to a large bowl or pitcher. Cover and refrigerate for at least 2 hours, allowing the flavors to meld and the soup to become thoroughly chilled.
- Serve and Garnish: Before serving, give the gazpacho a good stir. Pour into individual bowls and garnish with diced cucumber, bell pepper, red onion, and croutons for added texture and flavor.
Extra Tips: To make your gazpacho even more authentic, try using vine-ripened tomatoes and high-quality extra-virgin olive oil, as these will greatly enhance the flavor of the dish.
If you like a bit of heat, consider adding a small pinch of cayenne pepper during blending. Gazpacho can be prepared a day in advance, which allows the flavors to develop further, making it an ideal dish for planning ahead.
Make sure to serve it well-chilled, as its revitalizing quality is one of its most delightful aspects.
Rustic Catalan Escudella I Carn D’Olla
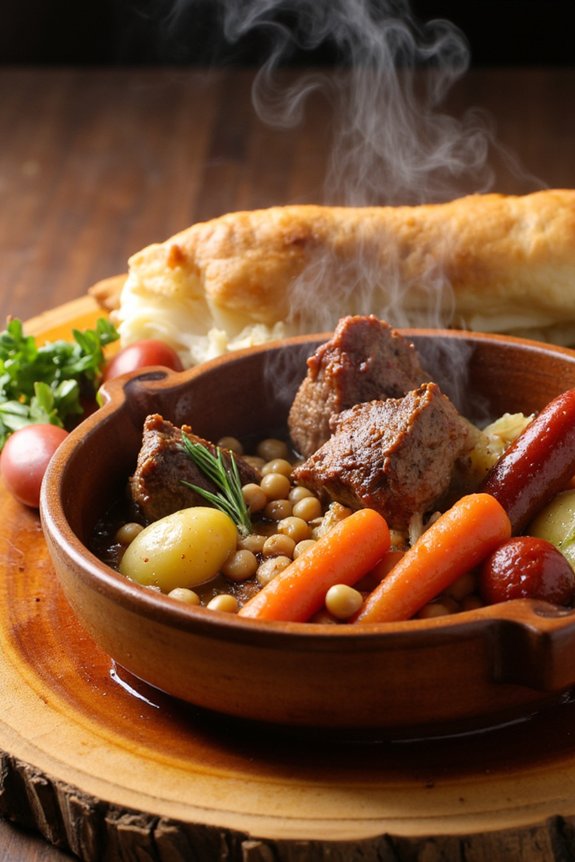
Rustic Catalan Escudella I Carn D’Olla is a traditional Spanish dish that embodies the essence of comfort food. This hearty stew is a classic from the Catalonia region and is often enjoyed as a two-course meal. The first course features a flavorful broth, while the second course serves the meats and vegetables that have been slowly cooked to perfection. Escudella I Carn D’Olla is perfect for a Sunday dinner, offering a warm and satisfying experience for family and friends.
This dish is characterized by its rich and savory flavors, combining various meats, sausages, and a selection of vegetables, all simmered together in a large pot. The slow cooking process allows the ingredients to meld into a deliciously robust broth. The aroma that fills your kitchen while making this dish is sure to entice everyone to gather around the table. The following recipe serves 4-6 people, providing a generous portion for everyone to enjoy.
Ingredients:
- 1 pound beef shank
- 1 pound pork ribs
- 1 ham bone
- 1 chicken (cut into pieces)
- 2 morcilla sausages
- 2 chorizo sausages
- 1/2 pound chickpeas, soaked overnight
- 2 carrots, peeled and sliced
- 2 potatoes, peeled and quartered
- 1 leek, cleaned and chopped
- 1 onion, peeled and halved
- 1 cabbage, quartered
- Salt and pepper to taste
- 1 bay leaf
- 2 cloves garlic, minced
- Water to cover
Cooking Instructions:
- Prepare the Meats and Broth: In a large pot, add the beef shank, pork ribs, ham bone, and chicken pieces. Cover with water and bring to a boil over medium-high heat. Skim off any foam that forms on the surface.
- Add Sausages and Chickpeas: Once the broth is clear, add the morcilla and chorizo sausages, as well as the soaked chickpeas. Reduce the heat to a simmer.
- Incorporate Vegetables: Add the carrots, potatoes, leek, onion, and cabbage to the pot. Season with salt, pepper, and add the bay leaf and minced garlic.
- Simmer: Cover the pot and let everything simmer gently for about 2-3 hours, or until the meats are tender and the flavors have developed. Check occasionally and adjust the seasoning as needed.
- Serve the Broth: Remove the meats, sausages, and vegetables from the pot. Strain the broth and serve it as the first course.
- Serve the Meats and Vegetables: Arrange the meats and vegetables on a large platter and serve as the second course. Encourage guests to enjoy each component with a bit of broth, if desired.
Extra Tips:
To enhance the flavor of the broth, consider adding a few sprigs of fresh thyme or a small piece of dried chili for a subtle kick.
Make sure to keep an eye on the liquid level during cooking, adding more water if necessary to keep the ingredients submerged.
For a more authentic experience, serve the dish with a crusty loaf of bread to soak up the delicious broth.
If you have leftovers, the stew improves in flavor after a day or two, making it a great make-ahead meal.
Authentic Galician Pulpo a La Gallega

Authentic Galician Pulpo a La Gallega is a traditional Spanish dish that showcases the rich flavors of Galicia. Known for its simplicity and the use of high-quality ingredients, this dish highlights octopus in its most exquisite form. Pulpo a La Gallega is the perfect centerpiece for a rustic Spanish Sunday dinner, offering a taste of the sea combined with earthy Spanish spices.
The octopus is tenderized and cooked to perfection, then served with a drizzle of olive oil, a sprinkle of paprika, and a hint of sea salt, bringing out its natural flavors and creating a delightful balance of taste and texture.
The preparation of Pulpo a La Gallega involves a few vital steps to guarantee the octopus is tender and flavorful. Traditionally, this dish is served on wooden plates, which adds a rustic touch and enhances the dining experience. The simplicity of the ingredients allows the quality of each component to shine, making it essential to choose the best available produce.
This recipe serves 4-6 people, making it ideal for a family gathering or a cozy dinner with friends.
Ingredients for Pulpo a La Gallega (Serves 4-6):
- 2 kg octopus
- 1 kg potatoes
- 2 bay leaves
- 1 onion, halved
- 4 cloves garlic, smashed
- 1 tablespoon coarse sea salt
- 1 tablespoon sweet paprika (pimentón)
- 1 teaspoon hot paprika (optional)
- 1/2 cup extra virgin olive oil
- Freshly chopped parsley (for garnish)
Cooking Instructions:
- Prepare the Octopus: Start by cleaning the octopus thoroughly under cold running water. Remove any impurities and confirm the tentacles are free from any debris.
- Tenderize the Octopus: Fill a large pot with water, add the bay leaves, onion, and garlic, and bring it to a rolling boil. To tenderize the octopus, dip it into the boiling water three times, allowing it to curl and soften slightly each time. After the third dip, fully submerge the octopus in the pot, reduce the heat to a simmer, and cook for about 45 minutes until the octopus is tender. Test the tenderness by inserting a fork into the thickest part of a tentacle; it should slide in easily.
- Cook the Potatoes: While the octopus is simmering, peel and slice the potatoes into 1/2 inch thick rounds. In a separate pot, bring salted water to a boil and cook the potato slices until they’re tender, about 15 minutes. Drain and set aside.
- Assemble the Dish: Once the octopus is cooked, remove it from the pot and let it cool slightly. Slice the tentacles into bite-sized pieces. Arrange the cooked potato slices on a wooden plate or serving platter. Place the octopus pieces on top of the potatoes.
- Season and Serve: Drizzle the extra virgin olive oil generously over the octopus and potatoes. Sprinkle with the coarse sea salt, sweet paprika, and hot paprika if using. Garnish with freshly chopped parsley. Serve warm, allowing the flavors to meld together.
Extra Tips:
For the best results, use fresh octopus if available, as it tends to have a better texture and flavor compared to frozen ones. If you’re using frozen octopus, make sure to thaw it thoroughly before cooking.
When cooking the octopus, avoid overcooking as it can become rubbery; check for tenderness midway through cooking. You may also experiment with different types of paprika to adjust the spiciness to your preference.
Finally, serving Pulpo a La Gallega on wooden plates not only adds authenticity but also absorbs excess moisture, enhancing the dish’s texture and presentation.
Flavorful Albondigas in Tomato Sauce
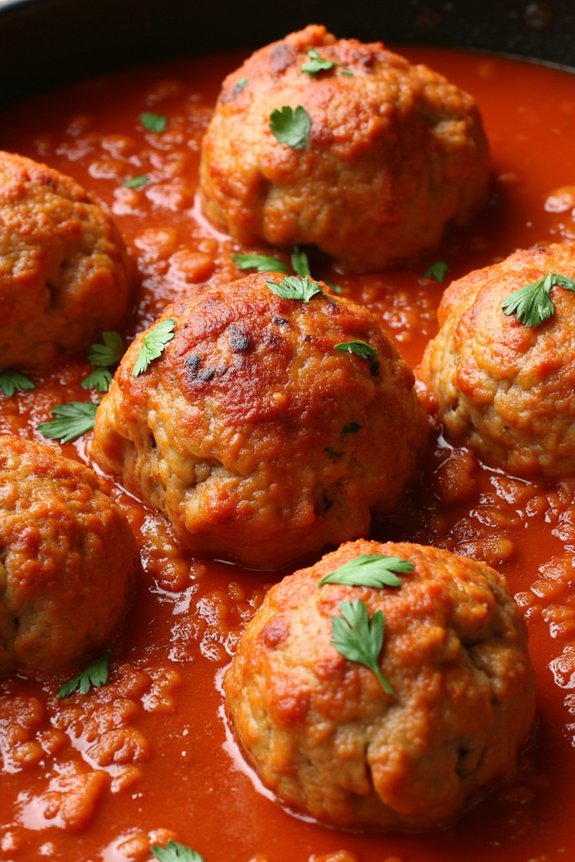
Albondigas, or Spanish meatballs, are a classic comfort dish that brings warmth and flavor to any Sunday dinner. These scrumptious meatballs are made with a delightful blend of ground meat, herbs, and spices, simmered to perfection in a rich and savory tomato sauce. The dish is often served as a main course, alongside crusty bread or fluffy rice, making it a satisfying and hearty meal.
The magic of albondigas lies in the perfect balance of textures and flavors, with the meatballs absorbing the aromatic tomato sauce, resulting in a melt-in-your-mouth experience.
The recipe for albondigas in tomato sauce is relatively simple, yet it captures the essence of rustic Spanish cuisine. The key to achieving the best flavor is using fresh ingredients and allowing the meatballs to slowly cook in the sauce, guaranteeing they remain tender and infused with the sauce’s richness.
This recipe serves 4-6 people, making it ideal for a family gathering or a cozy dinner with friends. Whether you’re familiar with Spanish cuisine or trying it for the first time, albondigas in tomato sauce is a dish that never fails to impress.
Ingredients:
- 1 pound ground beef
- 1/2 pound ground pork
- 1 cup breadcrumbs
- 1/4 cup milk
- 2 eggs
- 1 small onion, finely chopped
- 3 cloves garlic, minced
- 1/4 cup fresh parsley, chopped
- 1 teaspoon ground cumin
- 1 teaspoon smoked paprika
- Salt and pepper to taste
- 2 tablespoons olive oil
- 1 can (28 ounces) crushed tomatoes
- 1 cup beef broth
- 1 bay leaf
- 1/2 teaspoon sugar
Cooking Instructions:
- Prepare the Meatball Mixture: In a large bowl, combine the ground beef and pork, breadcrumbs, milk, eggs, chopped onion, minced garlic, parsley, cumin, smoked paprika, salt, and pepper. Mix thoroughly until all ingredients are well incorporated.
- Shape the Meatballs: Using your hands, form the mixture into small meatballs, about 1 to 1.5 inches in diameter. Place them on a baking sheet or plate as you go.
- Brown the Meatballs: In a large skillet, heat the olive oil over medium heat. Add the meatballs in batches, making sure not to overcrowd the pan. Cook them until they’re browned on all sides, about 5-7 minutes. Remove the meatballs from the skillet and set them aside.
- Prepare the Tomato Sauce: In the same skillet, add the crushed tomatoes, beef broth, bay leaf, and sugar. Stir to combine and bring the mixture to a simmer.
- Simmer the Meatballs: Return the browned meatballs to the skillet with the tomato sauce. Cover and let them simmer on low heat for about 25-30 minutes, stirring occasionally, until the meatballs are cooked through and tender.
- Serve and Enjoy: Remove the bay leaf, taste the sauce and adjust seasoning if necessary, then serve the albondigas hot with crusty bread or rice.
Extra Tips:
To guarantee the meatballs are tender and flavorful, avoid over-mixing the meat mixture as this can result in dense meatballs.
If you prefer a spicier kick, consider adding a pinch of red pepper flakes to the tomato sauce. For a more rustic texture, you can use coarsely ground meat.
Finally, allowing the meatballs to rest in the sauce for a few minutes after cooking will enhance their flavor, making every bite even more delicious.
Slow-Cooked Rabo De Toro (Oxtail Stew)
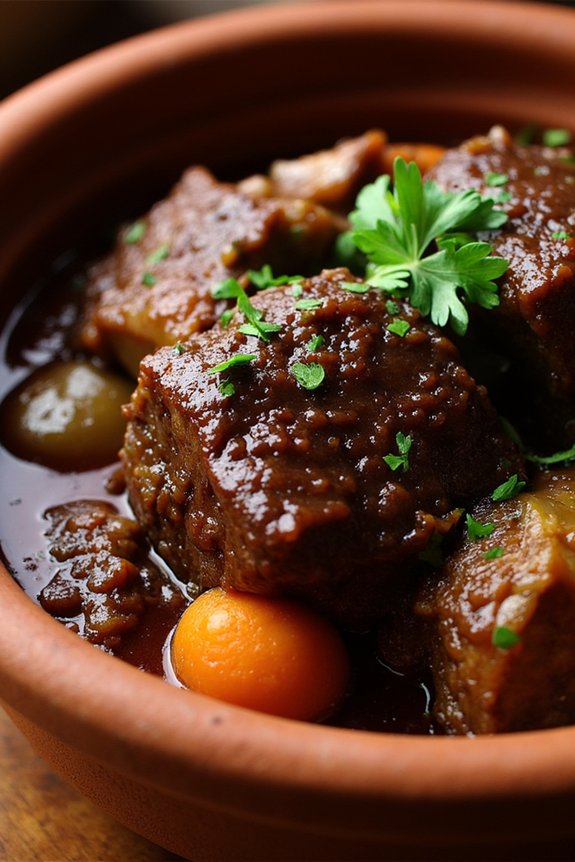
Rabo de Toro, or Oxtail Stew, is a traditional Spanish dish that epitomizes the rustic charm of Andalusian cuisine. This hearty stew, often served during special occasions or leisurely Sunday dinners, is beloved for its rich, deep flavors and tender, succulent meat. The key to a successful Rabo de Toro lies in its slow-cooking process, allowing the oxtail to become fall-off-the-bone tender while absorbing the aromatic spices and robust wine flavors. A perfect dish for those who enjoy a comforting and satisfying meal, Rabo de Toro is usually accompanied by crusty bread or potatoes to soak up the luscious sauce.
The origins of Rabo de Toro date back to the 16th century, with its roots deeply embedded in the bullfighting culture of Spain, particularly in the regions of Córdoba and Seville. Traditionally, the dish was prepared using the tails of bulls from bullfights, but today, readily available oxtail is commonly used. This recipe focuses on a slow-cooked version, allowing the flavors to develop fully over time, ensuring a delicious and fulfilling meal for your family or guests. Get ready to transport your taste buds to the rustic heart of Spain with this exquisite Rabo de Toro recipe.
Ingredients for 4-6 servings:
- 3 lbs (1.4 kg) oxtail, cut into segments
- 3 tablespoons olive oil
- 2 large onions, chopped
- 2 carrots, sliced
- 2 celery stalks, chopped
- 4 cloves garlic, minced
- 2 cups (480 ml) red wine
- 4 cups (950 ml) beef stock
- 2 tablespoons tomato paste
- 1 bay leaf
- 1 teaspoon smoked paprika
- 1 teaspoon black pepper
- Salt to taste
- 2 sprigs fresh thyme
- 1 sprig fresh rosemary
- 1 tablespoon flour (optional, for thickening)
- 2 tablespoons chopped fresh parsley (for garnish)
Cooking Instructions:
- Prepare the Oxtail: Start by patting the oxtail segments dry with paper towels. Season them generously with salt and black pepper.
- Brown the Oxtail: Heat the olive oil in a large, heavy-bottomed pot or Dutch oven over medium-high heat. Add the oxtail pieces in batches, browning them on all sides. Once browned, remove the oxtail and set aside. This step is essential for developing a rich flavor in the stew.
- Sauté Vegetables: In the same pot, add the onions, carrots, and celery. Sauté them for about 8-10 minutes until they’re softened and begin to caramelize. Add the minced garlic and sauté for an additional 1-2 minutes until fragrant.
- Deglaze the Pot: Pour in the red wine, scraping the bottom of the pot with a wooden spoon to release any browned bits. Allow the wine to simmer for 2-3 minutes until slightly reduced.
- Add Remaining Ingredients: Return the browned oxtail to the pot. Stir in the beef stock, tomato paste, bay leaf, smoked paprika, thyme, and rosemary. Bring the mixture to a boil, then reduce the heat to low.
- Simmer the Stew: Cover the pot and let the stew simmer gently for about 3-4 hours. Occasionally stir and skim off any fat that rises to the surface. The meat should be tender and falling off the bone when done.
- Thicken the Sauce (Optional): If you prefer a thicker sauce, remove a few tablespoons of the stew liquid into a small bowl, whisk in the flour until smooth, and stir it back into the pot. Simmer for an additional 10-15 minutes until thickened.
- Garnish and Serve: Once the oxtail is tender, remove the bay leaf, thyme, and rosemary sprigs. Taste and adjust seasoning as needed. Garnish with chopped fresh parsley before serving.
Extra Tips:
For an even deeper flavor, prepare Rabo de Toro a day in advance and refrigerate overnight. This allows the flavors to meld beautifully. Before serving, gently reheat the stew on the stove.
You can also enhance the dish’s complexity by adding a splash of sherry towards the end of cooking. Serve this delightful stew with crusty bread or creamy mashed potatoes to soak up the rich, savory sauce. Enjoy this quintessential Spanish comfort food with a glass of red wine for an authentic dining experience.
Spanish-Style Garlic Shrimp (Gambas Al Ajillo)
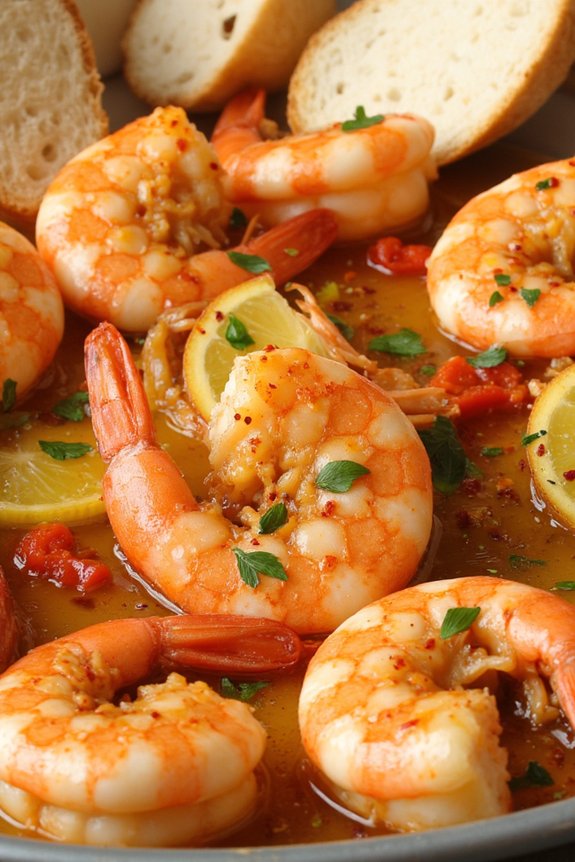
Gambas Al Ajillo is a classic Spanish tapas dish that brings the flavors of the Mediterranean coast to your dining table. This dish is celebrated for its simplicity and bold flavors, featuring succulent shrimp cooked in a rich garlic-infused olive oil with a touch of heat from red pepper flakes.
Traditionally served as an appetizer, this dish can be easily transformed into a main course for a rustic Spanish Sunday dinner. The key to its success lies in the quality of the ingredients, particularly fresh shrimp and aromatic garlic, which meld together to create an irresistible dish.
Perfect for a serving size of 4-6 people, this recipe requires minimal preparation and takes only a few minutes to cook, making it an ideal choice for a stress-free meal. The combination of garlic, olive oil, and shrimp creates a delightful aroma that will transport you straight to the heart of Spain.
Serve it with crusty bread to sop up the flavorful oil, and pair it with a rejuvenating white wine for a complete Spanish dining experience.
Ingredients:
- 1 pound large shrimp, peeled and deveined
- 1/2 cup extra-virgin olive oil
- 8 large garlic cloves, thinly sliced
- 1 teaspoon red pepper flakes
- 2 tablespoons fresh lemon juice
- Salt, to taste
- Freshly ground black pepper, to taste
- 2 tablespoons fresh parsley, chopped
- Crusty bread, for serving
Instructions:
- Prepare the Shrimp: Rinse the shrimp under cold water and pat them dry with paper towels. Confirm that they’re completely dry to avoid any water splattering when they hit the oil.
- Infuse the Oil: In a large skillet, heat the olive oil over medium heat. Add the sliced garlic and cook it gently, stirring frequently, until it becomes golden and fragrant. This should take about 2-3 minutes. Be careful not to burn the garlic as it will turn bitter.
- Cook the Shrimp: Increase the heat to medium-high and add the shrimp to the skillet. Sprinkle the red pepper flakes over the shrimp. Cook the shrimp for about 2 minutes on each side, or until they turn pink and opaque.
- Finish with Lemon and Seasoning: Once the shrimp are cooked, remove the skillet from the heat. Stir in the lemon juice, salt, and black pepper to taste. Toss the shrimp to confirm they’re well-coated with the garlic oil and seasoning.
- Garnish and Serve: Transfer the shrimp to a serving dish and sprinkle with chopped parsley. Serve immediately with slices of crusty bread to dip into the garlic oil.
Extra Tips:
To guarantee the best results, make sure to use fresh garlic as it considerably enhances the flavor of the dish. You can adjust the level of heat by adding more or less red pepper flakes according to your preference.
For an added depth of flavor, consider adding a splash of dry sherry or white wine to the pan after cooking the garlic but before adding the shrimp. This dish is best enjoyed immediately after cooking to savor the full flavor and texture of the shrimp.
Rich and Creamy Bacalao a La Vizcaína
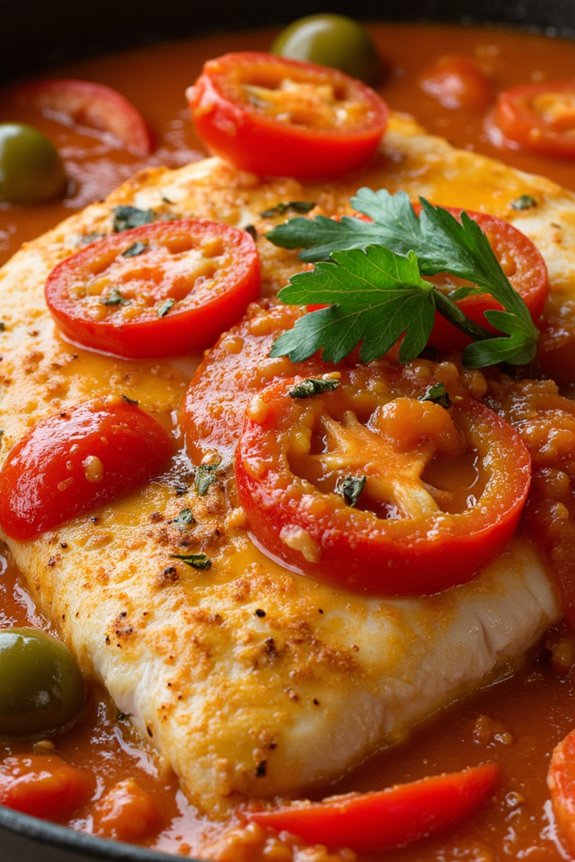
Rich and Creamy Bacalao a La Vizcaína is a traditional Spanish dish that showcases the rich flavors of the Basque region. This classic recipe features salted cod fish, known as bacalao, which is soaked to remove excess salt and then simmered in a luscious tomato-based sauce with hints of garlic, onions, and bell peppers.
The dish is a harmonious blend of savory and slightly sweet flavors, making it a comforting meal perfect for a Sunday dinner with family and friends. Its vibrant colors and fragrant aroma will transport you straight to the heart of Spain.
The process of making Bacalao a La Vizcaína is relatively straightforward, though it does require some planning due to the need to desalinate the cod. By infusing the dish with the smoky and sweet undertones of pimientos (roasted red peppers) and olives, this recipe elevates the humble cod to a gourmet delight.
Served alongside crusty bread or a side of potatoes, this dish is both hearty and satisfying, making it an ideal centerpiece for a rustic Spanish Sunday dinner.
Ingredients (Serves 4-6):
- 2 pounds of salted cod (bacalao)
- 1/4 cup olive oil
- 2 large onions, finely chopped
- 4 garlic cloves, minced
- 2 red bell peppers, sliced
- 1 can (28 ounces) crushed tomatoes
- 1 cup pimientos (roasted red peppers), sliced
- 1/2 cup green olives, pitted and sliced
- 1 teaspoon smoked paprika
- 1 bay leaf
- Salt and pepper to taste
- Fresh parsley for garnish
Cooking Instructions:
- Desalinate the Cod:
- Rinse the salted cod under cold running water to remove surface salt. Place the cod in a large bowl and cover it with cold water. Let it soak in the refrigerator for 24 to 48 hours, changing the water every 8 hours to remove excess salt.
- Prepare the Ingredients:
- After desalinating, drain the cod and pat it dry with paper towels. Cut the cod into serving-sized pieces. Prepare the vegetables by finely chopping the onions, mincing the garlic, and slicing the red bell peppers and pimientos.
- Cook the Base:
- In a large skillet, heat the olive oil over medium heat. Add the chopped onions and sauté until they become translucent. Add the minced garlic and sliced red bell peppers, cooking for an additional 5 minutes until the vegetables are softened.
- Add the Tomatoes and Simmer:
- Stir in the crushed tomatoes, smoked paprika, and bay leaf. Allow the mixture to come to a simmer, then reduce the heat to low and let it cook for about 15 minutes, allowing the flavors to meld.
- Combine Cod and Sauce:
- Gently place the pieces of cod into the tomato mixture. Add the sliced pimientos and green olives. Cover and let it simmer on low heat for about 20 minutes, or until the cod is cooked through and flakes easily with a fork.
- Season and Serve:
- Taste the sauce and adjust the seasoning with salt and pepper as necessary. Remove the bay leaf before serving. Garnish with freshly chopped parsley and serve hot with crusty bread or a side of boiled potatoes.
Extra Tips:
When cooking Bacalao a La Vizcaína, it’s essential to guarantee that the cod is properly desalinated to avoid an overly salty dish. The soaking time can vary depending on the thickness of the cod, so taste a small piece after the initial soaking period to check for saltiness.
If you prefer a spicier dish, consider adding a pinch of cayenne pepper or a chopped chili to the sauce. Additionally, this dish can be prepared a day in advance and reheated gently, allowing the flavors to deepen overnight.
Satisfying Pisto Manchego With Fried Eggs
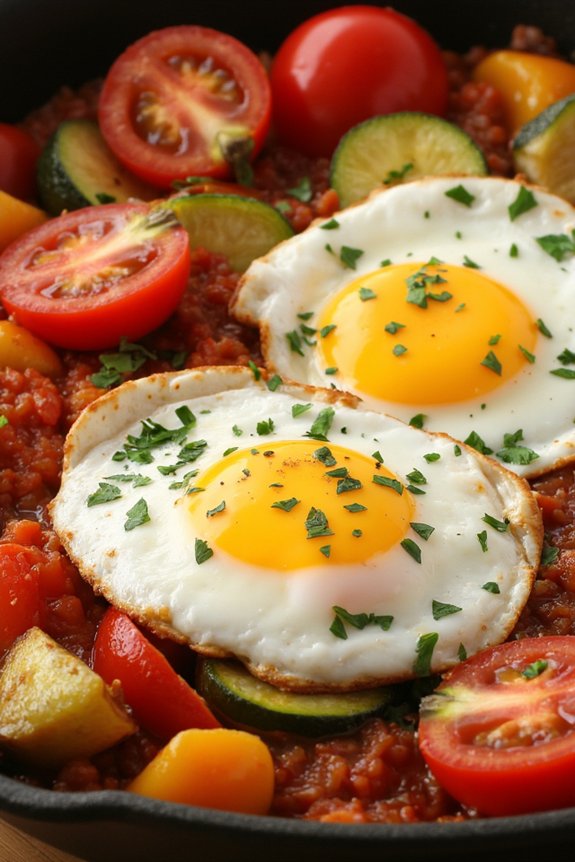
Transport yourself to the idyllic Spanish countryside with a warm and hearty dish of Pisto Manchego with Fried Eggs. Known as Spain’s answer to ratatouille, Pisto Manchego is a flavorful vegetable stew originating from the La Mancha region. This rustic dish is renowned for its simplicity and depth of flavor, perfect for a comforting Sunday dinner.
The stew is made by slowly simmering a medley of fresh vegetables such as tomatoes, peppers, zucchini, and onions until they melt into a luscious, savory sauce. Topped with perfectly fried eggs, this dish becomes a satisfying and nourishing meal that embodies the soul of Spanish cuisine.
Pisto Manchego is a demonstration of the beauty of using fresh, seasonal ingredients. The rich, sweet flavors of the vegetables are complemented by the slight bitterness of the olive oil, and the eggs add a creamy richness that brings everything together. Traditionally served with crusty bread, this dish is ideal for mopping up every last bit of the delectable sauce.
Whether you’re a seasoned cook or a novice in the kitchen, this recipe is approachable and rewarding, providing a delightful taste of Spain right at your dinner table.
Ingredients (Serving Size: 4-6 people):
- 4 tablespoons olive oil
- 2 large onions, finely chopped
- 2 red bell peppers, diced
- 2 green bell peppers, diced
- 3 zucchinis, diced
- 4 ripe tomatoes, peeled and chopped
- 2 teaspoons salt
- 1 teaspoon black pepper
- 1 teaspoon smoked paprika
- 6 large eggs
- Fresh parsley, chopped for garnish
- Crusty bread, for serving
Cooking Instructions:
- Prepare the Vegetables: Begin by prepping all your vegetables. Chop the onions, dice the red and green bell peppers, and zucchini. Peel and chop the tomatoes. Make sure they’re cut into similar-sized pieces for even cooking.
- Cook the Onions: In a large skillet or saucepan, heat the olive oil over medium heat. Add the chopped onions and sauté until they become translucent and soft, about 5 minutes.
- Add the Peppers: Stir in the diced red and green bell peppers. Cook for an additional 5-7 minutes until the peppers start to soften.
- Incorporate the Zucchini: Add the diced zucchini to the pan. Stir well and let them cook for another 5 minutes or until they begin to soften.
- Simmer with Tomatoes: Add the chopped tomatoes to the skillet. Stir to combine all the ingredients. Season with salt, black pepper, and smoked paprika. Lower the heat to a simmer and cover the pan. Allow the mixture to cook for 20-30 minutes, stirring occasionally until the vegetables are tender and the flavors meld together beautifully.
- Fry the Eggs: As the pisto finishes cooking, heat a separate non-stick frying pan over medium heat. Add a touch of olive oil, then crack the eggs into the pan, cooking until the whites are set but the yolks remain runny, about 3-4 minutes.
- Serve and Garnish: Spoon the pisto into serving bowls. Top each serving with a fried egg. Garnish with freshly chopped parsley and serve immediately with crusty bread on the side.
Extra Tips:
For an extra layer of flavor, consider adding a clove of minced garlic to the onions as they cook. If you prefer a spicier dish, a pinch of red pepper flakes can be added alongside the smoked paprika.
To make peeling the tomatoes easier, blanch them in boiling water for 30 seconds and then transfer them to an ice bath; the skins will slip off easily. Adjust the seasoning to your taste, and feel free to experiment with different herbs or a splash of balsamic vinegar for a tangy twist. Enjoy your culinary journey to Spain!
Homemade Spanish Empanadas With Beef Filling
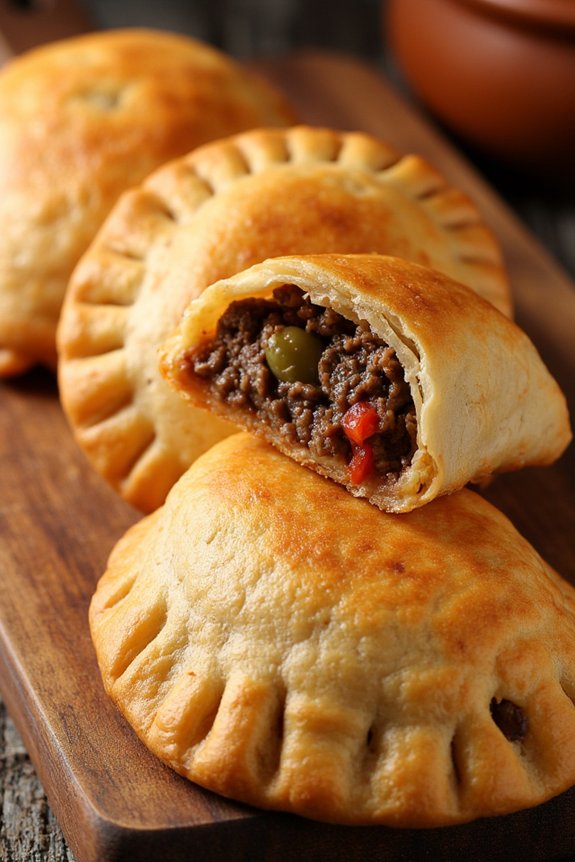
Spanish empanadas are a delightful culinary creation that encapsulate the rich and varied flavors of Spain. Featuring a tender, flaky crust filled with a savory mixture, these empanadas are perfect for a rustic Spanish Sunday dinner. The beef filling is seasoned with a blend of spices and vegetables, guaranteeing each bite is a burst of authentic taste. Traditionally, empanadas are enjoyed as a tapa, or appetizer, but they can also serve as a main dish when paired with a fresh salad or side of roasted vegetables.
Making empanadas from scratch may seem intimidating, but with a bit of preparation and attention to detail, you’ll find the process both rewarding and enjoyable. This recipe is designed to serve 4-6 people, making it ideal for family gatherings or intimate dinner parties. The homemade dough is buttery and soft, while the beef filling is rich and aromatic, made with classic Spanish ingredients that infuse the dish with depth and warmth. Follow the steps below to create your own batch of delicious Spanish empanadas.
Ingredients (serving size: 4-6 people):
*For the Dough:*
- 3 cups all-purpose flour
- 1 teaspoon salt
- 1/2 cup unsalted butter, chilled and diced
- 1 egg
- 1/4 cup cold water
- 1 tablespoon white vinegar
For the Beef Filling:
- 2 tablespoons olive oil
- 1 onion, finely chopped
- 2 cloves garlic, minced
- 1 red bell pepper, diced
- 1 pound ground beef
- 1 teaspoon smoked paprika
- 1/2 teaspoon cumin
- 1/2 teaspoon cayenne pepper
- Salt and pepper, to taste
- 1/2 cup green olives, chopped
- 1/4 cup raisins
- 1 hard-boiled egg, chopped
For Assembly:
– 1 egg, beaten (for egg wash)
Instructions:
- Prepare the Dough:
- In a large mixing bowl, combine the flour and salt. Add the diced butter and mix until the mixture resembles coarse crumbs.
- In a small bowl, whisk together the egg, cold water, and vinegar. Gradually add this mixture to the flour mixture, stirring until the dough comes together.
- Knead the dough gently on a floured surface until smooth. Wrap in plastic wrap and refrigerate for at least 1 hour.
- Make the Beef Filling:
- In a large skillet, heat the olive oil over medium heat. Add the chopped onion and garlic, sauté until the onion is translucent.
- Add the red bell pepper and cook for another 2 minutes. Stir in the ground beef, breaking it up with a spoon, until browned and cooked through.
- Season the beef with smoked paprika, cumin, cayenne pepper, salt, and pepper. Mix well to combine.
- Add the chopped olives, raisins, and hard-boiled egg to the beef mixture. Stir until evenly distributed. Remove from heat and let cool.
- Assemble the Empanadas:
- Preheat your oven to 375°F (190°C). Line a baking sheet with parchment paper.
- Roll out the dough on a floured surface to about 1/8 inch thick. Cut circles using a 4-inch round cutter.
- Place a heaping tablespoon of the beef filling in the center of each dough circle. Fold the dough over the filling to form a half-moon shape and press the edges together to seal. Use a fork to crimp the edges.
- Place the empanadas on the prepared baking sheet. Brush the tops with the beaten egg to guarantee a golden finish.
- Bake the Empanadas:
- Bake in the preheated oven for 20-25 minutes or until the empanadas are golden brown. Allow them to cool slightly before serving.
Extra Tips:
When making empanadas, make certain the beef filling is completely cool before assembling, as warm filling can make the dough difficult to work with and lead to leaks. If you prefer a spicier filling, adjust the cayenne pepper to your taste.
For a crispier crust, consider chilling the assembled empanadas for 15 minutes before baking. Finally, these empanadas can be made ahead and frozen unbaked; simply bake them from frozen, adding a few extra minutes to the baking time.
Enjoy your homemade Spanish empanadas as part of a delightful Sunday dinner!
Classic Churros With Thick Hot Chocolate
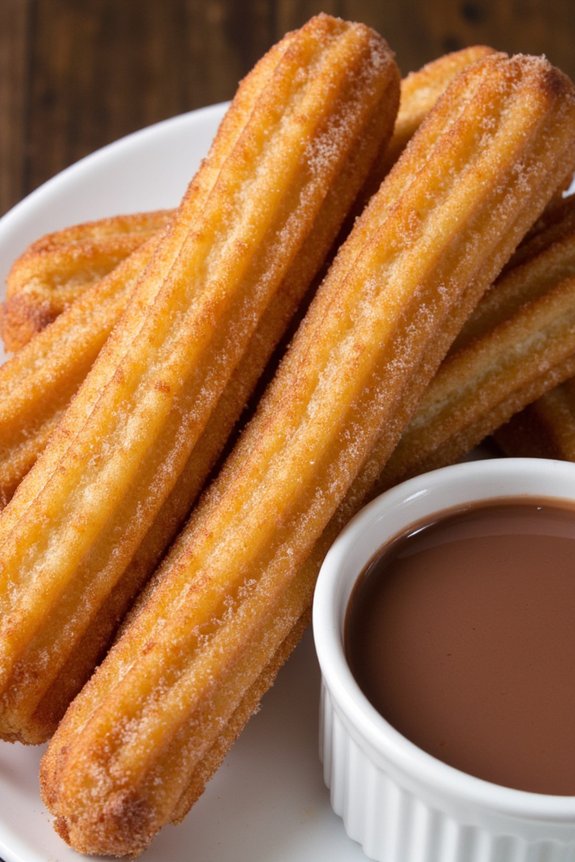
Churros with hot chocolate is a classic Spanish dessert that perfectly rounds off a rustic Sunday dinner. This sweet treat consists of crispy, golden churros paired with a rich and velvety hot chocolate for dipping. The churros are deep-fried to crispy perfection with a soft, chewy interior. They’re traditionally coated in sugar and sometimes cinnamon for an extra touch of flavor.
The hot chocolate, on the other hand, is thick and creamy, made using high-quality dark chocolate that provides a decadent and satisfying finish to the meal. The combination of churros and hot chocolate is a beloved staple in Spanish cuisine, often enjoyed as a late-night snack or a sweet breakfast treat.
To prepare this dish for a group of 4-6 people, you’ll need to focus on achieving the right texture for both the churros and the hot chocolate. While the churros should be light and airy inside, the hot chocolate must be thick enough to coat the churros without being overly runny. Follow this recipe to create a delightful dessert that will transport you to the bustling streets of Spain.
Ingredients (serving size: 4-6 people):
*For the Churros:*
- 1 cup water
- 2 tablespoons sugar
- 1/2 teaspoon salt
- 2 tablespoons vegetable oil
- 1 cup all-purpose flour
- Vegetable oil for frying
- 1/2 cup sugar (for coating)
- 1 teaspoon ground cinnamon (optional)
For the Thick Hot Chocolate:
- 2 cups whole milk
- 4 ounces dark chocolate, chopped
- 2 teaspoons cornstarch
- 2 tablespoons sugar
Cooking Instructions:
- Prepare the Churro Dough:
- In a saucepan, combine 1 cup of water, 2 tablespoons of sugar, 1/2 teaspoon salt, and 2 tablespoons of vegetable oil. Bring this mixture to a boil over medium heat.
- Remove from heat and stir in 1 cup of all-purpose flour until the mixture forms a smooth dough. Allow it to cool slightly.
- Fry the Churros:
- Heat vegetable oil in a deep frying pan or pot to 375°F (190°C).
- Transfer the dough into a piping bag fitted with a star tip. Pipe 4-6 inch strips of dough directly into the hot oil, cutting with scissors if needed.
- Fry the churros until golden brown, about 2-3 minutes on each side. Remove with a slotted spoon and drain on paper towels.
- Coat the Churros:
- Mix 1/2 cup sugar with 1 teaspoon ground cinnamon (if using) in a shallow dish. Roll the warm churros in this mixture until fully coated.
- Make the Thick Hot Chocolate:
- In a saucepan, whisk together 2 cups of whole milk, 4 ounces of chopped dark chocolate, 2 teaspoons of cornstarch, and 2 tablespoons of sugar over medium heat.
- Stir continuously until the chocolate has melted and the mixture thickens, about 5-7 minutes. Remove from heat and serve immediately with the churros.
Extra Tips:
For the best results, verify the oil is at the correct temperature before frying the churros. If the oil is too hot, the churros will burn on the outside and remain raw inside. If it’s too cool, they’ll absorb too much oil and become greasy.
When making the hot chocolate, use high-quality dark chocolate for a richer flavor. Adjust the thickness of the hot chocolate by adding more cornstarch if needed, but be sure to dissolve it in a bit of milk before adding it to the saucepan to prevent lumps.
Enjoy your churros and hot chocolate while they’re warm for the best experience!